Installing 2 (High + Low) Friam Freeway Blasters onto a Corolla
Nothing more terrible on a Corolla than it's 'Clown Car Horn'. An hour of time and about $30 for 2 Friam Highway Blaster horns ( High tone & Low Tone ) solves that problem.
Tools:
Utility Knife
Needle-nose pliars
A rachet set or box wrench set
Material:
- About 3 feet 14 gauge insulated wire
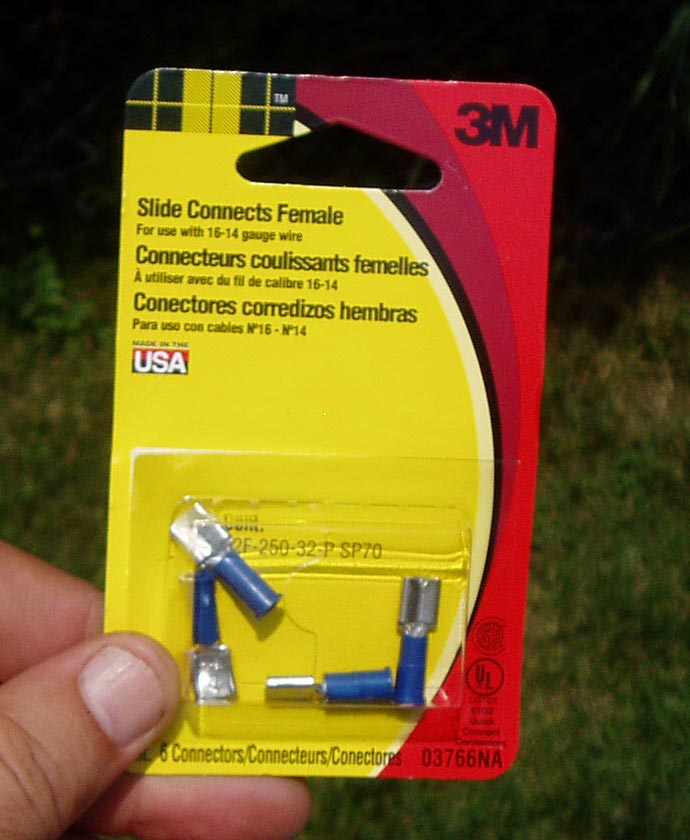
-4 female spade connectors for 14g wire. Wal-Mart carries the 3M brand for $1.50..which are good:
-Good Quality Electrical Tape
-A stainless Steel 6m Bolt, Net, 2 washers and a lock washer
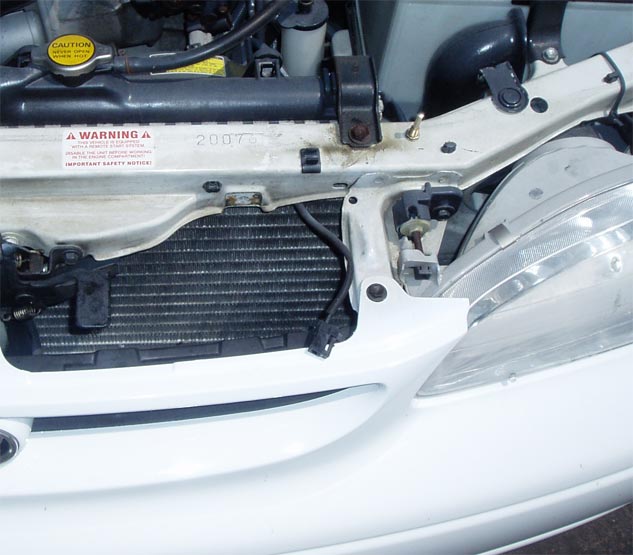
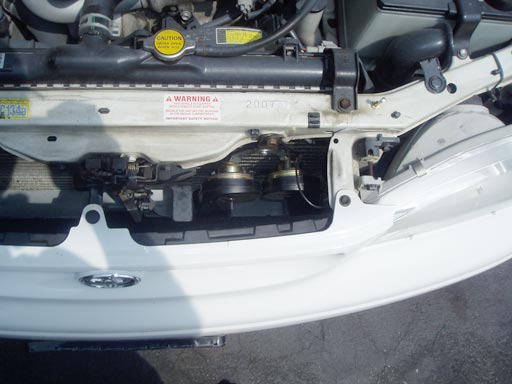
First, remove the 12mm bolt holding the clown car horn onto the radiator cross beam and disconnect the 12v line. It should just pull off. Don't throw away the clown horn yet.
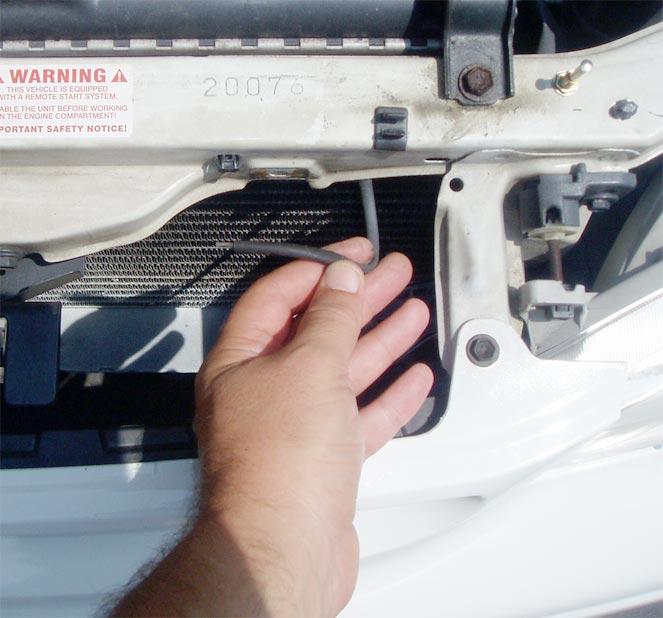
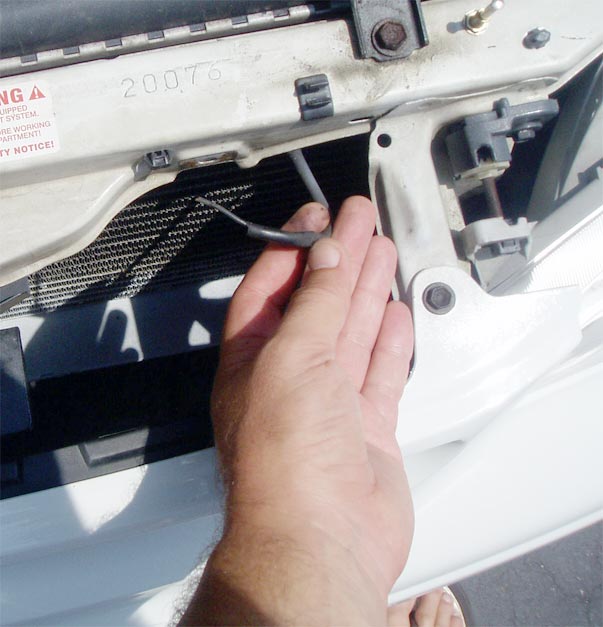
Next, We need to cut off the connector from the 12v line. Cut it off close to the connector. Then Strip off about 1 1/2 inches of insulation ( sheathing ).
Next, Cut the 14g wire into 4 pieces about 8 inches long. Strip the ends about 1 1/2 inch on both sides of all 4 wires
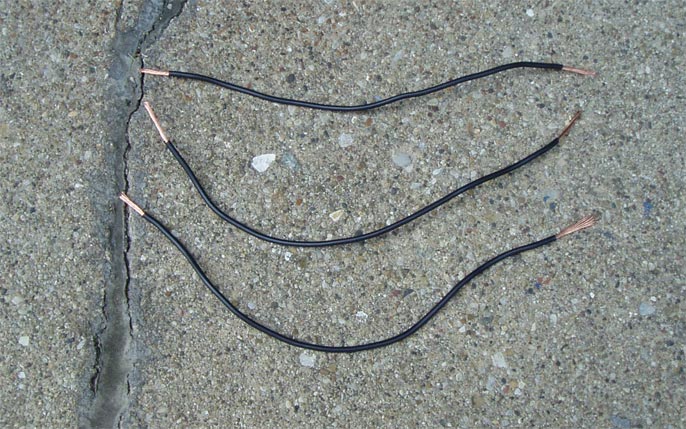
( only 3 shown here..do it on all 4 wires )
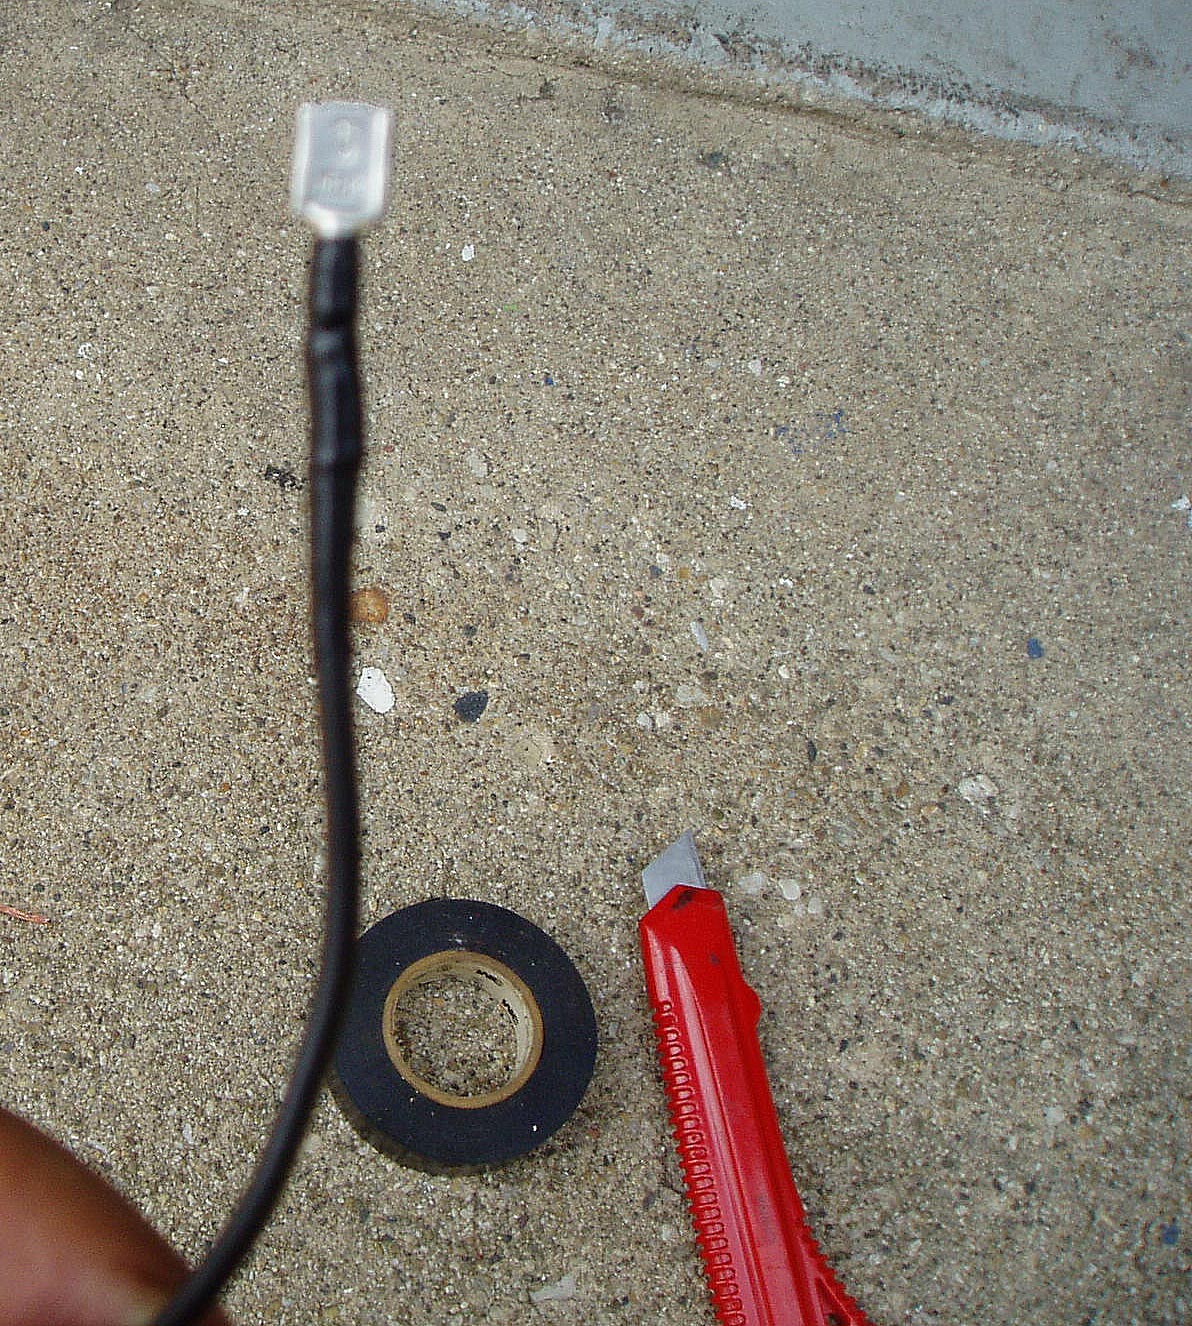
Next, Open the Spade connectors and take out 4. Remove the blue plastic from the ends. Just pull them off with the needle-nose pliers.

Put the spade connectors on one end of all 4 wires. I said ONE END, not both ends. Feed the Wire through the connectors, then just crimp them down hard. Then Wrap the connections good & tight with electrical tape.
Now, let's turn our attention to the Freeway blasters.
Originally, I planned on mounting them onto the cross beam like this:
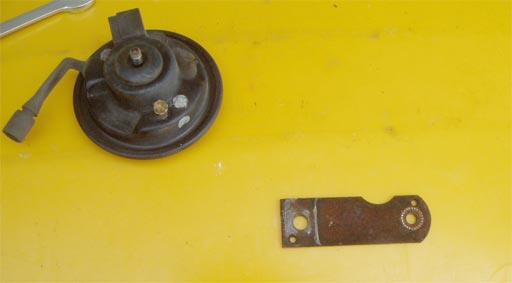
Unfortunatly, there are some 'Flares' ( outward bends ) on the front of the cross-beam where when original horn was mounted. Rather than pounding the flares down ( and risk damaging the AC condensor behind it, or the grille! ), I came up with a good solution. Get the Clown horn, and remove the flat metal bracket from it.
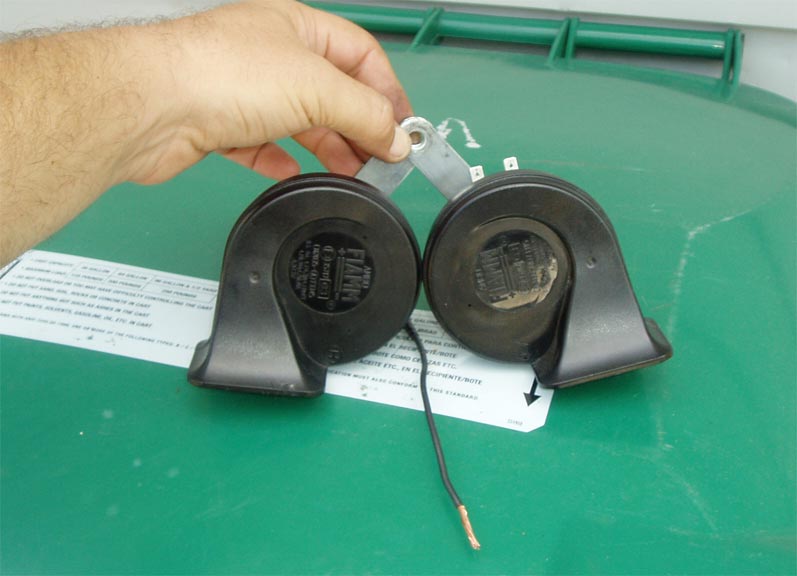
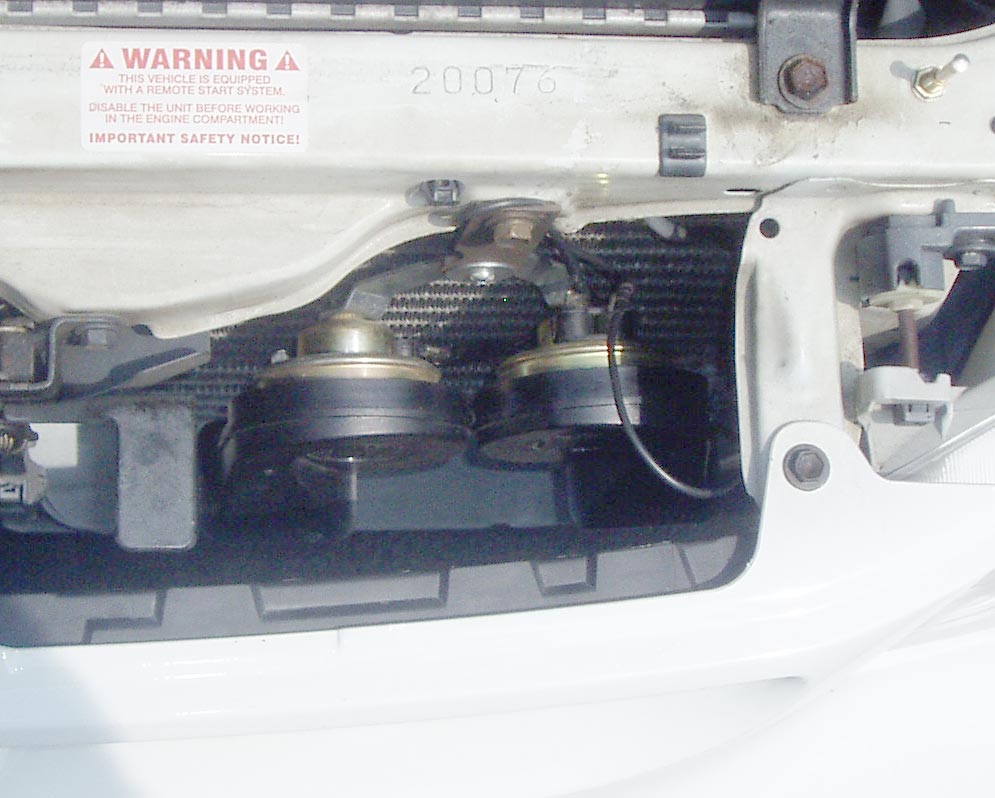
We will mount the new horns onto the bracket, then bolt the bracket onto the beam. Get the 6mm bolt, nut, and washers and mount the horns onto the bracket.
NOTE: Be sure the openings of the horns are POINTED DOWN ! We don't want water to get into them! Make sure the nut and bolt are torqued VERY tight! These will be under constant vibration when the car is on!
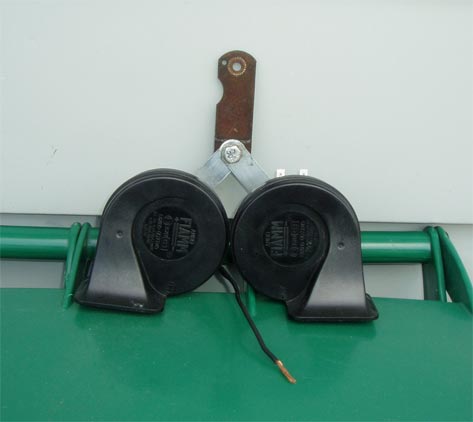
Now we're ready to mount the horns and hook them up. Attach all 4 of the wires onto the male terminals, and then bolt the horn assembly onto the cross-beam with the original clown horn bolt & lock washer, but don't tighten the bolt all the way yet. Just so the horns are hanging off of it.
Next, Take 1 of the wires from each horn, and splice them onto the 12v line. If you don't know how to spice wires correctly, take a look at page 3 of this PDF manual at this link.
Wrap them good and tight with electrical tape.
Next, take the remaining 2 wires ( 1 from each horn ) with the bare ends and wrap them around the back of the bolt. These are the grounds. Polarity does not matter. (i.e. It doesn't matter which 2 wires are (+) and which 2 are (-) ). Tighten down the bracket bolt nice and tight!
Here's the installed horns. Test them out! Goodbye clown horn.
If you like, use some wire tires and wrap them around all the wires for a nice neat job.
Troubleshooting: What if the horns don't work?
You probably didn't hook up the wires correctly. Make sure one wire from each horn is going to the 12v line(+), and the other wire is around the bolt (-).