 StarFinder User's Guide: Running StarFinder
StarFinder User's Guide: Running StarFinder
StarFinder User's Guide: Running StarFinder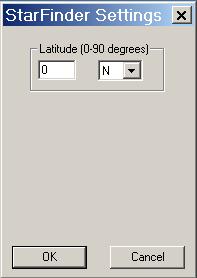
When you start StarFinder for the first time you must first specify some of the settings for the map. The positions of the stars and planets in the sky is different depending upon where you are when you look at the sky, the latitude and longitude of your observing location, as well as the time zone and whether standard or daylight savings time is in effect.
StarFinder only requires you to specify the latitude for the map. The default value is the Equator. As long as you specify a value within 5, 10 or even 20 degrees of your latitude of interest the map will look "about right" for most situations. Of course, if you want to see what the night sky might look like at the Equator, set the value to 0. To see what it might look like at a pole, set the value to 90. The N or S indicate north or south latitude, respectively.
Selecting either OK or Cancel will close this dialog box and display (or return to) the StarFinder main window. You can return to this dialog by selecting Settings... from the StarFinder main menu (see below). When you close StarFinder it will give you an opportunity to save this setting (latitude) if it is set to a value different from the one it found when it first started. Whenever StarFinder starts up it will display this dialog box automaticall if it is unable to recall the setting (latitude) that was saved when StarFinder was run previously.
For casual observing correcting the map for longitude, time zone, and standard time or daylight savings time isn't really required. StarFinder will not get the time of sunrise or sunset precisely correct without the corrections related to these parameters, but in general it will produce maps "close enough" to help you identify objects in the sky.
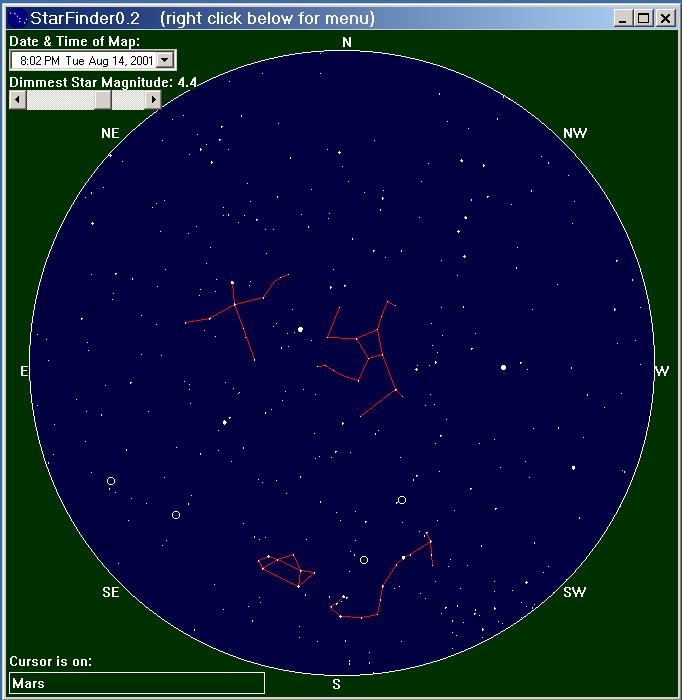
This is a screen shot of the StarFinder main window. The large circle represents the horizon of the map, and the cardinal directions are indicated (N, NE, E, etc.) around the outside of the map. The dark green surrounding the circle represents the ground just below the horizon. The blue shading inside the circle represents empty sky. If the Sun appears above the horizon (represented by a large, filled, white circle) a lighter blue shading is used. Stars are depicted as solid white dots. Larger dots represent brighter stars. Open circles represent solar system objects: small open circles for planets and a large open circle for the Moon. Deep sky objects (which don't appear on this particular map) are small green crosses. Red lines are used to show the patterns of the constellations. This map shows the constellations Cygnus and Hercules near the center of the map (high overhead in the sky), and Sagittarius (the "tea pot") and Scorpius (the "fish hook") near the edge (just above the southern horizon).
The upper left corner of the main window, just under the label "Date & Time of Map:" is a control to set these parameters for the map. You can click on the hours, minutes, month, day, or year fields and change the value either by typing in a new value or using the up or down arrows on your keyboard to increase or decrease the value. You can move from one field to the next (or previous) field by pressing the right or left arrow keys. Clicking on the down arrow icon at the right end of this control pops up a calender which gives you another means of selecting the desired date.
Near the upper left corner of the main window, just under the label "Dimmest Star Magnitude: 4.4" is a horizontal scroll bar that controls whether StarFinder emulates bright sky (few stars) or dark sky (lots of stars) observing conditions. A star's magnitude is a measure of its brightness, with magnitude decreasing for brighter stars, and increasing for dimmer stars. This usually seems backwards to non-astronomers, but that's just the way its done. StarFinder will only display stars that have a magnitude less than (that is, are brighter than) the indicated value. In this case, that limiting value is 4.4. You can change this value by manipulating the scroll bar control; move the thumb left to decrease the value (and decrease the number of stars displayed on the map), and move it to the right to increase the value (and increase the number of stars displayed). The map can look like the sky shortly after sunset when just a few stars have appeared, or look like the sky on a very dark, clear night when it is bursting with stars. StarFinder does not attempt to emulate the Milky Way, which unfortunately is getting increasingly difficult to see due to the increased use of careless outdoor lighting at night.
At the bottom left of the main window is a box that will display some information on the object that your cursor is pointing to (if any). In this case the cursor (which unfortunately doesn't appear on the screen shot) was pointing to the planet Mars, which is the small open circle just above the fish hook looking constellation (Scorpius). If the object is a star the information begins with the star's Bright Star Number which won't mean much to most people. For dim stars this number may be all that appears. For somewhat brighter stars this number may be followed by a cryptic name such as "25Sig (Andromeda)". The "Sig" is an abbreviation for "Sigma", the English word for the Greek letter, and the name within the parenthesis is the constellation the star appears in. This is one standardized convention of naming stars where the stars within a constellation are each given a Greek letter in alphabetical order (according to the Greek alphabet) according to their brightness. These names are somewhat meaningful to some people. Most of the brightest stars have real names that were at least somewhat meaningful within the culture where the name originated. Hopefully these names will soon become meaningful to you, as the stars become some of your landmarks in the night sky.
StarFinder does not use the menu bar that appears at the top of most Windows programs so that the map can be drawn as large as possible. Instead, pressing the right mouse button (left mouse button if you've set up your mouse for left-handed use) most anywhere within the StarFinder main window a pop-up menu of commands will appear. This is StarFinder's main menu. The best thing to do is to try them all and see what happens. For your reference, they are listed below:
Copyright (c) 2001 by G. L. Deitrick.
Permission to use is granted provided appropriate acknowledgement is given.