| Icer (Acapolca) Peak |
| In April of 2005 Chris Mishmash and I climbed and skiied Icer Peak. This is the name given to this peak by local skier's, for reference sake the heli-crowd referes to this run as Acapolca. We took two days to complete the climb/ski but a strong party could do the ascent/descent in a long day. It took us about 10 hours of travel from the car. This time would be quicker with lighter loads and stronger legs though. The route requires that parties have glacier travel skills as many crevasses are crossed enroute to the peak. Traveling the route unroped is not advised. The main ridge and face are relativly crevasse free. There is a bergschrund that must be skied across on the descent. By April or so it is usually filled in enough to pose little problem. |
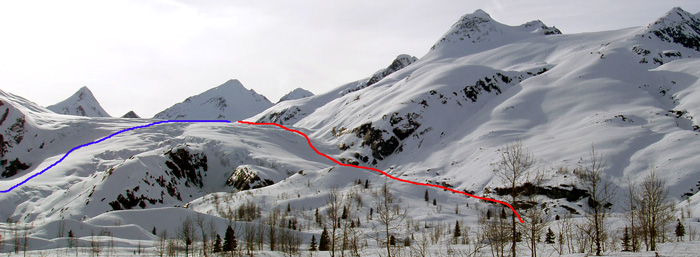
| In order to get to the peak proper a little over 3.5 miles of glacier travel is required. Park as near to Worthington Glacier as possible and head across the flats. We ascended looker's right of the glacier underneath "Bald Boy". This route had few creavasse but did have avalanche exposure from above. As an alternative one might ascend the looker's left hand side of the glacier accessed from the Visitor Station. This may be the prefered ascent route through the glacier. Attached is photo of the ascent up the glacier. The red line is the route we went up and the blue line is the alternative. |
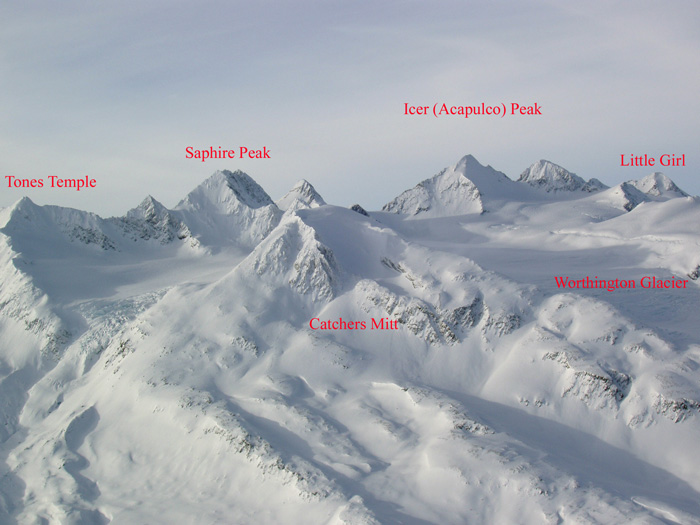
| There are many high quality ski lines in the area. Here is an overview shot of the surrounding area. Icer Peak is Peak 6819' on the map, making it the tallest in the Worthington area |
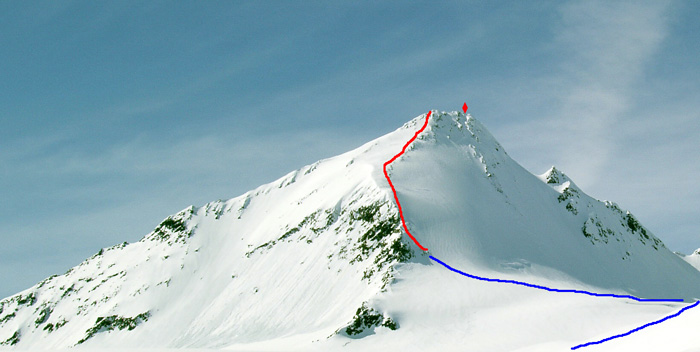
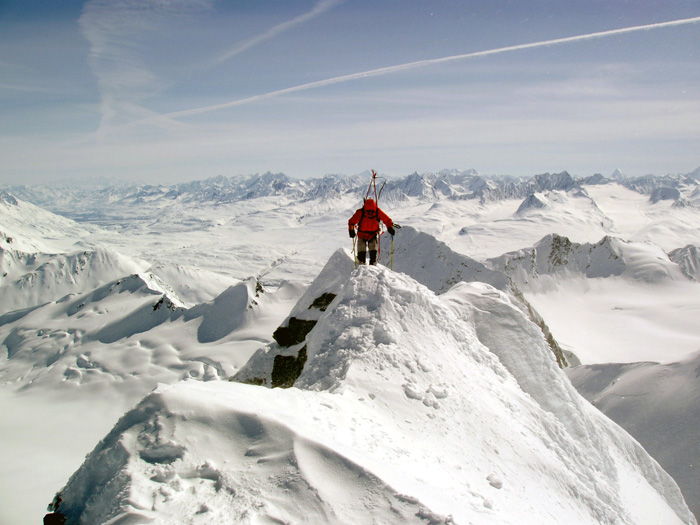
| We travled for about 4 hours the first day. Which wasn't bad considering we didn't get started till 4:00pm. Sleds proved very helpful on the long open stretches of glacier. We set up camp on a flat spot, that was just past "Girls Mountain". This put us within striking distance for the morning. The next morning we were able to get a 10:00am start and head up glacier. We were able to head straight up glacier then move to east to avoid some crevasse. After a few hours of skinning we were able to reach a point on the South Ridge that required taking skis off. At this point we ascended the ridge toward the summit. The ridge was straight forward and broad. As it nears the summit it disappears and some exposed snow climbing was required to reach the West Ridge. In the ascent photo blue denotes the skin track and red shows were we had to take our skis off. The red diamond is the start of the descent line. The West Ridge was more exposed but easy traveling. Exceptional views were the order of the day. |
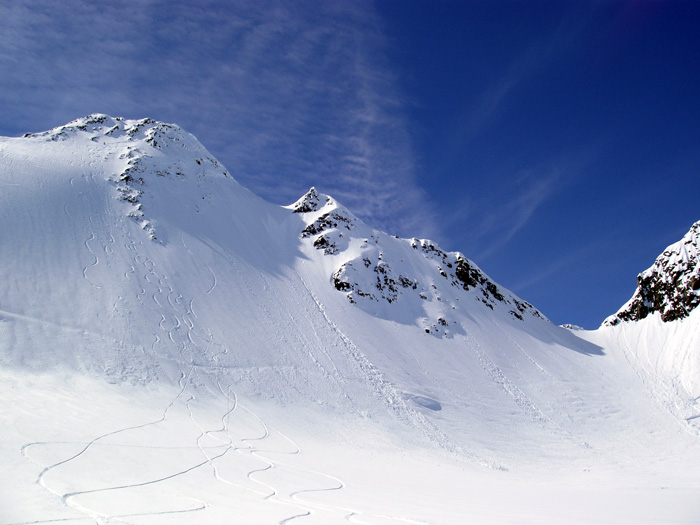
| In order to reach the descent line, that we skied, you must cross over the summit and drop down to the start of a rock chute. The chute is narrow steep and no fall territory. After desending the inital chute you exit onto the large East Face. Slope angles on the face average high 40's with the steepest section being about 52 degrees. Manage your sluff and ski to the glacier below crossing the bergschrund. There were few if any islands of safety on the the line and it seemed best to ski all the way out the bottom. The other tacks seen in the below shot are from the heli group that was dropped on top of us while we were ascending the ridge :( If you look close you can see Chris Mishmash exiting the chute near the top |
| All in all this is a classic area route and should be skiied again. I think is gets over looked or disregarded becasue of the glacier skills need to reach it safely but it is well worth it |