Simple Calyx for the Kawasaki Rose
By Ron Yu
Part 2 – Finishing Steps
blue line = valley fold
red line = mountain fold
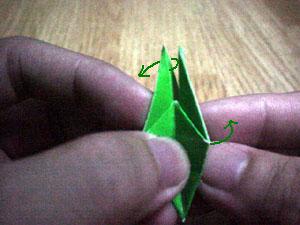 Starting from the crane base, fold top left layer
to the right and bottom right layer to the left.
Starting from the crane base, fold top left layer
to the right and bottom right layer to the left.
 Fold flap from the bottom upwards.
 Do the same on the other side.
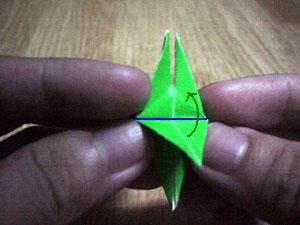
 Bring the top flap downwards at a right angle
(90 degrees).
Bring the top flap downwards at a right angle
(90 degrees).
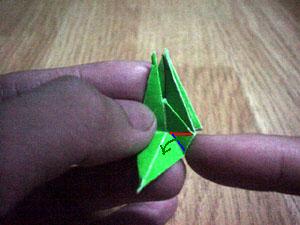 Bring the red line to the center via mountain
and valley fold.
Bring the red line to the center via mountain
and valley fold.
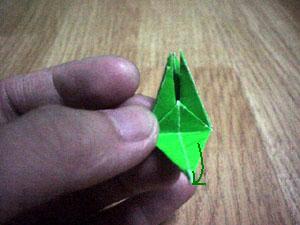
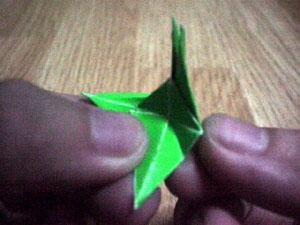
 This is what you’ll get. Try to study the
picture carefully.
This is what you’ll get. Try to study the
picture carefully.
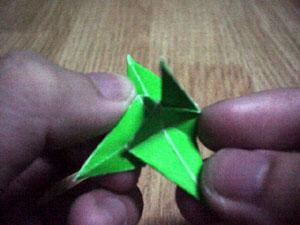
 Bring shown flap downwards. In effect the
layer at the back will be folded 90 degrees.
Bring shown flap downwards. In effect the
layer at the back will be folded 90 degrees.
 Do the same mountain-valley fold step as you
did on the first flap. I’ve omitted the lines for a better view.
Do the same mountain-valley fold step as you
did on the first flap. I’ve omitted the lines for a better view.
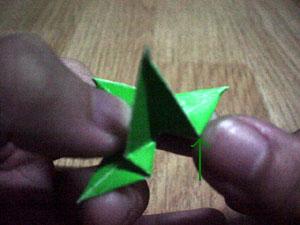
 Similarly, bring another flap downwards.
 Again, the mountain-valley fold on the third
flap. The figure is rotated as you go along.
Again, the mountain-valley fold on the third
flap. The figure is rotated as you go along.
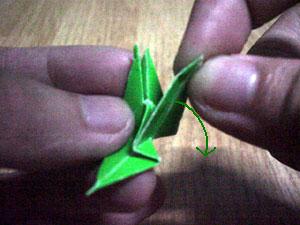
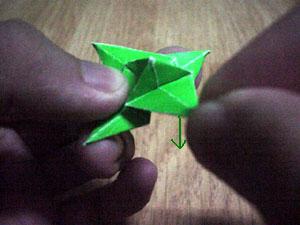
 To bring down the fourth flap, you have to first
push back and upwards the part indicated by the arrow.
To bring down the fourth flap, you have to first
push back and upwards the part indicated by the arrow.
 Do the mountain-valley fold one last time.
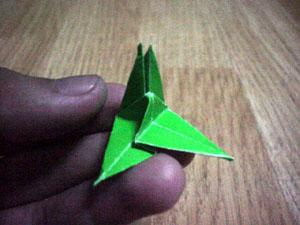
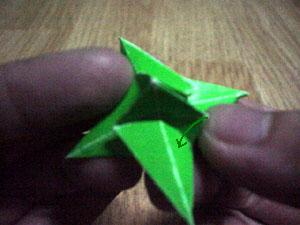
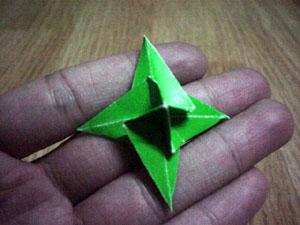 You’ll get this nice shape with a protruding
pyramid in the center. We want to flatten that out.
You’ll get this nice shape with a protruding
pyramid in the center. We want to flatten that out.
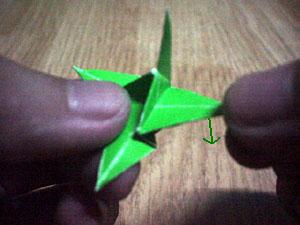
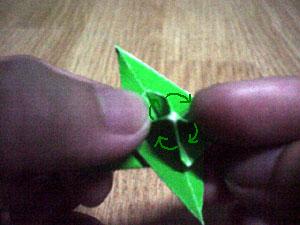 If your rose spirals clockwise outwards, then
twist the pyramid edges clockwise. Counterclockwise otherwise (Dan’s rose spirals clockwise).
If your rose spirals clockwise outwards, then
twist the pyramid edges clockwise. Counterclockwise otherwise (Dan’s rose spirals clockwise).
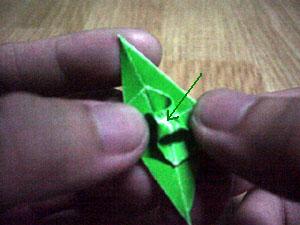 As you twist, slowly form the center square
by squashing.
As you twist, slowly form the center square
by squashing.
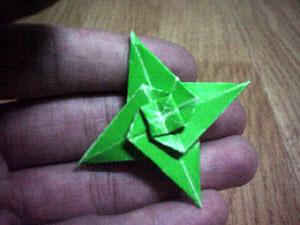 Finished calyx. This can now be attached to
the rose, but if you plan to add a stem, you need to attach the stem to the
calyx first before attaching the calyx to the rose. Go back to the home page
for links to the instructions.
Finished calyx. This can now be attached to
the rose, but if you plan to add a stem, you need to attach the stem to the
calyx first before attaching the calyx to the rose. Go back to the home page
for links to the instructions.
r o n y u 0 2 a t y a h o o d o t c o m