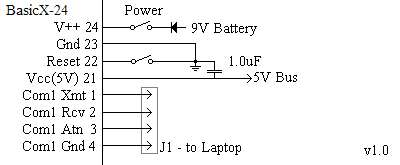
The Basic Infrastructure consists of...
- Connections to a 9V battery
- A Diode to protect against reverse polarity
- Main Power switch
- A Reset pushbutton
- Connections to the 5V power bus and ground bus
- Connections to a Laptop

The Battery Monitor simply uses a 2 to 1 resistive divider to divide the switched 9V in half and monitors with an ADC input.

The Collect/Upload Switch allows you to select the Mode that to Flight Data Recorder will run in at next reset. You can either set it to Collect Data (after a trigger,) or Upload Collected Data to the Laptop for the Flight Data Analyzer program.
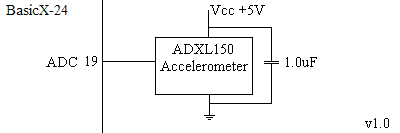
I'm using an ADXL150 Accelerometer connected to a BasicX-24 ADC input. I got four of them on E-Bay for $18.50 and I managed to ruin the first one because it was my first experience with SMT (Surface Mount Technology) components (good thing I had spares!) At first I tried soldering wire extensions on the pins I was using, and then epoxying everything in place. Apparently one of the connections opened up, and I couldn't cut through the epoxy (it was like trying to cut through glass.) I ended up taking a Dremel tool and grinding it off (ouch!)
Then I used my head! I bent the pins I wasn't using out of the way, and soldering the pins I was using to the circuit traces on the BACK of the circuit card (why didn't I think of that in the first place?!?!) That worked! I'll epoxy it in place before the first flight. The Self Test function assumes that the Rocket is upright on the Launch Rod and checks for 1G +-10%; Self Test will fail if the Rocket is laying down (0G) or upside down (-1G).
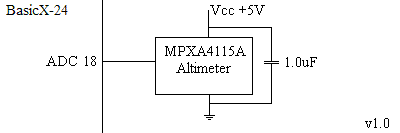
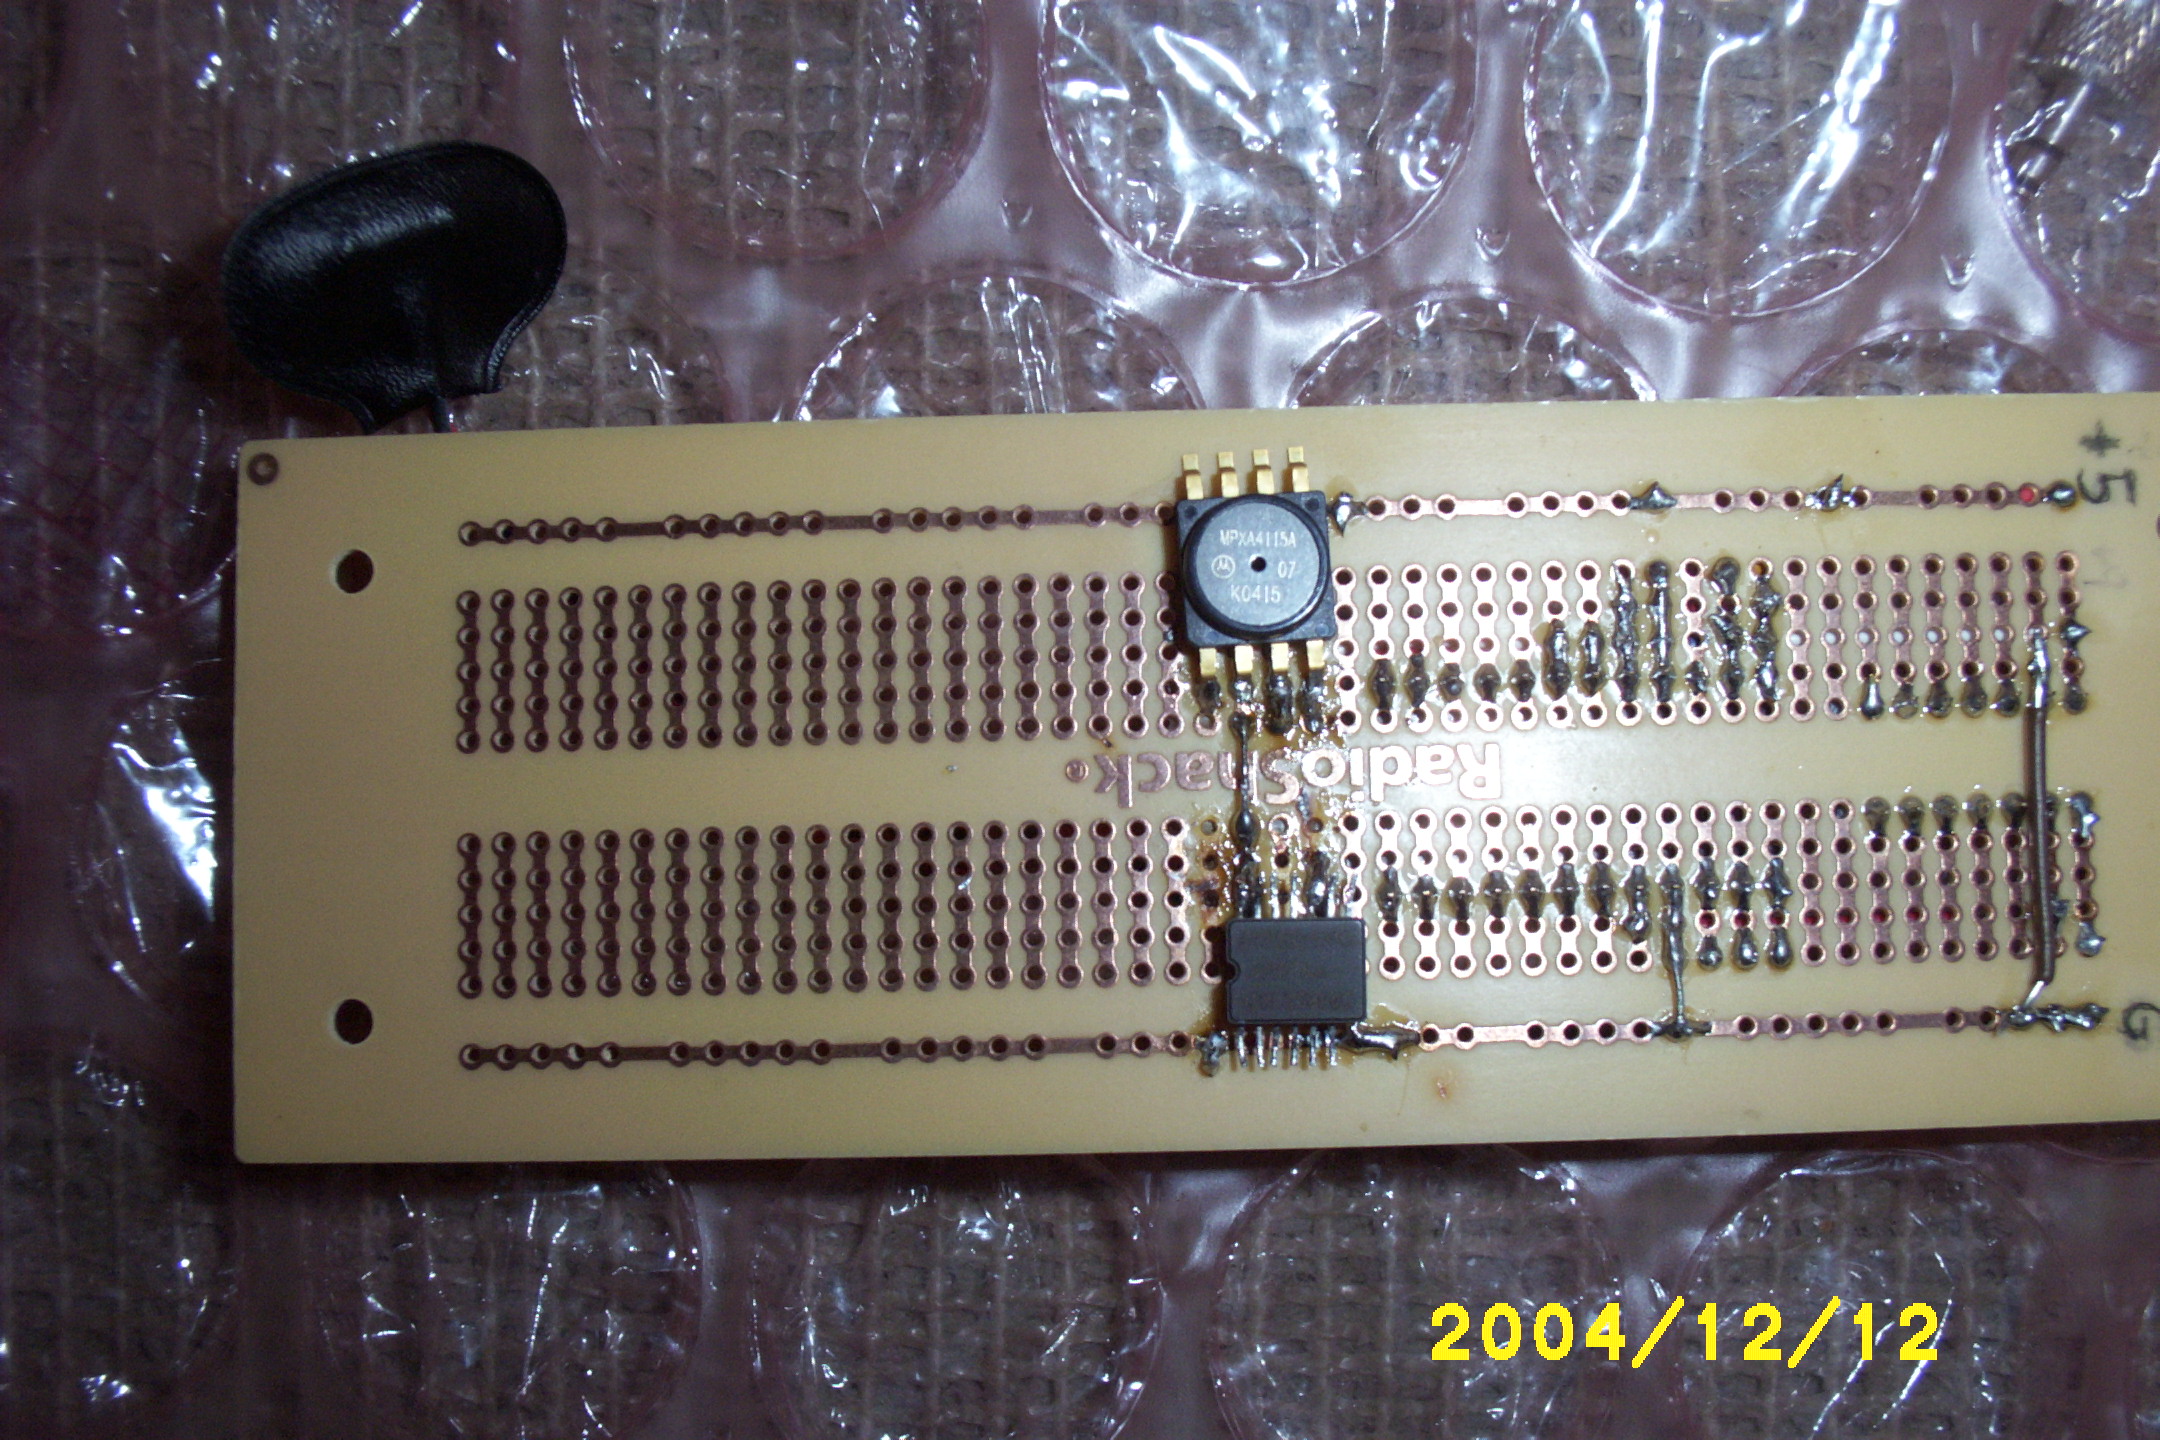
I'm using a MPXA4115A that I got on E-Bay connected to a BasicX-24 ADC input. At Self Test it remembers the ambient Air Pressure, and reports the Altitude difference from that initial setting (daily Barometric changes can represent as much as +-500 feet altitude.)
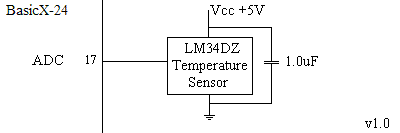
I'm using a LM34DZ that I got from www.AllElectronics.com connected to a BasicX-24 ADC input. I don't expect the Temperature to change too much from the ground to one or two thousand feet up, but it was so easy to do I figured I'd just add another Sensor.
Haven't figured this one out yet (and may just skip it and fallback on Sensing >2G to start recording data.) The reason I want to use this instead of just sensing >2G or using a break wire, is that I'd like to record the 1 or 2 seconds of quiescent data between the time the Launch Button is pushed and the motor actually kicks in. I'd like it to be sensitive enough to detect the small voltage generated when doing a continuity check (and issue a Blip on the Piezo Siren so you know it's connected properly,) but still protect the BasicX-24 from the 12V and (possibly) reversed polarity (anything over 5.2 volts or under -0.2 volts will damage the BasicX-24.) That was my first idea, then I read that someone else used a small wire (break wire) that got burned through when the motor ignited. That sounds like a better idea (K.I.S.S.); I might borrow that idea and just wait for the connection to open to trigger the Data Logger.
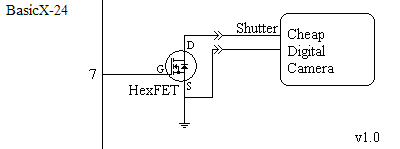
For starters I'm using a cheap Digital Camera that I picked up at a yard sale for $2.00. I'll probably use a better Digital Camera after I get all this working, but this one is small, weighs next to nothing, and uses very little battery power, so it's a good choice to develop with.
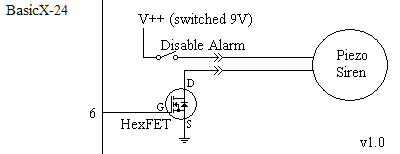
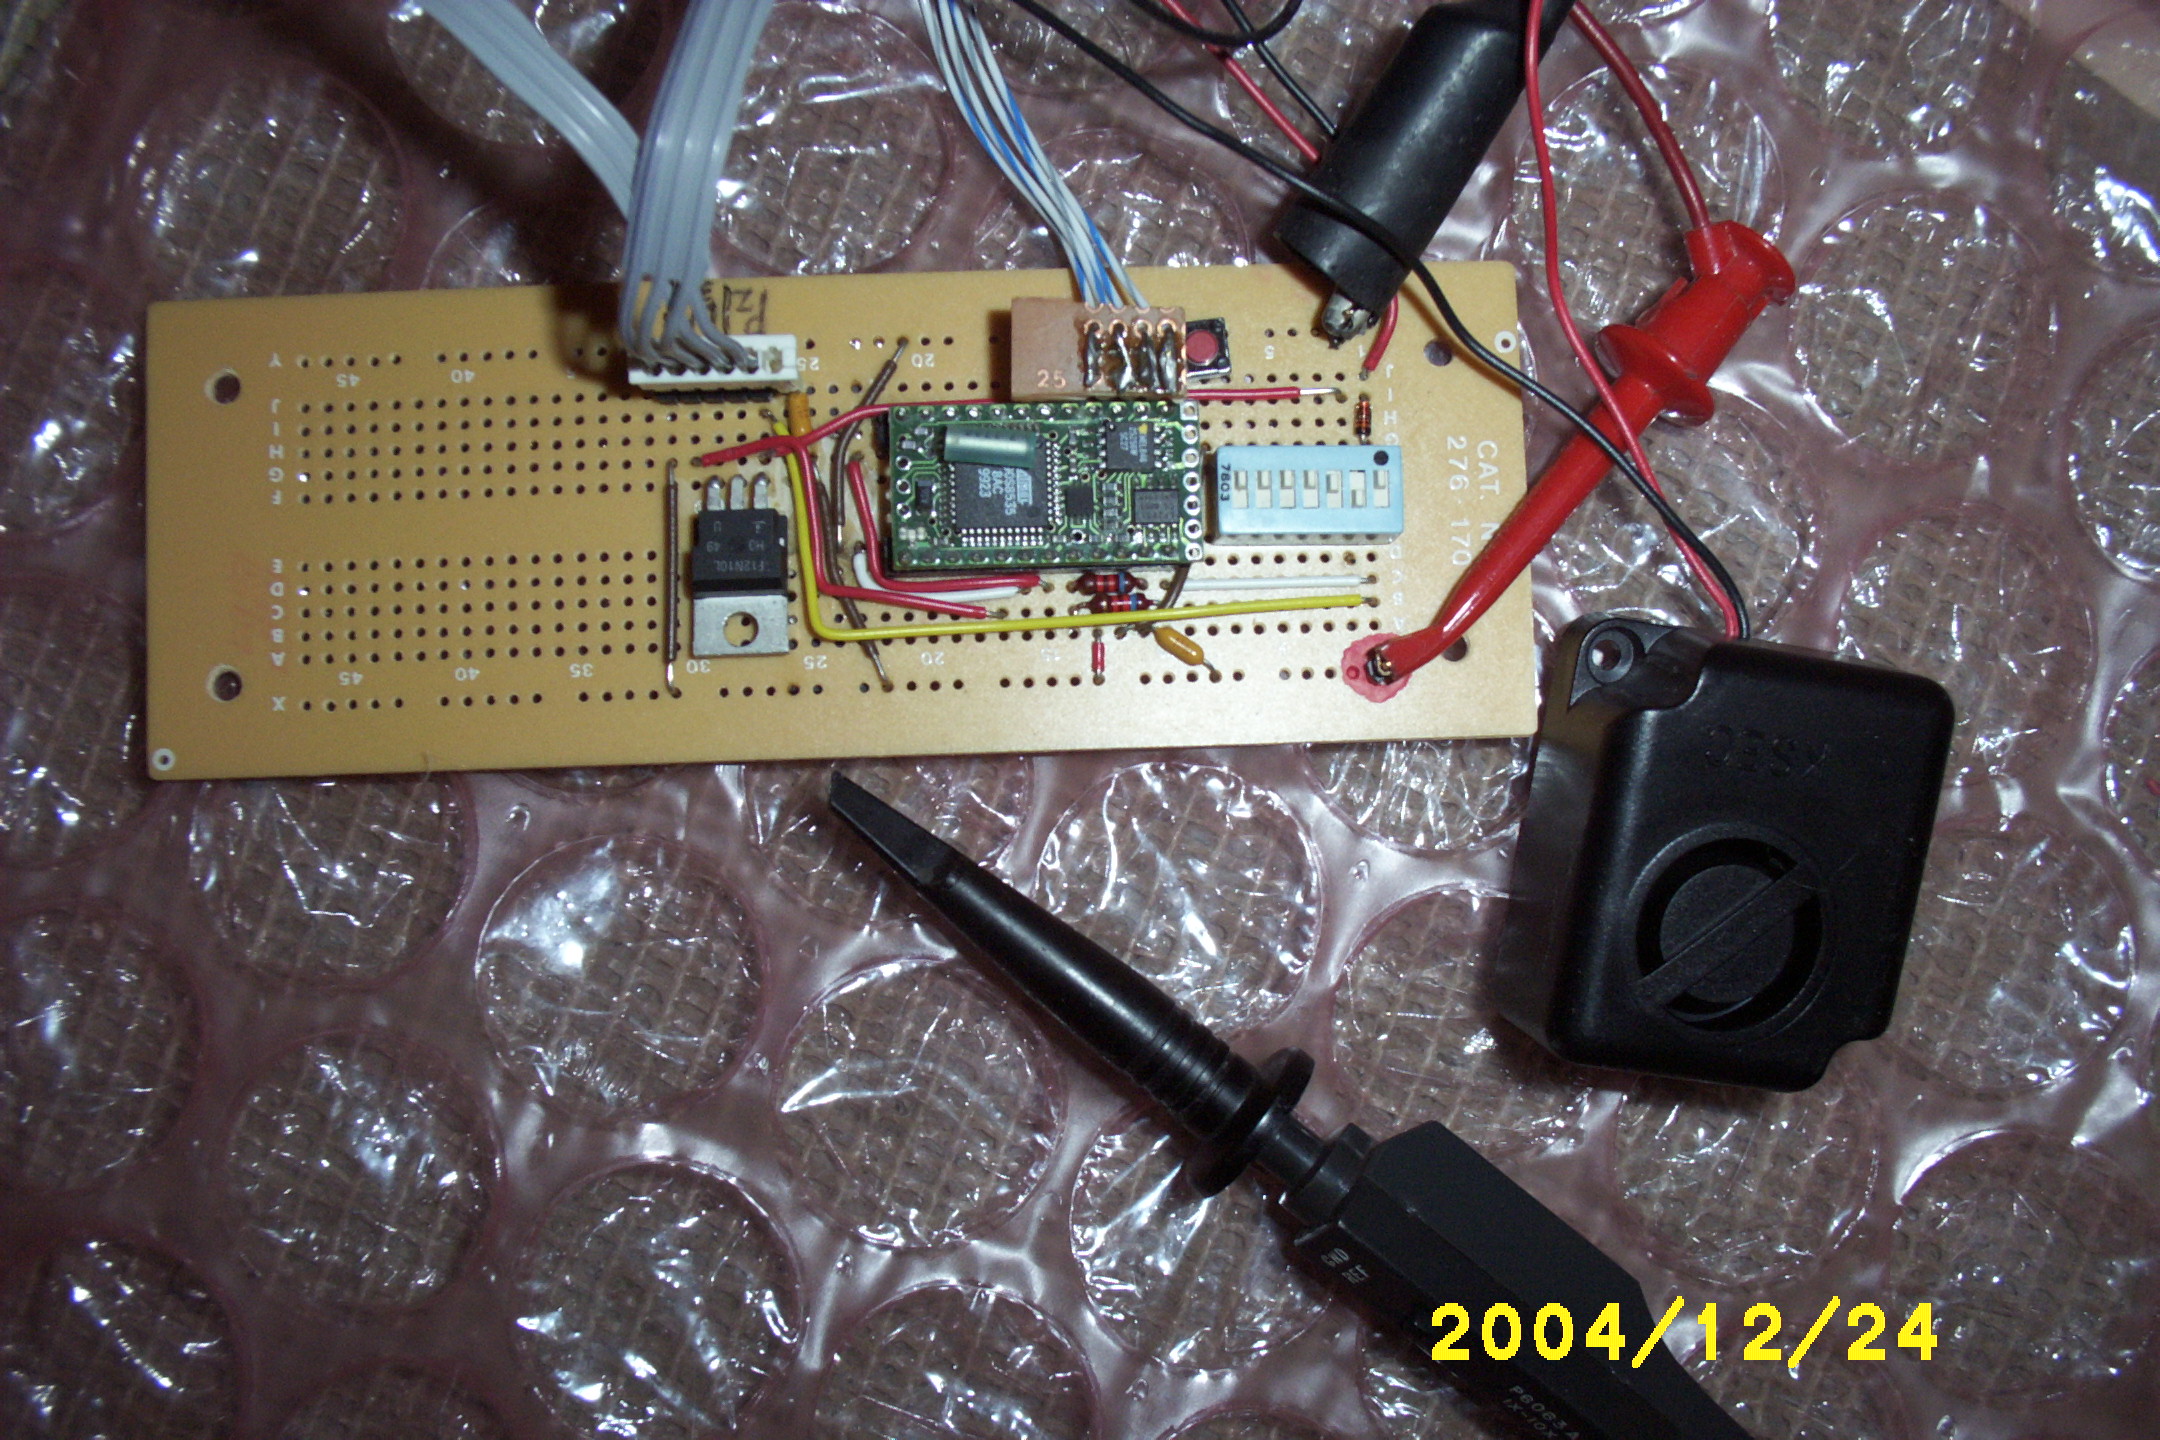
I'm using a HexFET to control the Piezo Siren. It's a 105dB (Damn Loud!) that I picked up at Radio Shack. The Software has five different control patterns that can each be repeated one, two or three times. The control patterns are...
- Blip (on for 0.10 Seconds)
- Short (on for 0.20 Seconds)
- Long (on for 0.40 Seconds)
- Very Long (on for 0.80 Seconds)
- Warble (pulses four times every 0.10 Seconds)
 Poo Poo on NetMedia!