I have great news to bring to Super8 users after the few decades of setbacks we've endured. I have undertaken to thoroughly scrutinize how both the Super8 Camera and Cartridge operate. After doing so I've determined the primary cause of jitteriness which most Super8 users experience. Contrary to popular belief, it is not related to the Cartridge design. It is possible for stiff Film (such as Velvia) to cause some problems in the Cartridge -- including jamming. A Film that is cold will also be stiff, and will be more difficult to travel through the Cartridge. You should let your Films defrost for a couple of hours after removing them from the Fridge. Higher Film Speeds can also result in jitteriness. The Silent Super8 Cartridge was originally designed for 18 frames / second. 24f/s is fully 33.3% faster than 18f/s which translates into 33.3% more friction per second. Thus, at 24f/s you are more likely to suffer an incomplete advance of an individual Frame resulting in double-exposed Film Frames. The four 90 Degree Corners to overcome in the Super8 Cartridge are tougher than in a 16mm or 35mm Camera. If things work well at 24f/s be grateful, but don't blame the Super8 format for any jitteriness at 24f/s which would not be suffered at the intended 18f/s. It was the Sound Cartridge which was designed for 24f/s. There could also be mistakes in manufacturing which cause problems -- such as the Film being cut too wide or improper Sprocket perforation alignment, and these problems can lead to a Film jam. These problems do not constitute a defect in the Super8 design. With all the foregoing said and done, these would not explain the general problem of jitteriness that is suffered. The general cause of jitteriness can only be with the Camera's Clutch being too tight.
In a Movie Camera, the Take-up Spool / Reel regularly runs out of slack Film as it "takes up" the used Film coming down from the Film Gate. Every time the Take-up Spool in the Super8 Cartridge runs out of slack Film, the Clutch on the Camera -- which turns the Cartridge Clutch -- has to slip until more Film is pushed down by the Film Gate's Sprocket Arm / Claw. However, if the Clutch slippage is too tight, the Film will be tugged by the Spool -- thus pulling the Film in the Film Gate and causing a jittery picture. This tugging will not only make the individual Film Frame blurry, but it will also cause a delay in Film advance as the Camera's Arm is forced to re-catch and re-align with the Sprocket Holes on the Film. You could suffer a delay of several Frames. The Cartridge's Take-up Spool is only supposed to wind up the Film as it enters the Take-up Chamber. It is the Camera's Sprocket Arm which is exclusively responsible to move the Film through the Cartridge -- one Frame at a time. In addition to jitteriness, a tight Clutch will also put a strain on the Camera's Gears and Motor causing them to capriciously slow down -- thus screwing up the Film timing! TThis strain on the Camera's Gears can also cause damage and wear. A tight Clutch also makes a Film jam more likely because the strain it puts on the Gears and Motor weakens the Sprocket Arm's strength for pulling and pushing down the Film. A tight Clutch is not an acceptable condition for your Camera.
It is very easy to test the slippage strength of the Camera Clutch. You test it with the Camera ON and the Cartridge Chamber Door open. Just stop the Clutch with your finger as it turns, and note how much force is required to stop it from turning. It should slip with only a little bit more force than is required to turn the Cartridge's Clutch. In order to appreciate the small force required to turn the Cartridge Clutch, use your baby finger to turn one of the two blades on the Clutch counter-clockwise a few turns and then clockwise. Only do this on a used or partly-used Cartridge -- not a new one! You will quickly feel when the slack Film runs out, and thus easily determine how little force is required to turn the Cartridge Clutch before the Camera Clutch needs to slip. It's a small amount of force.
An additional test for Clutch tightness is to verify that the Clutch is not tugging on the Film by simply looking at the end of the Film in a used Cartridge. The end of the Film should not advance after the last Sprocket Hole has been pushed down by the Sprocket Arm. There should be about 5 Sprocket Holes of Film left in the Cartridge's Film Gate opening after the last Hole has been advanced by the Arm. If the last Hole at the end of the Film has advanced past the point of the Sprocket Arm, or there is no Film left at all, then this means that the Clutch is pulling the Film down, and it's too tight! Try running a used Cartridge in the Camera for a good 30 Seconds to see if the Film advances past the last Hole. The 5 Holes of Film should still be there.
A last factor relating to the Clutch's strength that you need to test is whether or not it slows down the Camera's Gears when stopped. With some Cameras you need to do this with the cover off of the Camera so that you can see the Gear neighbouring the Clutch Gear. With other Cameras you can see the neighbouring Gear once the Label Plate in the Cartridge Chamber is removed. You can test the Clutch's slippage strength as mentioned above by holding the Clutch with your finger. With the Clutch stopped, take a close look at the Gear. The Gear must not slow down whatsoever! If the Gear's speed remains the same when you stop the Clutch, then you know the Clutch is slipping properly. If it slows down the Clutch is too tight, and it will be affecting the Film timing.
The pictures below show the front, side and back views of two types of Camera Clutches from an Argus and a Sankyo.
Argus Clutch
The Clutch assembly consists of a Clutch & Shaft, a Gear, a Spring, a Washer and a Locking Ring. The Ring slips into the groove on the Shaft to hold the Washer in place. The Spring applies pressure between the Gear and Washer which causes the Shaft (and Clutch) to turn with the Gear. The point of slippage for the Clutch is at the Washer. The LENGTH of the Spring is what determines how tight the Clutch is before slipping. If this Spring applies too much pressure making the Clutch too tight, you thus suffer jitteriness. The Spring you see in the center view picture below is less than one-half of its original length. The Clutch on this Camera was originally way way too tight! It originally slowed down the Gears notably. It now slips properly, and passes both tests mentioned above.
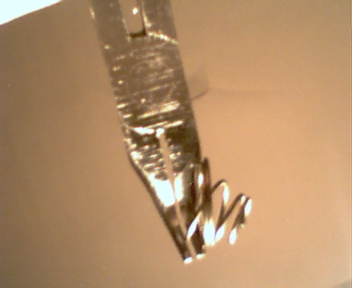
If this type of Clutch is too tight, then you need to shorten the length of the Spring. The lower picture shows how to do this with a pair of Needle Nose Pliers. Just grab the Spring right near the bottom, and bend it down. Keep doing this until the Spring is reduced to the desired length. You will need to re-install and test the Clutch a few times with differing lengths of the Spring in order to determine when the Spring is the proper length, and applies the correct pressure for the Clutch to slip properly. You remove the Washer and Spring by pushing down on the Washer with Pliers, and carefully pulling out the Locking Ring with Needle Nose Pliers. You do the reverse for re-installing it.
 |
 |

 |
 |
Use Pliers to bend the Spring down
Sankyo Clutch
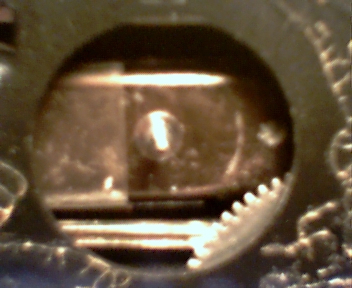
The Sankyo Clutch is a contained assembly consisting of the Clutch and a hollow Shaft which is connected to the White Disc at the back. It fits over a fixed Shaft on the Camera, and is held in place with a Locking Washer. The Black Gear in the center is turned by a Drive Gear on the Camera. There is a Cross "+" Spring which applies pressure between the Gear and the Disc, and the Disc is supposed to slip when the Clutch stops turning from insufficient slack Film in the Cartridge. The Clutch on this Camera was also way way too tight. To loosen it I simply bent down the four arms of the Cross "+" Spring with a small Screw Driver. I made the mistake of adding lubricating oil inside the assembly -- do not repeat this mistake as I couldn't clean the oil out! This oil made the Clutch too loose. You can see in the back picture a short piece of Tooth Pick which I inserted inside to stiffen it up. This Clutch now works perfectly which I can determine both by the Gear speed remaining the same when I stop the Clutch and by the Indicator Light in the Camera's Viewfinder. Down below is a picture of the base on the Camera for the Clutch which shows a Cotter Pin Switch on the bottom edge. The four knobs on the White Disc close and open the Switch which turns the Cartridge Indicator Light on and off. So, when the Clutch and Disc stop turning when the Film runs out in the Cartridge, the Light stops flashing -- unless the Clutch is too tight and keeps turning. This Clutch now slips properly, and passes both tests mentioned above.
 |
 |


Cotter Pin Switch for Indicator Light
I can state that as long as the Clutch in these Super8 Cameras is not too tight, these Cameras should never wear out. The only component on the Camera that could potentially wear out is the Brushes on the Electric Motor, but you'll never use it enough to wear out the Brushes. So little force is required to advance the Film through the Cartridge that there is nothing to cause these Cameras to wear out except a tight Clutch which will put a strain on all the Gears. This is why the plastic Gears in some Cameras wear out. Even with a cheap Camera, if the Clutch slips properly you shouldn't suffer jitteriness. It's very unfortunate that the Camera Manufacturers weren't more attentive to calibrating the Camera's Clutch properly. Jitteriness is probably a significant reason why many Super8 users quit using this format. You will also find the Camera's timing to be very consistent with a properly slipping Clutch, and this is important for recording sound. With this problem solved I hope that many former users will come back. At long last we may now see a rebound in the Super8mm format.
Mr. Terry Mester
To download an original Version of this
Webpage, Click the Link below, and Save it to Disk without the ".txt" at the
end.
v. 7.28.2008