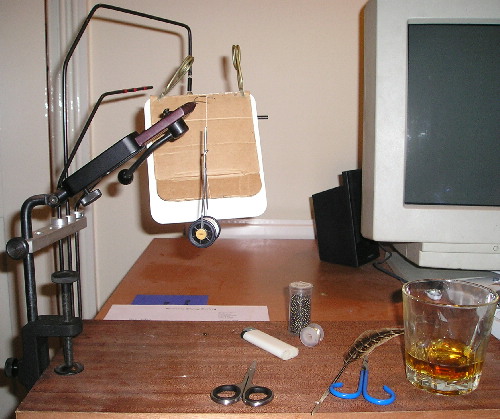
Ok, so the Scotch is optional... but the list is as follows:
Vice
Bobbin Holder
Tying silk in the colour of your choice
Thread scissors
Wire scissors/cutters
Pheasant tail herl
Thick nylon monofilament
Glass beads (x2)
Cigarette lighter with a metal flame shroud
Wire for the rib
An Extra Long Partridge Sedge/Caddis hook in size 14
Grey Partridge hackle
Step 1.
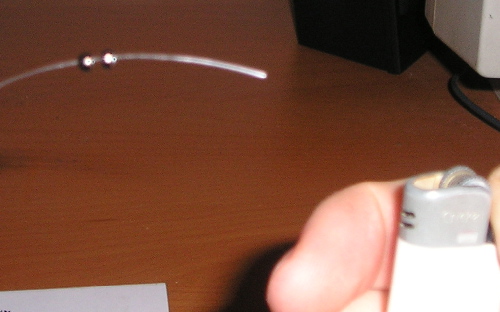
Thread the two beads onto a piece of the nylon mono. Bounce the lighter flame off the end of the mono a couple of times to get it hot and molten, the quickly press it against the metal lighter shroud to flatten it.
You should end up with something approaching this:
Step 2.
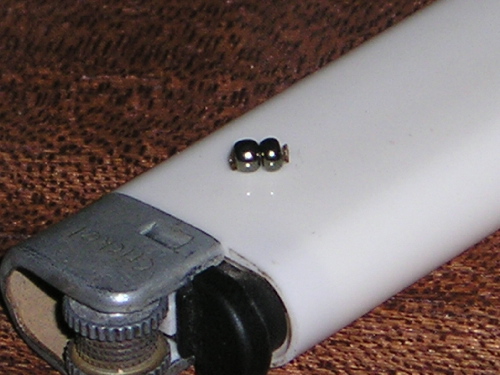
Pull the two beads together against the stop you've just created, clip the nylon approximately 5 or 6mm (1/4 inch) from the beads and repeat the above. CAUTION: You may need something to hold the beads and nylon with - lighter flames are hot. If you needed to read this warning, you probably shouldn't be allowed near anything sharp, so perhaps fly tying isn't really for you, give up now before you get hurt!
If you're still alive after that, you should have something approaching this:
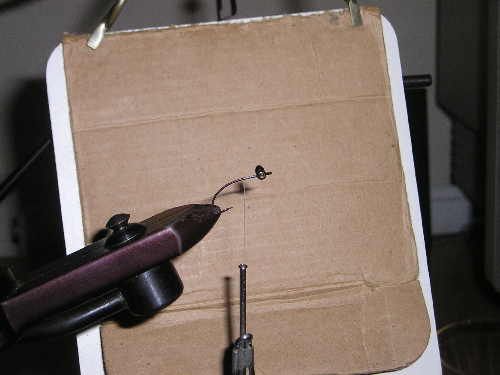
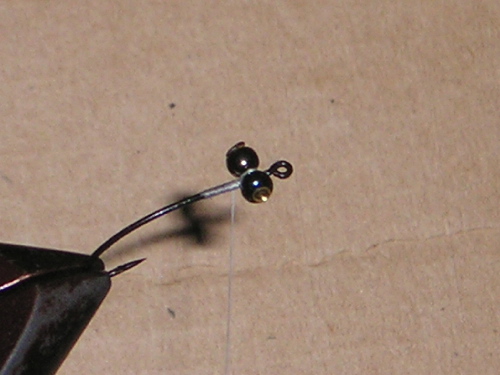
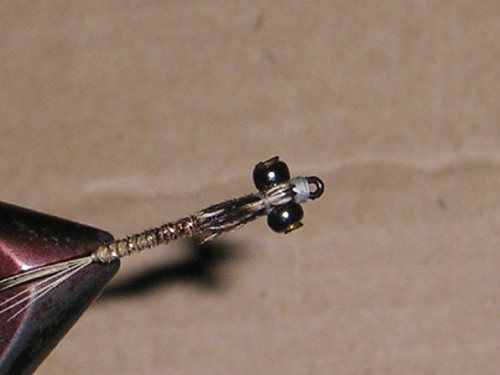
Step 3.
Next we need to attach the eyes to the hook, depending on how close you've managed to get the beads, they may be obliging and sit neatly on the hook while you lash them down with a few simple figure of eight turns of the bobbin.
If not, you'll have to hold them and use a pinch and loop to get them attached. In either event you should end up with something looking a little like this:
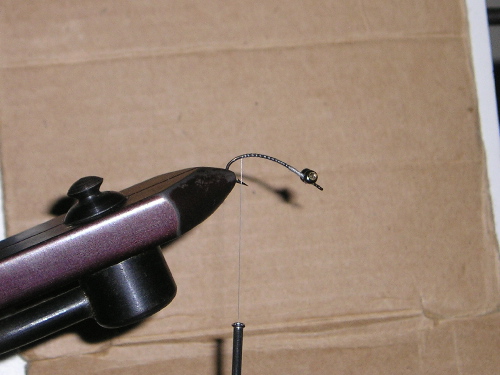
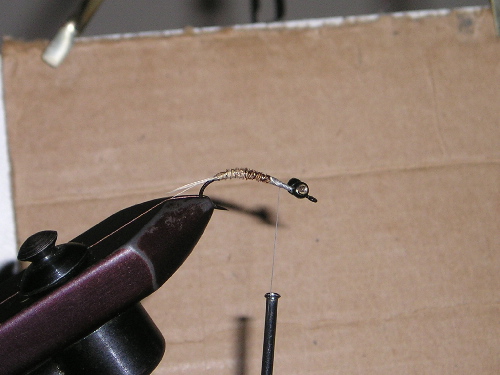
Step 6.
Take the thread back to just past the start of the bend of the hook like this:
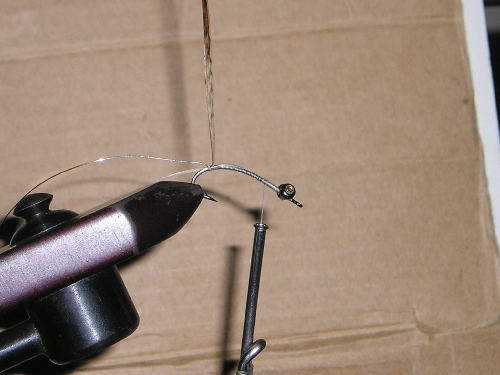
and tie in 5 pheasant tail herls and about an inch of ribbing material, then return the thread back to the thorax area as shown below. I've used hen pheasant and silver wire in this example.
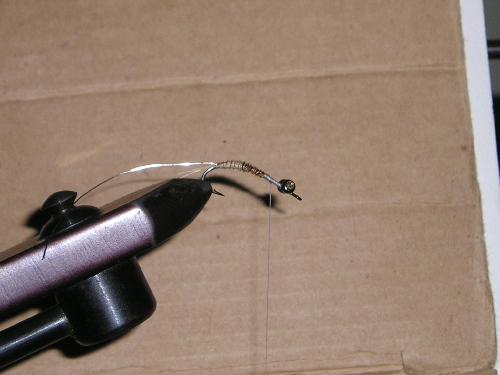
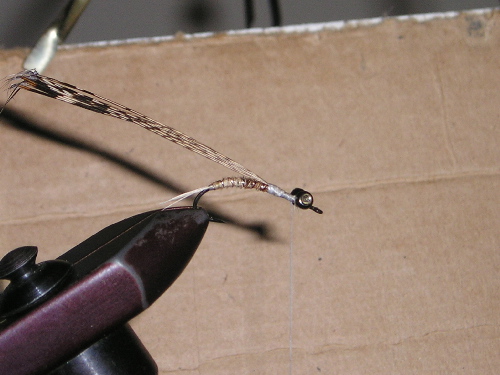
Step 7.
Hold the butts of the pheasant tail herls and wind them around the shank in touching turns and tie them off at the thorax area. Winding the herls is a bit of an aquired art - some get it immediately, others need a bit of practice. Suffice to say, it's not difficult provided you take it slowly at first and are prepared to unravel it a few turns and have another go.
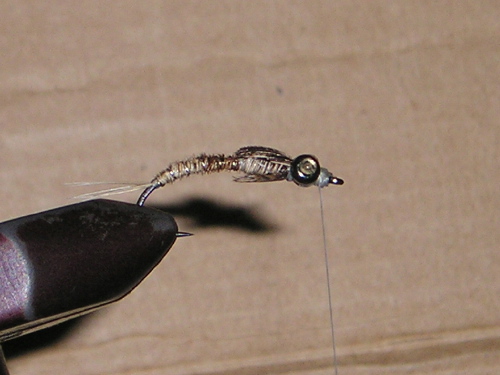
Step 8.
Now rib the fly with even turns of the wire and tie off as before. Break, don't cut, any excess rib by wiggling it back and forth after tying down with at least 3 or 4 hard wraps - this prevents any sharp edges being left showing to cut your thread or materials in the next steps.
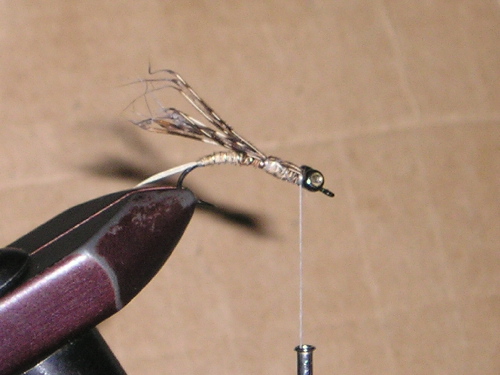
Step 9.
Now take a larger than before bundle of pheasant tail herls - TIP: One side of the tail usually yields shorter herls than the other. Use the long side for the tails and the short side for the thorax, you'll get more mileage from your pheasants.
Wind this, as before, in touching turns to form a thorax a tad fatter than the abdomen and tie in just behind the eyes. Take the thread back over the whole thorax in a single, half turn, like so:
Step 10.
Pull the herls back over the thorax and secure with a single soft wrap, then a single hard wrap of silk. Take the thread forward to just behind the eyes, again in a single, half turn of thread over the thorax as shown, apply a full turn once the thread is back behind the eyes so you can turn the fly upside down for the next step:
Step 11.
Turn the fly upside down - those of you with a rotary vice, say halleluja, those without, reseat the fly as shown in the image below. Select a grey/brown partridge hackle and strip the fluffy end to leave just the stalk of the feather:
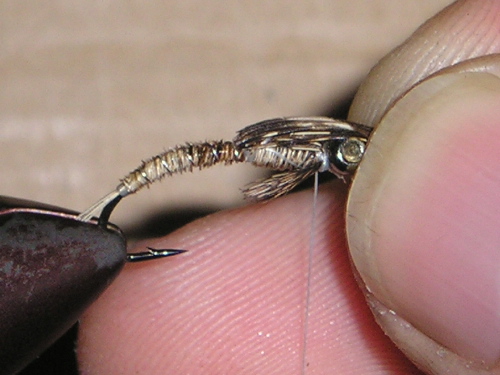
Now tie the stalk in against the undeside of the thorax and draw the feather through until the tips of the hackle are just the same length as the thorax area. Trim the tag end and secure well with a few more figure eights. Now turn the fly back over in the vice, don't worry if the figure eights look a little untidy from above, we're about to hide them nicely.
Step 12.
Bring the remainign herls forward again:
...and tie in with a single soft wrap, follwed by a single hard wrap behind the eyes:
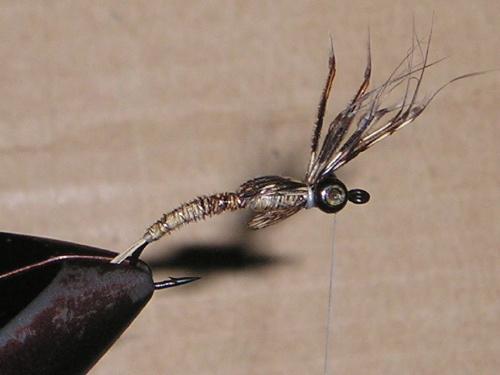
Step 13.
Draw the butts of the herl over the tops of the eyes and secure immediately in front of them, put a 3 turn whip finish in front of the eyes to form a neat head, trim the herl butts off by snapping them individually after making sure your whip finish is cinched down very tightly:
This should look something like this from above:
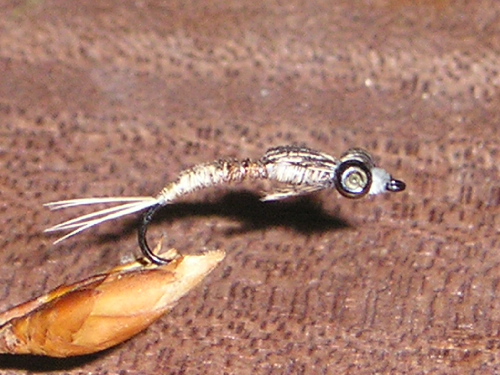
Step 14.
Finish the fly by applying a single coat of head finishing varnish, or nail laquer, to the wing cases to strengthen them against the trout's teeth. Your finished fly should look something like this: