October 1 2006. Page 19.
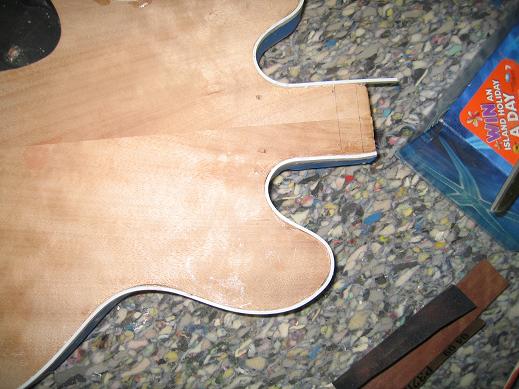
If I recall correctly, the last episode finished with some gaps between the body & the binding.
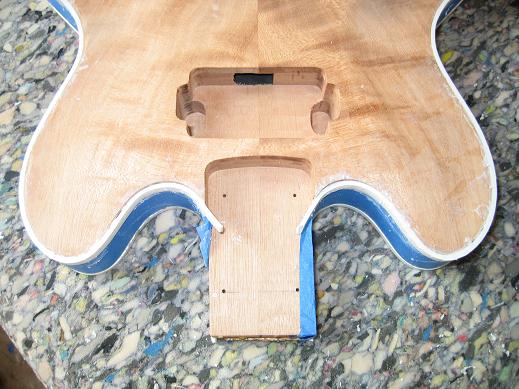
Photo 1. Something needs to be done here...
After seeking advice in a couple of groups & digesting the many different opinions I formulated the following plan.
1. Repair the waist gap in situ. The gap over the horn might be more difficult as I was unsure hoe to compress things evenly...
2. Fill the gap over the horn with binding paste.
3. If either or both measures failed, I would strip the binding completely & have another go.
Stripping it seemed to be risky in itself with one poster emphasising that I should immediately grab any large chips that came away & glue them straight back in.
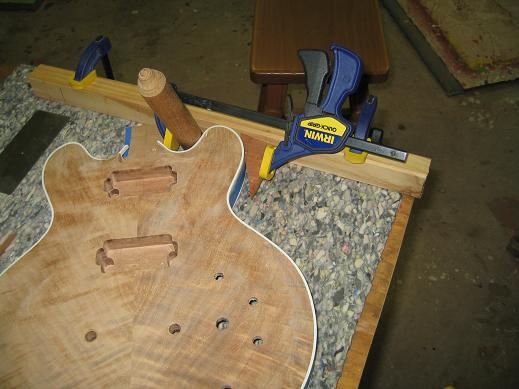
Well....no doubt you can guess that a less dramatic fix was more appealing. After a bit of fiddling I came up with this clamping setup....
Photo 2. You can't buy a set up like this...
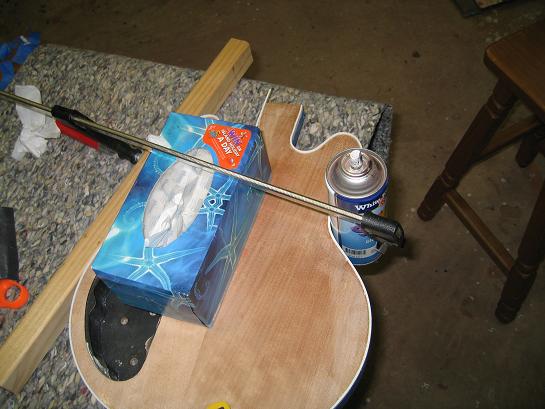
The diameter of the spray can was just right!! LOL. I heated the binding with a hair dryer, injected binding paste into the gap with a syringe & fine needle. NOTE: This required a sharps container since the fine needles were good for one shot only and I didn't want anyone of us or the dog to end up a pin cushion.
Anyway here's photo 3.
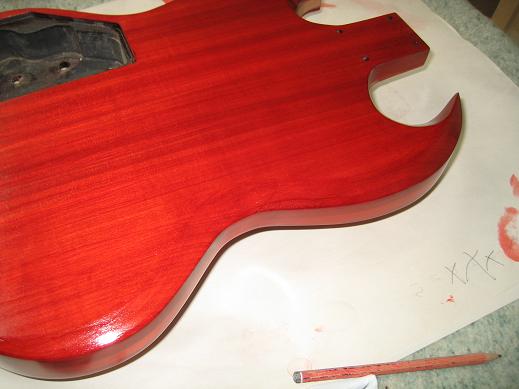
Photo 3. The repair is now the best bit!!
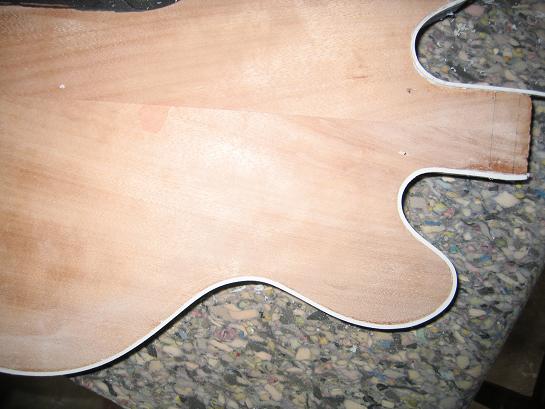
Success!! Woo Hoo!! The 'line' visible around the bottom of the horn is Weld On 16 on the wood not yet cleaned up & not an issue.
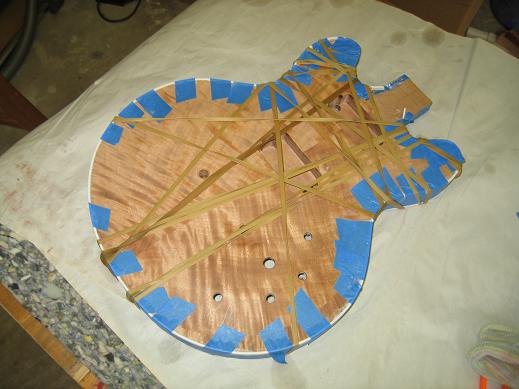
In doing the top & took things much more slowly & tied things down!! I used binding paste. (binding pieces dissolved in acetone. I might add that gaps at the waist as happened here seems to be a VERY common outcome since all but a very few posters had experienced the same thing. First hand learning I think it's called. I had no idea of how much to prebend the binding & what I accepted as 'normal' was nowhere near sufficient. Here is a reply from Norman with some links that will give you an idea of what to aim for.
"If you start over than prebent the horns and use rubberband wrapped around the body to get a tight fit.
I used old inner tires of a bicycle. Here's a link of some foto's I took when doing mine.
http://img83.imageshack.us/img83/4092/bindingprebentdf8.jpg
http://img83.imageshack.us/img83/6190/bindingsidefw2.jpg
http://img83.imageshack.us/img83/2320/bindingroundlw2.jpg
http://img83.imageshack.us/img83/7827/bindingbodywrapedmm1.jpg
Norman"
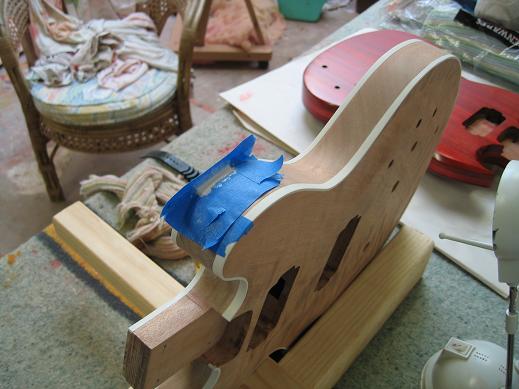
Photo 4. I'm gonna nail the top.
Not as thorough as the job in the links, but a great improvement.
Photo 5. Not perfect..but much better.
Now at the bottom of both cutaways you can see a line...this is not a binding issue, but where top of the guitar is proud of the binding. The carve in the top takes the surface from below to above the binding. Look to the left of the left cutaway as you see it and what appears to be the left end of the 'line' is in fact a small gap. That was the only blemish. With a bit of fiddling to get pressure on I gave it the treatment!!
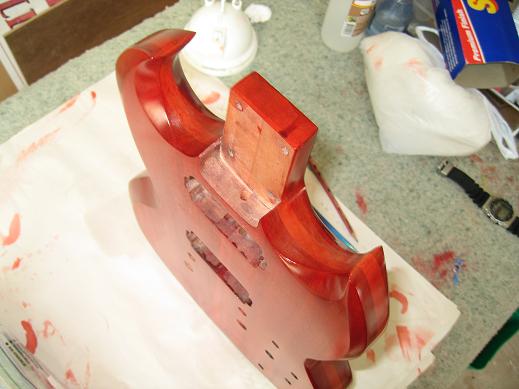
Photo 6. More squeezing...
Then came the job of scraping the binding back. The top & back went OK but scraping the sides level was a bloody horrible boring messy job that irritated me beyond belief. I have since found out that it's a good idea to take the depth of the binding down in a special jig BEFORE gluing it on...and also that on my Blueshawk the binding is actually slightly below the surface of the sides, so I could've bought a thinner binding & saved heaps of work. This whole shebang took almost a day and a half!!!
Actually my experiences triggered a whole tangential debate as to whether power tools ought to used for cutting back binding. You won't get an answer to that one from me. Some guys swear by scrapers, others by flush cut router setups...after they've lost a few projects. :o)
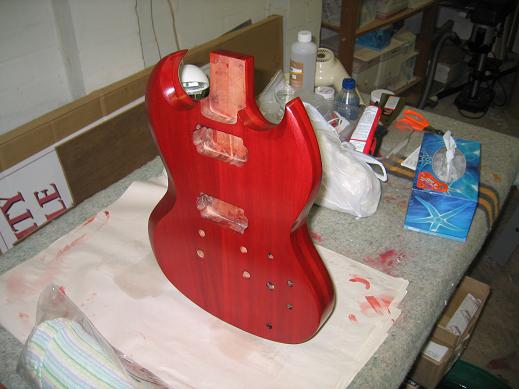
Photos 7,8 Let's check it out.
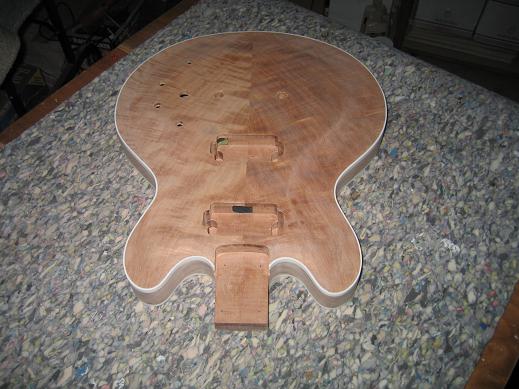
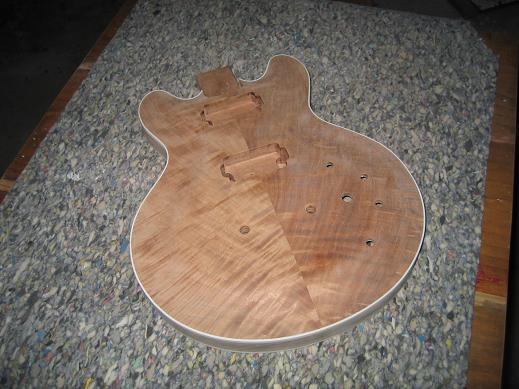
OK..I'm starting to realise that I can do this!! LOL!! ..Can this be real? Clean it up & stain it and we're almost home!!
Well another gem that a poster passed on was that the slightest flaw in binding looked like a speck of pepper on a plate of cream!!. He's right. But after the frustrating time consuming and mundane task of scraping the binding back, I think it's more like a small ball of snot hanging in a nostril. Make sure your scraper is sharp.
I went about cleaning up the surfaces and was about to mix up the dyes when...What the...There was a speck of pepper on the cream...I'd missed it. It was a hole that I'd sort of uncovered as I scraped the overhang back. I was able to inject binding paste into it & fill it, but the paste obviously reacts with the existing binding and produces small bubbles that can be trapped as the 'fusion' takes place. They lurk there waiting for a careless touch with a scraper to expose them & send you back to the filler. LOL.
Meanwhile the re-staining of the SG was progressing slowly but surely. I'd re-read the chapters on shellac & was using a 50/50 mix of shellac & alcohol (+ a couple of drops of turpentine) and padding on thin coats leaving long intervals between successive coats ..in the order of hours & limiting the n umber of coats to 4 per day. It took 12 thin coats to get the shade of red that I'd had before.
Photo 9. I've been here before..
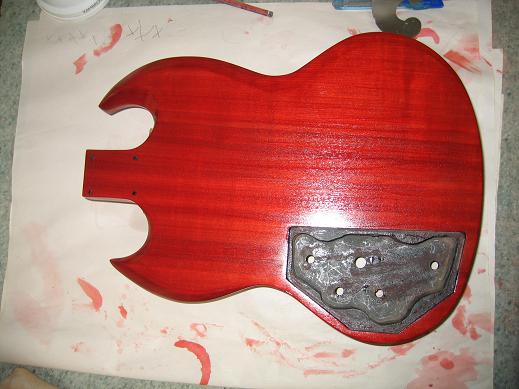
Photo 10. There's a slight run..
...on the chamfer just above the waist. I was able to clean this up with very light use of 000 steel wool & a bit of turps. I do NOT want a rub through!!
Photo 11. Look no hands!!
I'm trying to show the grain in the scallops on the cutaways. It does look good, but I don't know how I'm going to get a good photo.
Photo 12. Another look.
After I'm happy with the evenness of the colour I'll put 6-8 thin coats of clear shellac on before spraying on the nitrocellulose lacquer & rubbing out.
With things inching towards assembly I took the masking tape off the necks & cleaned them up. On the first I suffered a few chips that came away with the masking tape so I had a few issues going at once..
I alternated between rubs of alcohol in steel wool as a 'levelling' action over the chipped areas with more thin coats of shellac. Drop filling with superglue is also possible, but always shows. The advantage is that it dries convex, while drop filling with lacquer or shellac dries concave. That's why I did neither. The chips are almost invisible.
Photo 13. Do a bit here, a bit there..
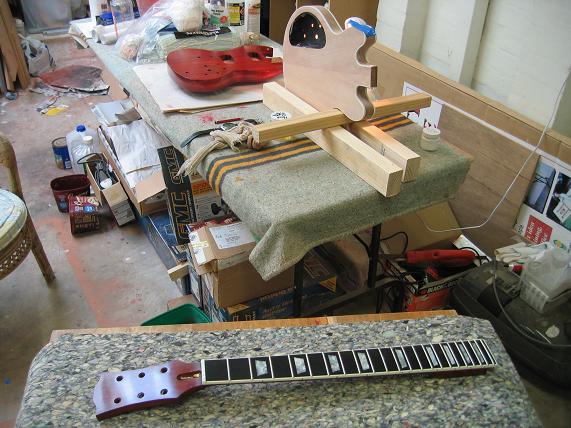
Photo 14. A closer look at that patch..
I'm confident enough to believe this will put the binding to bed & I can stain & maybe spray nitro in the next few days. Time to practise up on my soldering.
Actually the above repair wasn't final. I finally realised the masking tape was causing more problems than it was preventing. What I mean is that any runs of binding paste over the timber can be easily scraped off, while the tape was leaving specks embedded in the fill and 'grooves where it's edges had been. The binding pasts sets reasonably quickly so I've redone the patch with no tape, just wiping away dribbles as they might occur with my finger.
Also I'm starting to take the hardware into the garage. Bit by bit. It's exciting in a way. Sort of like rounding the home turn (I wish.... LOL!! ).
Tuners are on.I didn't realise how heavy they are. Schaller locking tuners on all necks.
I'm also setting up a VERY rudimentary jig to solder the pots & switches in the appropriate position & setup. They came partly wired but I have changed the configuration of the controls since then so a bit of rewiring is needed.
I have stuck a piece of copper tape in each pickup cavity to give an anchor for soldering the earthwires but am using conductive paint as the shielding.
I will probably not get too much done today (Sunday Oct 1) as we have our lunchtime gig and my team (the Brisbane Broncos) have made the Grand Final (read Superbowl) . It will be played later on and I must watch that!! It might be a good thing because I'm starting to get a little impatient...THAT'S BAD ...... LOL!!
The programme: Prep & spray the SG body with rattle can nitro. (leave for a couple of weeks of more)
Prep & dye the CS336 and maybe put on a coat of shellac & the spray the nitro.(leave for a couple of weeks of more)
Assemble the LP Double cut.
Well .... The Broncos won a fairly tough grinding game, so I mightn't get much done tomorrow either ... also I don't have the camera to hand for a few days.
CYA
RobSm
Page List - Much less editing doing it this way. LOL!!