
17 September 2006
Page 18.
Some smooth sailing and some uncharted hazards!! Smooth sailing first otherwise it could turn into a rant!!
I rubbed the LPS back & sides to a satin finish....no rub throughs...WHEW!! and now it can rest a while until I clean up the necks a bit...around the nut & edges of the fingerboard...at which time I will practise my soldering & attempt to assemble it.
The back & sides were stained with water soluble dye and given following coats of 'hard' shellac which is said to contain an additive that makes the shellac tougher. We'll see!
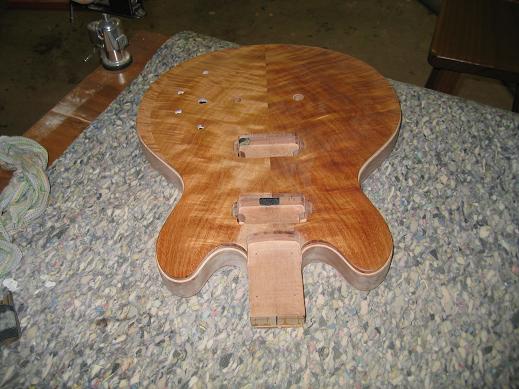
Photos 1,2,3, LPS back & sides satin finish.
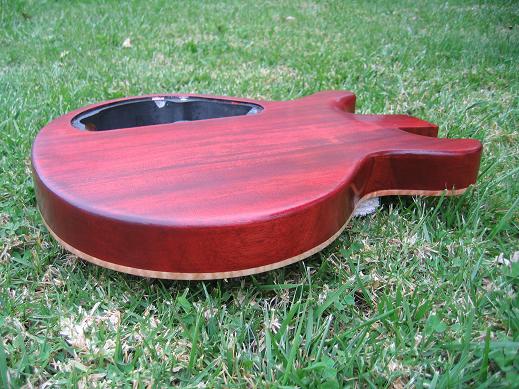
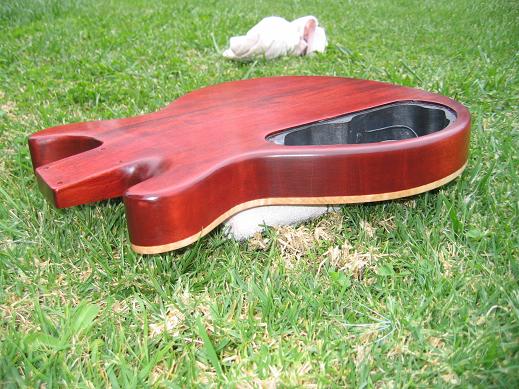
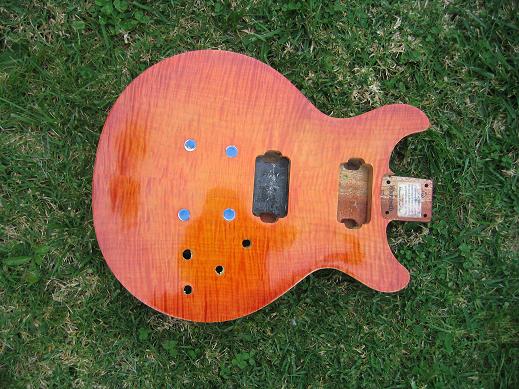
Photo 4. Remember the top?
Well at least I seem sure to come away with something to play out of all this!! LOL!!
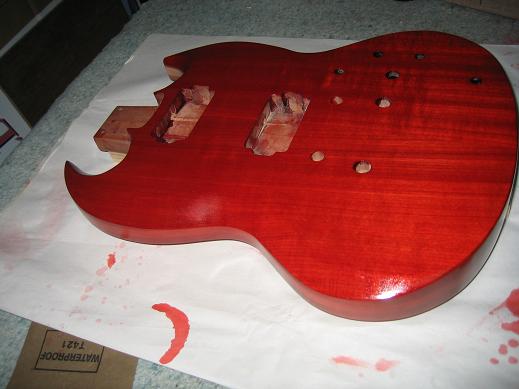
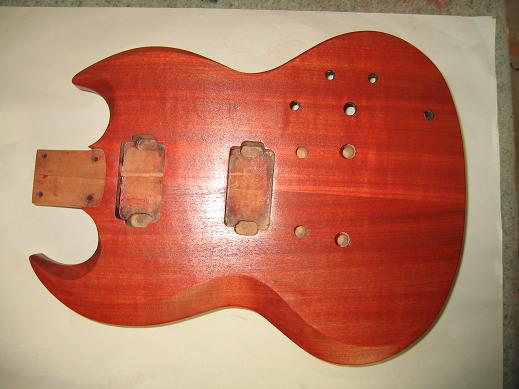
Now back to the re-stain on the SG. I am going very slowly and am happy to report that so far all gas gone OK. In the following pictures I wasn't able to get the light right & so You will have to extrapolate a bit. The true appearance is a sort of blend of all of the photos. the top is OK for now & I'm starting on the back & sides. I'm using Feast Watson Prooftint (red) 10% in a 50/50 mix of shellac & alcohol. Later I will apply a couple of coats of clear shellac and then use rattle can nitrocellulose to finsh.
Photos 5,6,7,8. SG top stain so far..so good


In doing some reading I believe I have discovered what caused my original problem. Shellac sort of fuses or melts into the preceding coats and lingering too long in one spot when applying it can lift the redissolved under-coats. I am sure that's what happened though I reckon I wasn't lingering ..I just went to touch up an odd spot and WHOOSHKA!! off it came. Anyway I'm now being very cautious.
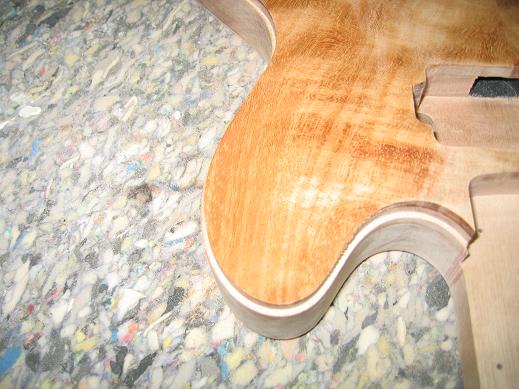
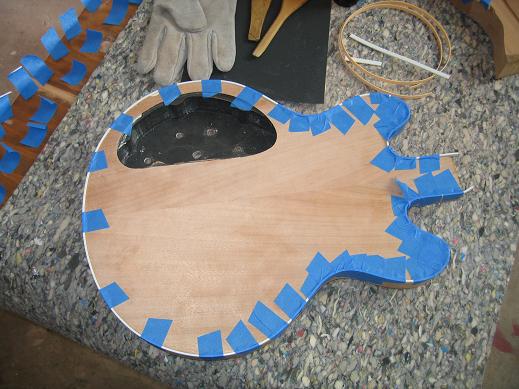
I also had to sand out by hand the upper bouts of the 336. In one place I was very close to the bottom of the top laminate & had to go VERY CAREFULLY. I was talking to Chris (my safety net) about the unevenness in the surface I wondered whether the whole guitar had warped. He measured it up cast his keen eye over it & opined that there was in fact up to 2mm difference in some spots but regarded this as compounded errors rather that a miscue or warp. That's where I had no idea. I did not build in any margin for error. So there's a tip. Leave yourself room!!
Well the hand sand went OK and you can see in the photos of the bouts that the surface shape is sort of like a Les Paul inside the cutaway. 336's are flat round all of the edges & contour upwards & inwards. I didn't feel I had sufficient MARGIN for ERROR to attempt to do that at this stage given I was so close to the bottom of the laminate in one place. This means the binding will hopefully look like that on a Les Paul inside the cutaway & not be dead flat all the way round. StewMac reckon invisible joins are possible. I hope so!!
Photos 9,10,11. Finished top shaping on upper bouts.
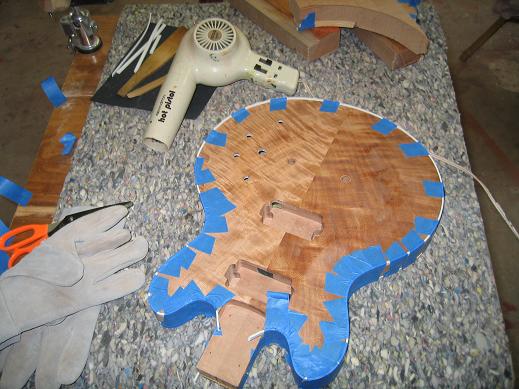
Next I pre-bent the binding by yaping it onto the body with the aid of a hair dryer to soften it up.
Photo 12,13. Binding taped on to pre-bend it.
Now I practised gluing on strips of binding on scrap using Weld On 16 and binding paste made by dissolving pieces of binding in acetone. This is what StewMacs say can give invisible joins. Well it was fiddly and I decided to go with the Weld On 16 as I had more confidence in it as a product than my garage chemistry.
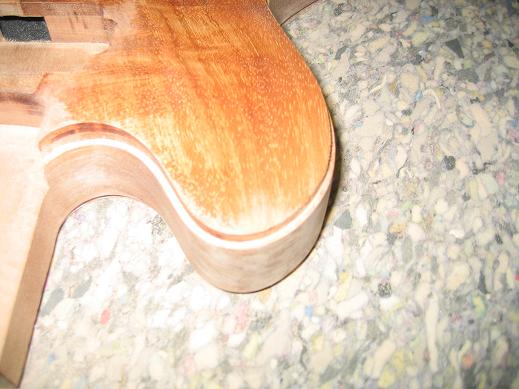
The binding job was horrible. The weld on was difficult to manage & I got it all over by hands the paper & whatever and it goes off quickly. I wouldn't say I panicked, but I did get very very flustered at first despite my practise. Well the upshot is that I have obvious gaps between the binding & the edge in a couple of places.
Photo 14. A job not done all that well. See that gaps.
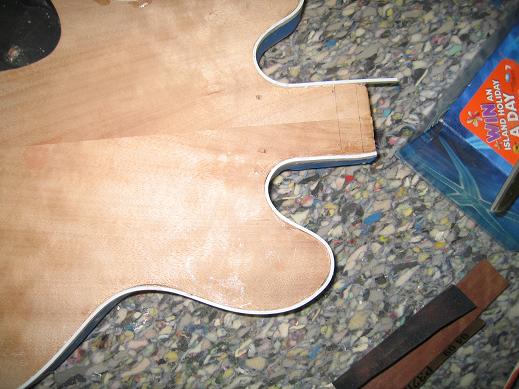
I'm not sure what I can do if anything, but the gaps are too big to allow. I will definitely use binding paste from now on as it's easier to work with...you brush it on the channel & onto the binding & hold firmly till it sets. I had all sorts of difficulty controlling the weld on 16 despite the practice.
Man ..What a ride this is LOL!!
Thanks for viewing, RobSm