20 August.
Page 15.
I've been finishing the necks and they're coming along OK.
This will be short on text because it's late and I've had problems which I will expand on later.
Here are the latest pics.
Photo 1,2,3....the well ventilated paint shop and some rattle can nitro
This is a cool clear mid winter day here in Oz. (yet we're 2 to 3 hour drive from the ski fields)
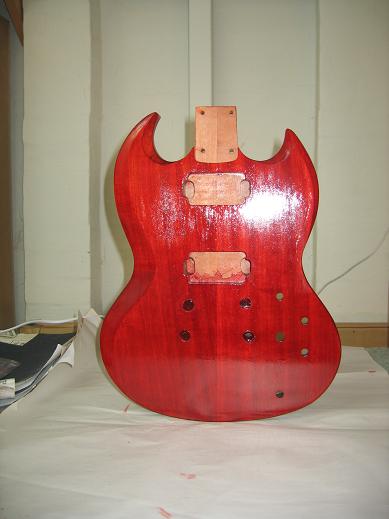
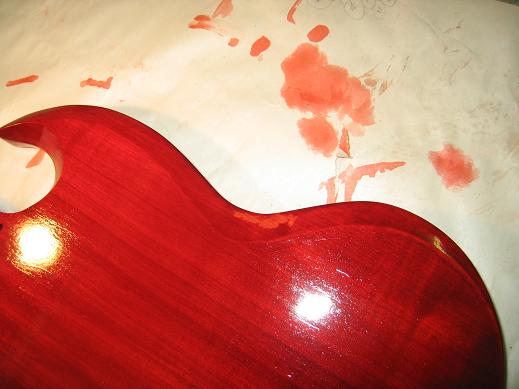
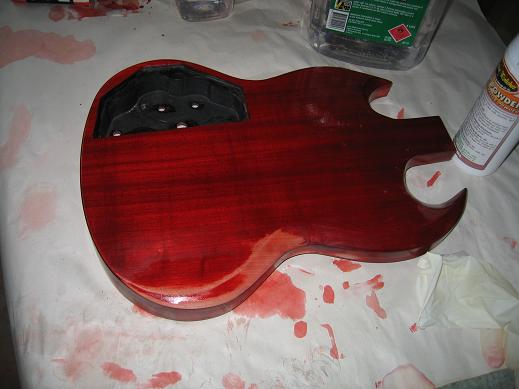
Photo 4. the SG with tinted shellac
It's not a good picture and it's nor going smoothly however both bodies are now put aside for a while so I can do the necks & a bit on the CS336. I must add that it looks gorgeous in real life. I took heaps of shots but couldn't get a good one.
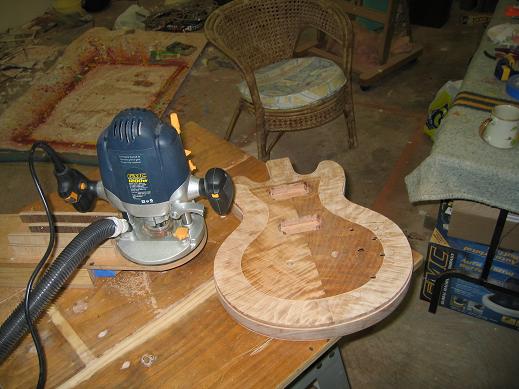
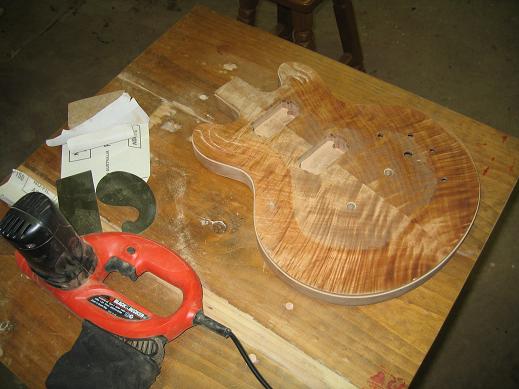
Photo 5. Surfacing 'jig'
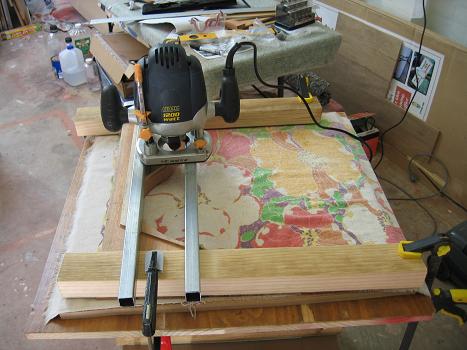
I have to take 2mm off the back because I'd routed the binding channel too deep. I don't want to carve the back. I want it flat for when I attempt to carve the top.There will still be adequate thickness to bolt on the neck though. This did not go smoothly either!! :o(
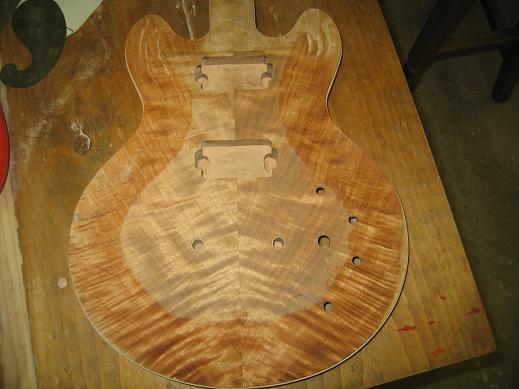
Photo 6. Underway.
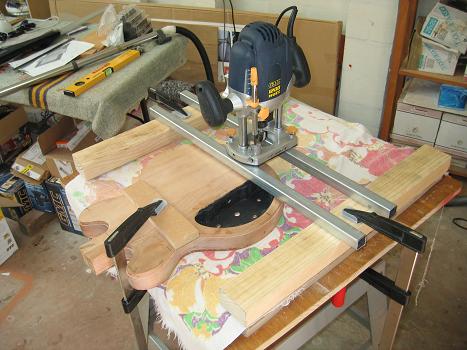
Photo 7. Done.
Looks quite good, but there's a requirement for some filler at a later date!! LOL!
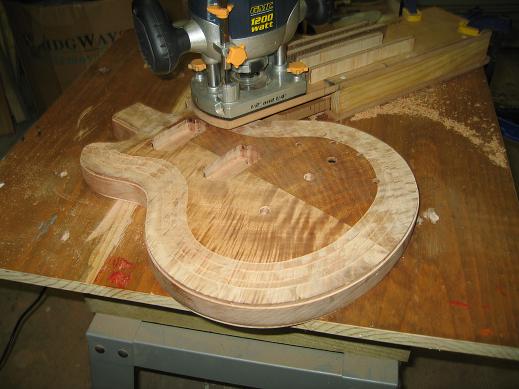
Photo 8. Man I hope I've done enough practice...The Setchell Carve top jig.
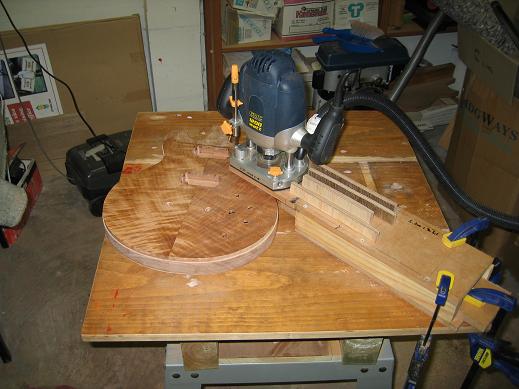
Photo 9. First cut
So far so good.
Photo 10. Steps done!!
You have to look closely to see the steps. There were problems here, and I nearly threw the lot through the garage door!! It was closed too!! LOL! However things can be salvaged in a number of ways so I'm basically happy, but it's not perfect any more!! Waaahhh!!
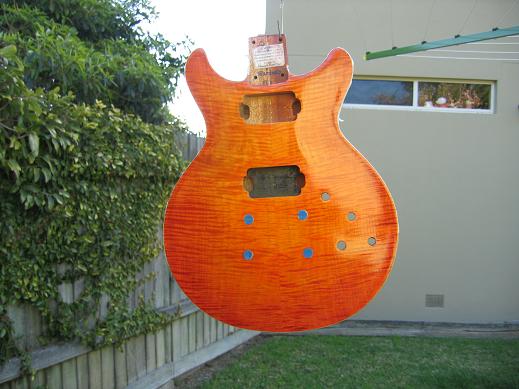
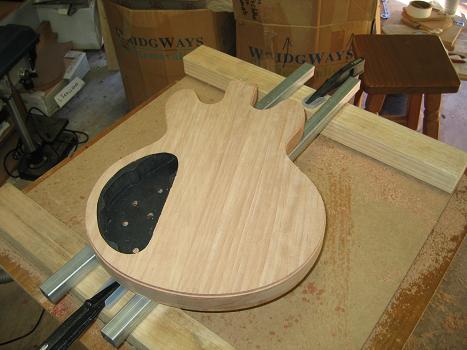
Photo 11, Carve done
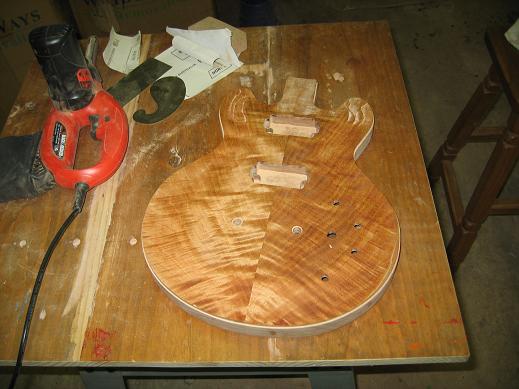
Can you see the bloopers?? My wife couldn't so I don't feel too bad. I wet the surface to try to show the carve but it doesn't come up too clearly. I used a powerfile, scrapers and...you guessed it...Sandpaper!! LOL!!
I'm thinking I might just clear lacquer this & shine to gloss. What a wild piece of Qld Maple I lucked on.
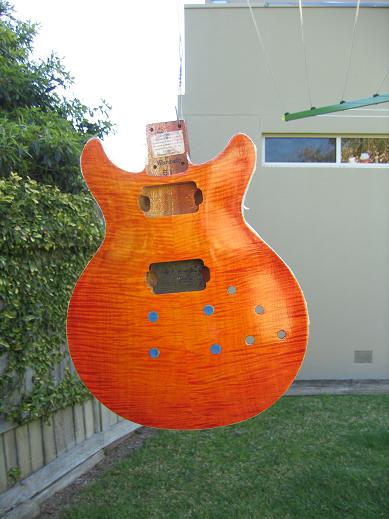
Photo 12,13,14 More of the same
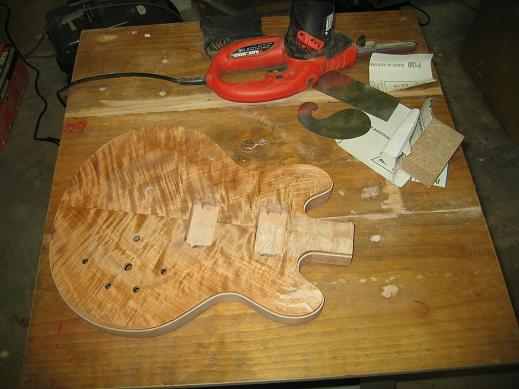
I haven't done the horns & cutaways yet since I will need to think it through thoroughly before doing anything. I was aiming for a flat 'S' shaped (sigmoidal) contour but I didn't get the round over on top right. It's regular and smooth but at this stage I'm not planning on tinkering with it. I have learned to quit while ahead!! LOL!!
I should say that most of my problems were caused by momentary losses of patience.
Problems!!!
OK. If this blog is to serve it's purpose and help other newbies I have to include the lows as well as the highs.
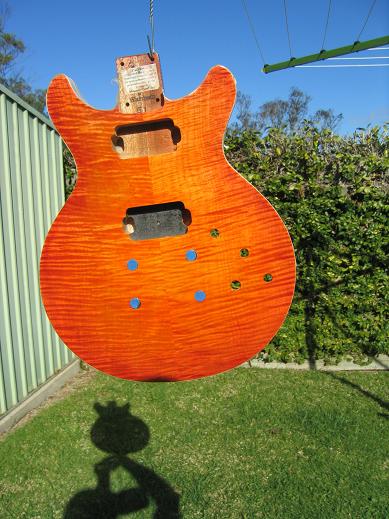
Looking at the right side of the guitar in the above picture you can see a sort of linear rim on the edge of the lower bout. I think I must've tilted the job while routing. The upshot is that I've gone ever so slightly through the figured top & exposed the rim. Also if you look closely at the left lower bout to left of the centreline you can just make out a little chip or tearout.
It's frustrating since the rest went so well...but I did it...probably through lapses of concentration.
The possible fixes would be to fill the chip and then to do a sort of sunburst finish with very dark staining round the very edge. That would make the flaws pretty much invisible to all but the knowing.
The other fix would be to used the 'scrap' and fill will chip with a near match, and to excise a sliver around where the rim is exposed and 'implant' a similarly shaped sliver of the figured top retrieved from the off cut. Now I am not up to this and I am all for cutting my losses.
But I have a 'go to' guy who has been of considerable help in the past and who has taken an interest in my...er....work...well attempts. I took it to Chris who is a custom furniture maker and firstly he thought the implant fix was feasible and secondly he agreed to do it. It is a paid job. I chose to do this because I think a clear glossed nitro finish is the best I can do for this top. I cannot see how I could improve on what is shown in the previous photos . See Photo 11.
Now I also ran into problems finishing the SG. Because I'd been unable to decide whether or not to stain it until after I'd seen it shellaced I more or less had to use tinted shellac. It was going wonderfully when I was tempted to touch up a spot and part of the finish seemed to evaporate or get sucked off the wood back into the pad. I do not know why this happened.
Photo 15,16...What the....????
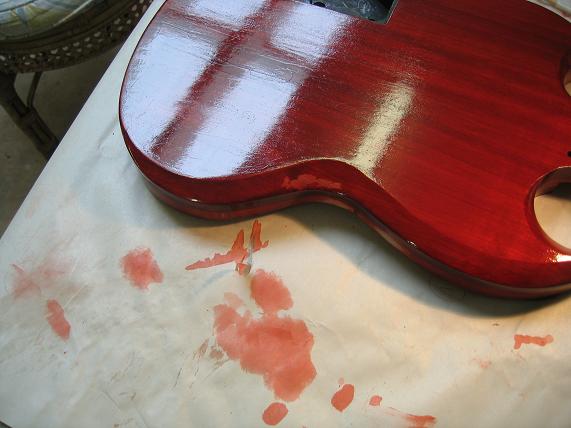
I am trying to 'blend finish by taking off the finish on a large part of the edge & building it up to match. If this doesn't work I will strip the lot & start again using water soluble dye on the timber a clear coat of shellac to seal & the nitro. Fingers Crossed!! LOL.
Photo 17. Can I patch this?
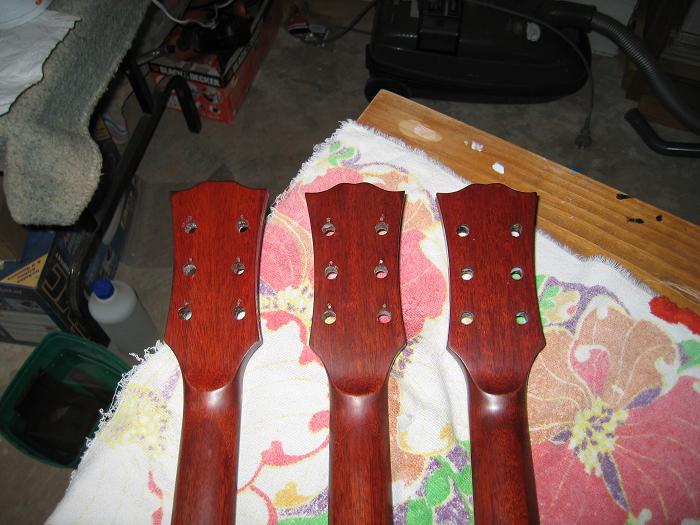
I hope so. While this photo is dark, I like the colour and starting again with a different process would mean losing it. Well I have had a win in finishing the necks to date. They're coming up very well. I'm following 'The Polishers' Handbook' and I read where the author gave directions for a satin finish and commented that it was his favourite. I figured I'd try this one bearing in mind that it is only a few more steps to do a gloss finish which I'd tried much earlier
Photo 18. Headstock rubbed to gloss earlier.
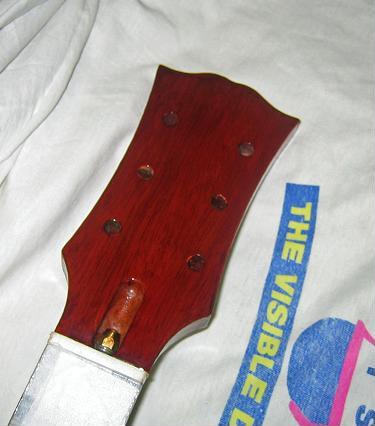
I'll say up front here that the photos don't do justice to the objects photographed. Again it's a shortcoming of mine since I can't operate the digital camera expertly. You'll just have to trust me!! LOL!!
Well I agree with the author. I'd always thought satin finishes were a cop out & that shiny was best, but with my hand on my heart I can honestly say that the satin finishes produces a beautiful piece of timber while the gloss gives a shiny plastic coated object of indeterminate origin. That's the best I can do to describe the difference. I must add that having got to the satin stage, going on to gloss is quite quick & simple. Follow Dan Erlewine's method originally. It's step 8 on page 270 of Guitar Player Repair guide. I'm happy to say I committed only the one most minute rub through!!
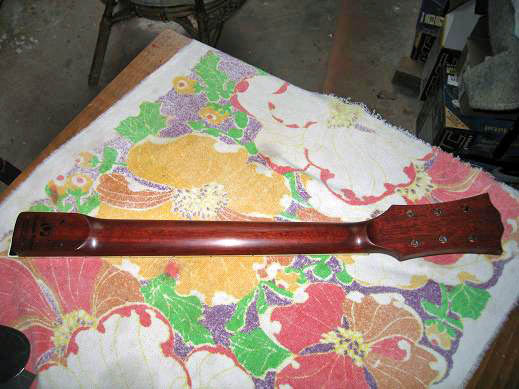
Pictures 19,20,21. I'm converted to satin finishes for necks.
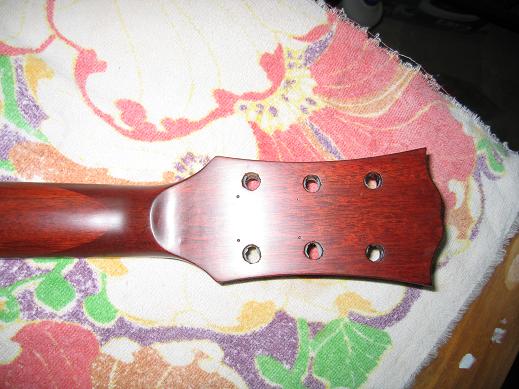
Actually I've just spotted an imperfection in one of the pics!! I'll have to fix it.
Basically patience was the key ingredient. I used wet 'n dry mainly 600 grit with a few touches of 320 & 400 on the more recalcitrant pits. All were used with paraffin, and I might say a very light touch. LOL.
The tip of the day here is: SCRAPERS!!
I used the flat one and the curved one. and I believe that's why I was able to do the headstocks without rubbing through. (The rub through is down near where the neck bolts are). They take off very thin smooth shavings. The flat one was good for going right across the headstocks & finding the high bits and taking them down evenly in a line across. I hope that's clear. The curved one was best for the odd shiny pits that are left and also for use in the curvier parts to the neck for example where the headstock joins the fingerboard part & where the necks curve into the bolt on heel. It was slow work but very satisfying.
CYA
Page List - Much less editing doing it this way. LOL!!