2 April 2006.
Lots of delays visitors,work, you name it, and time consuming stuff...eg hand sanding!! LOL
I wanted to tidy up the edges and so did some resanding. I became confused until I realised I wasn't going to get consistent results because the orientation of the grain changes as the sanding works around the body. Once I twigged to that and worked with the right grained paper I got results. I was using far too fine a grit at times because as I said I was confused about the varied results. Another lesson learned!!
The end grain parts took forever!!! I can't describe what foul nasty intransigent stuff end grain is!!.
During the same period I was laying on coats of 'hard' shellac on the necks. 'Hard" shellac is dewaxed shellac with additives to give a tough heat & water resistant finish after a month's curing. See: http://www.ubeaut.com.au/ubhome.htm and browse. I chose shellac after lots of reading particularly on the http://www.lmii.com/ site. It can be applied easily in a variety of ways, and I didn't want to go into spray equipment.
I do have some spray can Nitrocellulose which I might use on the bodies.
I had to 'interweave the lacquering & the sanding as I didn't want sanding dust in the wet lacquer.
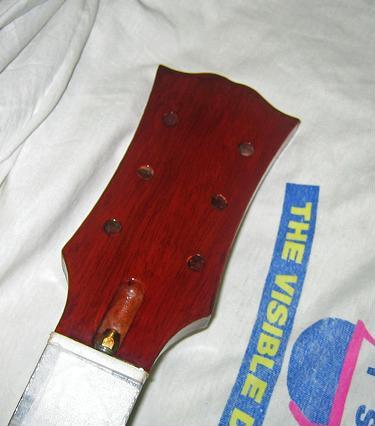
Well that wasn't all plain sailing. I think I was laying too much on at a time. When I throttled back things went much better and I spent some time sanding back!! The length of the necks was no problem...I was having problems with the nice flat headstocks!!!. At this time I decided to 'rub one out' to see if I was on the right track or hopelessly lost. That of course would mean a lot more sanding back!! LOL. Well I'm happy to report that The headstock came up very well. I did get a rub through but I have my dye ready made on standby. After restaining & more lacquer & a bit of effort here is the headstock of neck #1. It gets everything tried on it first!!
Photo 1. Headstock rubbed out.
I must say with due modesty that the photo isn't as good as 'real life'. You can see the rub through up on the top edge. GRrrr!!. But really it does look good. And it feels beautifully smooth. I feel a fetish coming on!! LOL. However it is not perfect. The back came up very well too but I used a slight variation and there are very faint rub marks visible under direct light in a particular position. So I have decided to lightly scuff with 600 grit and apply a few more coats of lacquer and try again. I do not want to go after the rub marks by sanding and risk more rub throughs. The theory is after a 600 grit & more lacquer the new & old surface should merge. If they don't it will be no worse after rubbing, and I won't have a rub through. Then the necks can lie for some weeks while the lacquer cures.
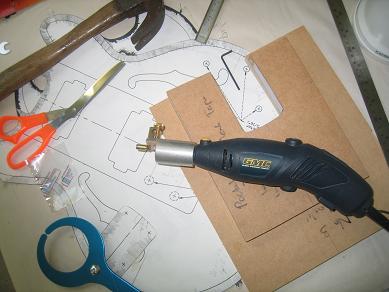
The neck templates have also cost time & effort. The stewMac templates are oversize. They're far too big. Even with many layers of finish the necks come nowhere near a snug fit. Wrapping tape round the ball bearing doesn't help and as you would guess when I bought a bearing the next size up, the result was too small. I the figured I could stick on some 'laminex' in the larger pocket. This has potential, but the laminex doesn't like going round corners!!!. I will probably make my own for each neck with some variation tof the Martin Koch method, or press some epoxy putty round the oversize template & force the neck in (suitably protected). When the putty dries I should have an accurtate template. Or so the theory goes...but this also has taken up time. And it's coming to the time when I must route the neck pockets.
OK ! Let's CUT!!
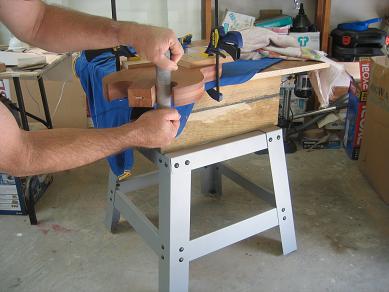
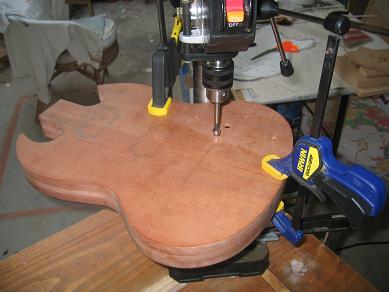
I used a fortstner bit in the drill press to get rid of the bulk of wood in the control cavity of the SG.
Photo 2. Roughing out the control cavity.
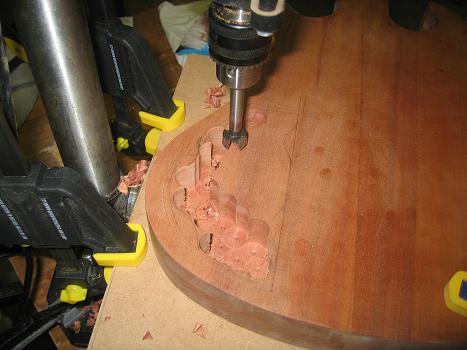
No surprises, just take your time. This is a fairly large bit. I changed to a smaller one near the corners
Photo 3. Cavity roughed out.
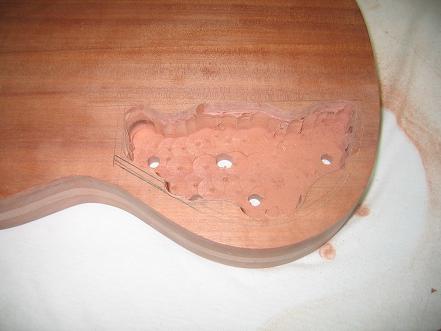
To clean it up I used a dremel tool with a small sanding drum hand held to work around the top. This gave me a reasonable surface to use for a flush cut bit in the router.
Photo 4. Cleaned up with router
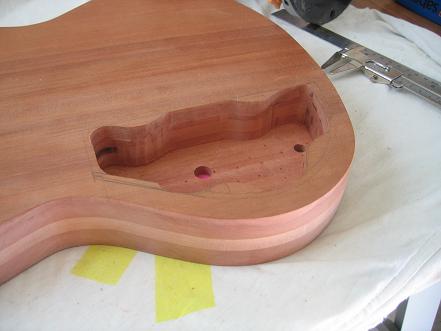
You can see how rough the dremel sanding is compared to the router cut. Now I had to cut in the recess to accepts the cover panel. I thought I could do this with the StewMac binding attachment for the dremel. And I could..up to a point.
Photo 5. Recess for cavity cover 'almost' cut
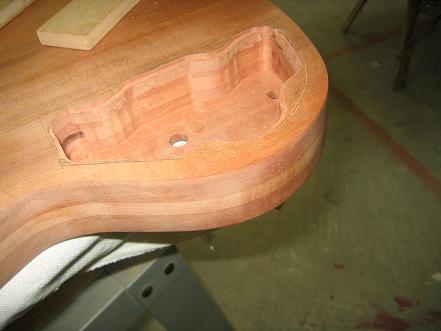
Photo 6. Dremel with binding cutting attachment.
The picture of the control cavity isn't very clear but you can see 1. the recess, 2. It follows the top shape and 3. It won't get into the corners...HMmmmm....Over to the mallet and chisel. I haven't SEEN either since year 8! LOL. Well let me cut to the chase. This didn't go well. I couldn't see myself doing anything like an acceptable job...so I redesigned the control cavity cover shape. It origianlly curved in parallel with the curve of the body which I thought would be very pleasing..but when it came to cleanly cutting it there was no guide and ans someone said..if you think you can route freehand slap yourself in the face & build a template. The cover is now all straight lines, done with the router & pattern following attachment and is clean and tidy.
Photo 7. Redesigned Control Cavity cover.
I see so many things now...why is the cover on Les Pauls a crappy little parallelogram? Because it's quick & easy. Why on a class instrument like a Les Paul are the headstock neck & body painted black? Because it's quick & easy. Well that's why we build our own...for satisfaction and our own vision!!LOL. Wait till I finish these!! The next one will be a Ripper!!
Photo 8. Inside the horns....End Grain!!!
Note the Hi Tech sanding tools!! LOL.
Now....remember TEST ON SCRAP!
Photo 9,10,11,12,13
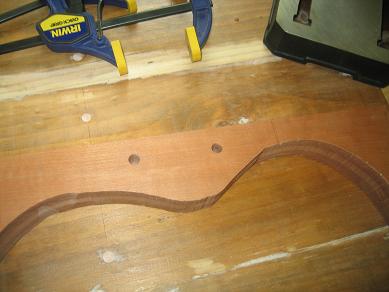
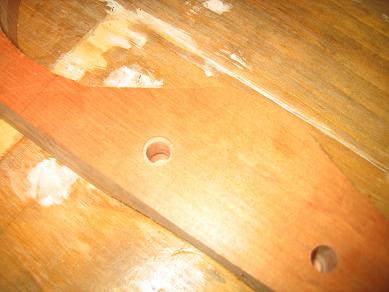
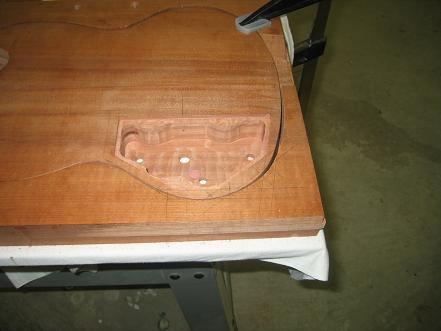
Can I drill a hole in a piece of wood. You Bet!! Two holes? No Problem! Are they in the right place? The tail piece fits, but it is a little tighter than I'd like. Are the holes the right depth? Yeah!! Can I countersink the tops? Of course!!
Ok Let's go live.
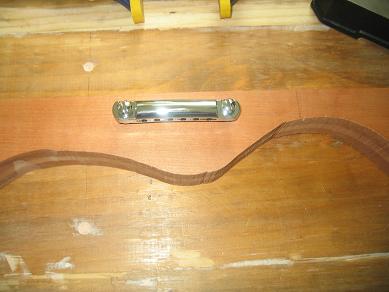
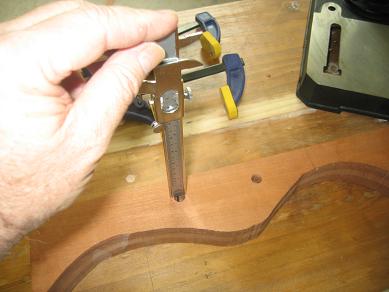
Photo 14. This is NOT an exercise. Photo 15. Practice pays off.
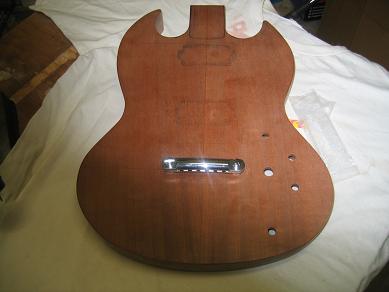
The tail piece is still a little tight after a small adjustment. I practised again on scrap & over compensated ..it didn't fit and did another and it was perfect....There's a bit of luck at work in the mix. As for the SG I might try to grind out a little bit oth the tail piece since I would rather have it fitting easily without any tension.
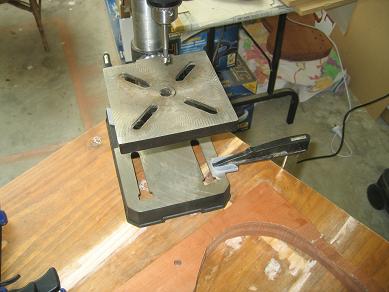
Now for the CS 336...Would you believe it?? The curves of the lower bout are so full that I cannot line up the drill with the positions of the holes. The neck on the drill press is too narrow!! or the curves to fat!! @@@%%$$vvvXX%^&*&. What to do? I dunno right now. I could make up some kind of jig for the hand held drill. Sleep on it!! LOL.
A word on forstner bits...they get hot very quickly and require very slow drill speeds. I'm not sure whether it's better to withdraw & let things cool a bit or keep the pressure on very lightly and use one 'plunge'.
Oh Yeah... I drilled the 1/8 hole from the control cavity into the tailpiece stud hole. It might be visible in the finished cavity picture.
Thanks for visiting.
Page List - Much less editing doing it this way. LOL!!