New Year’s Eve 2005 thru Jan 4 2006
Rrrrrready to ROUT!!
Still on the move though slowly because of peak period at work..no holidays for me…and the Warmoth and Rockler Tools orders have not yet arrived.
More pictures less talk this time. Here is the SG fresh from the Band saw.
1. SG Body shape. Chilean Myrtle
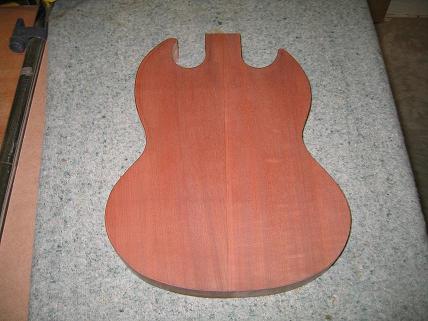
I have done some dye testing on scrap because my daughter to whom I might eventually give the guitar wants a red SG. Nothing wrong with that. Rough dye tests give good colour with 1 application of Proof spirit mahogany followed by 1 application of red over the top. Application was direct to timber.
2. Very rough dye tests.
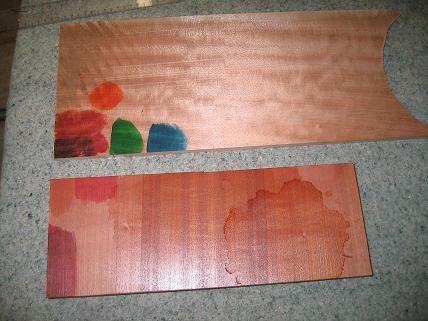
The photo may not show it but the proof spirit mahogany with red over the top comes close to an SG type red. But these are very rough.
Meanwhile for the CS 336 I have marked out channels from the pickup cavities to the control cavity and I will rout them tomorrow I hope.( Maybe I’ll go windsurfing). The Fralin humbuckers are identical ie the pole screws & wiring is attached in the same place so when the bridge pickup is ‘reversed’ the wire emanates from bottom right while on the neck pickup the wires emerge top left
3. Lindy Fralin Humbuckers

For the neck channel I decided on a ¾” channel ¾” deep in a straight line from the source of the wire to the control cavity.
However the bridge pickup while closer to the control cavity is in a busy area with the bridge and tail piece inserts nearby and also I decided to stay well clear of the height adjusting screw on the pickup and also clear of the pickup ring screw position., I decided on a ¼” channel since the travel is short and direct.
I did a bit of practice establishing the offset distances for the router bit when using the pattern following attachment. The actual distance is 1/32” greater than the theoretical distance.
In theory the offset distance is (Outer diameter of attachment – diameter of router bit) divided by 2.
4. Pattern following Attachment & Router bit.
After routing the
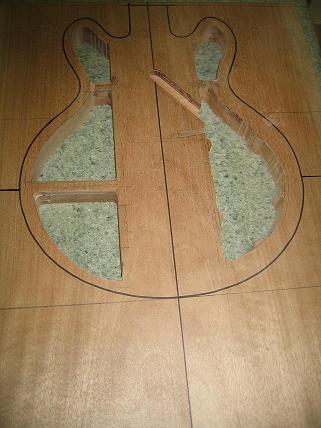
wiring channels I used the jig saw and router to cut the chambers. I cleaned up
the sides with the ball bearing flush trim router bit and sandpaper wrapped around an end cut from a broom handle. I
gotta tell you…my freehand routing SUCKS!!
But overall despite a few chips
& splinters using the jigsaw .I feel the job is OK. I might do a little
filling. Also I have a bad habit of moving the router at times when I lift with
power on hence a few wobbles in otherwise straight lines. It seems to happen at
the end of a travel. And …the sickening feeling when you feel the template
move….LOL 5. Chambers and
wiring Channels done.
Next I need to glue
on the top and the back. The control panel cover is cut from a similar piece of
Queensland Maple and will be shaped to fit. While the timber is the same
species, I hope for enough contrast to make things look interesting when all
are coloured. My ‘long weekend’
was interrupted by a bush fire very close to my house. We packed essentials
like guitars & computers and were ready to evacuate but the fire was
contained not extinguished and now EVERYTHING
smells of smoke. I’d hoped to get the
back and maybe the top glued on as I said , but not this time. 6. Body blank made
from Blackwood.
As an aside I decide
to square & glue up the blackwood. I looked at it one day & thought it
was most beautiful. It’s similar to Koa. I want to find a shape that is simple
and elegant to complement the beauty of the wood. I don’t want yet another
strat or Les Paul or a horrible distortion of either shape. I’m looking at some
Ibanez, Flat Earth & Rickenbacker models for ideas. What’s a simple elegant
shape for this great piece of timber? Happy New Year. 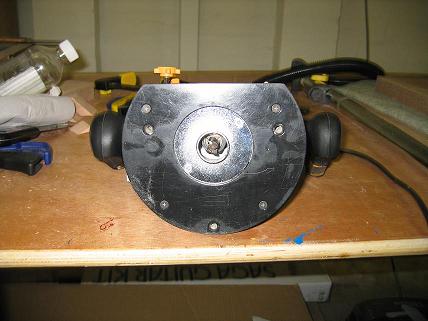
![]()