Introduction
Parallel Projects
An amateur’s attempt to build an learn about building
Warmoth LPS (chambered)
Gibson SG
Gibson CS 335
Started Nov 5 2005
Robert Smallwood,
Merimbula, NSW, Australia
I’m creating a photo – text record of my experiences building some electric guitars starting out with the lumber tools and plans. I am buying ready-made necks from Warmoth but they have not arrived in time for the initial photos. I hope I can make it all interesting enough for you to stay with me,
My
brief to myself is “Do my best at each step”. I’m trying to build the
…er…quality in from the bottom.
My
Ultimate goal is a DIY CS335 so I’m doing two side projects to use as part of
the learning to use tools and problem solving processes. I am using plans that
morph the original guitars ( CS335 and SG ) to accept a Warmoth 243/4
Conversion neck. The neck would bolt straight on to a standard strat. The SG
project the first side project will have and angled neck & neck pocket,
& the same bridge setup as the ‘Ultimate’ and should give me the tool time
necessary to route angled neck pockets etc etc.
The
second side project is a Warmoth LPS carved top. I have bought neck & body.
This is to use a reference in building the SG & the “Ultimate”. I can study
how the top is carved..how the neck screws are set into the neck & body
with angled neck and tapered heel with a view to doing the same thing on the
other two. Ultimately it should prove to be fine guitar in it’s own right…my
inexperience notwithstanding!! LOL
Here
is Photo Zero – Lumber plans and tools still in their boxes. LOL. Maybe
the world is safer that way.
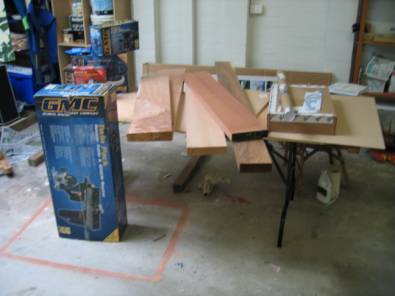
The
timber is left to right: Two planks of Qld Maple (similar to mahogany),
Victorian Mountain Ash, Chilean Myrtle and Queensland Blackwood (Similar to
Koa).
Originally
the ash was for figured tops over the Maple bodies, but it turned out to be
boring and one piece of the Qld Maple turned out to be highly figured.
I’ll use the figured maple for tops. I don’t know what I’ll do with the Mountain ash at this stage.
Photo 1. Figured Qld
Maple. Mountain Ash is the pale timber to the right.
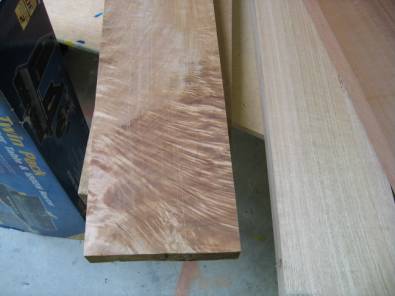
Photo 2. Myrtle and
Blackwood. (check the Qld Maple to the left of picture)
Now
to actually do something!!!.
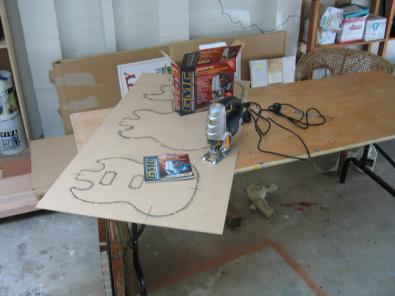
Make
the templates. I couldn’t figure out a high tech way so I made 1:1 copies of
the plans, cut them out stuck them on masonite and feathered round the edges. I
did well in First Grade. LOL
I
will make ¾ ply templates from the masonite, practising router technique that
I’ll need later to fine shape the rough cut bodies.
Photo 3. Making yer basic
templates.

The Strat is not part of the Parallel Projects…but hey…everyone builds one sooner or later…or so I’ve heard. I’m just doing the masonite template here.
OK after at Saturday night watching ‘Kill Bill’ I wanna break out the Jig Saw & test the metal (& my mettle. (USA readers read ‘cojones’)
Photo 4 – Out of the box at last
Most
important thing. The INSTRUCTIONS!!
I sat down & had a good read cover to cover & again & figured I’d do some practice cuts. Two things came out of this. Just about every dumb thing that attracted a warning in the instructions seemed to be an intuitive action when using the tool especially the temptation to brush away bits of dust and to use the hand to clear debris afterwards. I had no desire to touch the blade though.
The
second thing was that I sucked. With a laser guided tool I missed the straight
line I drew by 1mm or more..and as for curves…forget about ‘em. So there’s the
lesson for me that I’m sure will be reinforced at every stage of the
project…Test on scrap first. LOL.
So
I practiced some more & some more until I felt confident enough to go for
the real thing. Well I would try the hard bits first viz the cutaways
(on the SG). I drilled relief holes, put in relief cuts but still the bass
string cutaway crossed the line. The other one was better but still ‘not good’.
What
to do? I want to get everything right from the bottom up, so should I
start again now? Maybe.
I
decided to do the rest of the shape. Best case ..it can be salvaged. Worst
case..it’s just more practice with the tool.
Well
I produced what shipwright’s would call a very cranky hull. But wait. One side
was really OK. Well compared to the other side. And I haven’t measured anything
yet. So I reached for the rasp and attempted to produce smooth curves. I used
the Mark 1 eyeball to determine this. After getting the hang of the rasp and
turning the template over (the top side was impossible to judge because of the
black lines – they dominmate what you see) I reckoned I’d produced fair curves.
Aside from the cutaways.
I
set the template against the cut out and lo & behold it sat reasonably
well. The only place I’d really fouled up was the first (bass side) cutaway.
Photo
5 Curves not too bad but cutaways suck. Template is backside up.
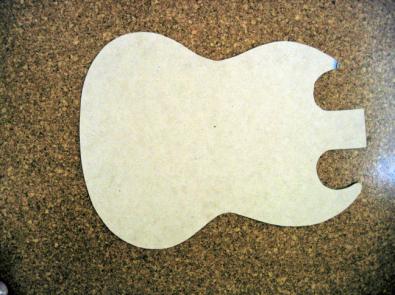
As
I understand things if I go on & make the 3/4inch template from the above
and cut the shape using the ¾ inch template the router will transfer every
detail good or bad to the body. So it’s important to do a good job at each
stage minimizing the irregularities.
Where
does that leave things? I’m not sure. I will try to smooth out the masonite
template more and get a closer match to the plan drawing using sandpaper &
block. If it’s no good I will restart.
I
might enquire about the availability of commercial curve copying machinery, but
I live in ‘ the bush’ ( ie a rural area ) 3 hour drive from a big
city so I don’t hold out much hope.
The
point is the CS 335 shape is VERY CURVEY!! (See Photo 3) Looking for the
easy way already. LOL. Well sort of. I want to produce a high quality
instrument.