1 May 2006.
I am fortunate to have a 'Goto' guy in the area...Chris Burns the bandsaw man. He was kind enough to let me use his much larger drill press to drill the tailpiece holes in the CS336 body and offer a number of tips in measuring and general practices. As I'd discovered already pencil lines are far too thick in some tasks. How you measure in half millimetres? Carefully!!.
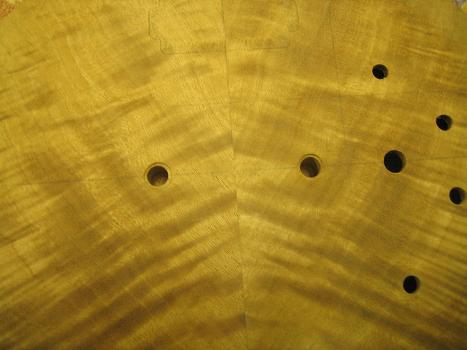
Photo1. Tail piece holes on 336 done & countersunk.
The binding channels on the CS336 were the next jobs. After much reading around various sites, it was evident that they should be done, the neck angle plane shaped onto the bodies from the end of the fretboard back towards the neck, then the binding applied, then the neck pockets routed. Then of course, string up to accurately determine the bridge position.
So there was quite a bit of tool practice to be done!
I'd considered shimming the necks to the right angle in a conventionally cut neck pocket but at this point have decided against it mainly on aesthetic grounds. I can still change my mind at this point!!
I have the StewMac dremel attachment for routing the binding channels and practised with it. I was not entirely happy since there is some play in the adjustment mechanism, it is difficult to reproduce settings accurately, and because it is a comparatively lightweight tool, a number of passes have to be made to safely make the channels. So I played about with my router d various bearings & bits.
I found that taking a slightly undersize bearing of a roundover bit & putting it on a flush cut bit gave a spot on channel for StewMacs thicker binding. So I ordered the thicker binding printed off the StewMac binding info followed their recommended order of channelling. I'm happy to say it worked quite well without any tear outs.
Photo 2. Binding Channels routed Front & rear.
However I have a couple of conundrums that I have to deal with, but they should be OK. Firstly, the bearing on the router left 'wheel tracks' on the sides of the body.
Photo 3. Bearing tracks on the side of the body.
Will I ever get done hand sanding???!!! LOL!!
Secondly and more importantly I mistook one of the tracks from a previous shallow cut to be the glue line and took the channel somewhat deeper that I'd planned. I wasn't going to 'shape the back of the guitar, just leave it flat & bind the edges mainly because I didn't want to pfaff about 'shaping' the top of the control panel cover. Since I want the binding sizes to be the same top & bottom, I will now put a shallow carve on the back of the guitar. I'm happy because it will give me a 'practice' run for shaping the beautifully figured top.
Also I realised I can't 'carve' the neck pocket area on the back because it needs to be flat to allow the neckplate to be screwed down fast. I believe I can cope with the discrepancy in channel depth & binding height by sort of chemical welding the binding to a greater width & shaving it back to height. It should give an effect similar to the way the cutaway of some Les Pauls are bound. As I read the StewMac info acetone & binding dust applied to two the edges of two pieces of binding will join them with an invisible join. I hope so!! LOL!
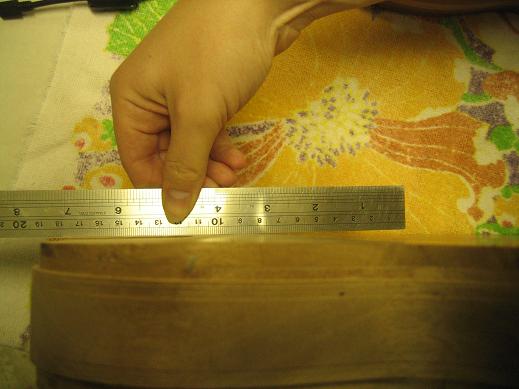
I have practised the method of Hiscock & Koch to determine the neck angle and have got answers of 2, then 3 degrees. believe this is because of difficulties in measuring consistently. I will buy a more expensive set of callipers and remeasure.
If the angle is too small the tune O matic bridge will have to be recessed into the body to allow the action to be properly set. If the angle is too great the bridge will have to raised a lot to set the action. So I want to get things 'just right' When I'm happy that I can reproduce the measurement of the neck angle I'll attempt to route the neck plane onto the body.
My new callipers give me an angle of 3 deg consistently when I measure everything as per Hiscock & Koch.
After much router practice, and agonising over jig designs I was talking to a customer of mine who runs a joinery ..he looked at me strangely & said ..."I can use my planer for that" so I took the bodies down to his workshop & in less than 10 mins he'd done both bodies. I haven't got pictures of the process, but essentially it was the same as using a jig, but upside down. He cut a rabet in a piece of timber that gave a precise height at a set distance from the start of the back angle... (yer basic trigonometry) made sure the blades touched at the line. pressed a button and pushed the workpieces across and here they are after a tiny bit of sanding to clean things up. I measured the angles & they are 3 degrees ....whoa...that's GOOD..LOL
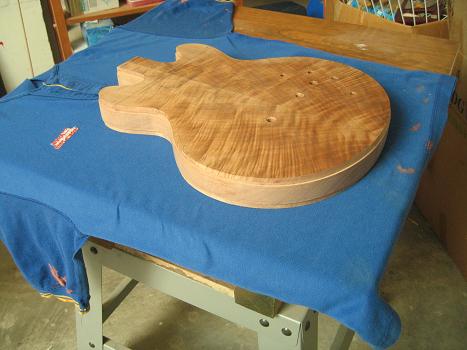
Photo 4. SG Neck angle planed on
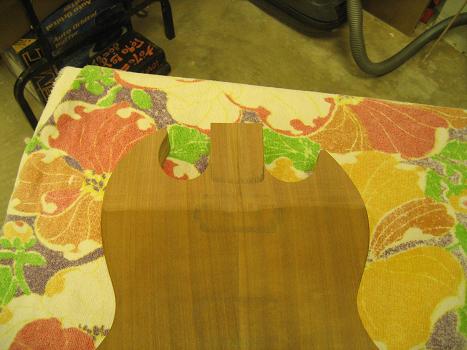
Photo 5. 336 Neck angle planed on
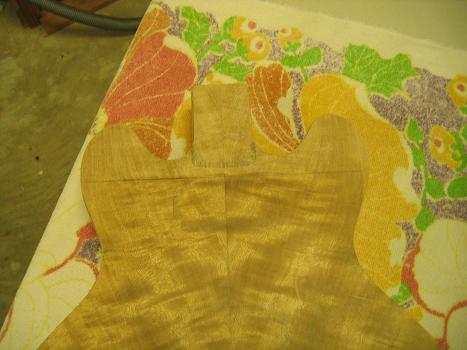
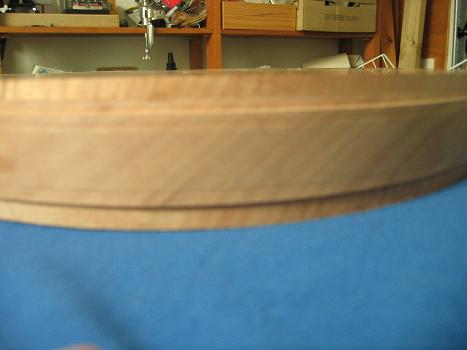
Photo 6. SG from the side
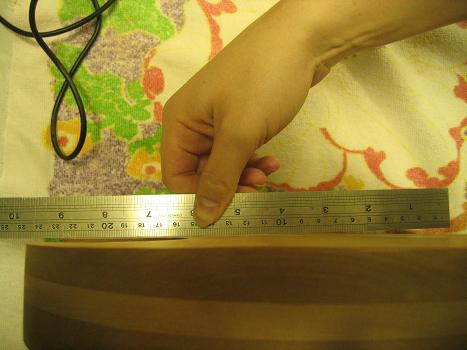
Photo 7. 336 from the side
Sorry about the horrible towel under the work.
Now the projects diverge a bit. The SG is pretty much ready to have the neck pocket routed while the CS336 has to a have quite a bit of shaping and the binding put on before the neck pocket is routed. That seems to be the way more experienced builders do this type of body, though I've seen at least one who put the binding on after the neck pocket is done. More reading more practice!!
I have to get the sizing of the neck pocket template right. StewMacs are far too oversize for the finish to adequately compensate so I have to come up another idea. Putting layers of tape round the bearing doesn't work. I have some laminate that might fit, and oversized bearings to make the pocket smaller than the template but will need to practice to get the setup right.
Winter's approaching here, and it's cold out in the shed at night!!.
Thanks for viewing the progress.
< Page List - Much less editing doing it this way. LOL!!