It's been an eventful few days with some wins & some...er..well some low marks from the Russian judge!!
The main tasks were to 'cut' to size both body blanks and clean up the edges. There seems to be two main ways to do this :
1. With a flush cutting router or
2. with a template following wheel guided drum sander.
I chose to go with the sander since it less drastic and my templates were made out of thin mdf which would mean lots of shimming...not ideal for my limited experience with routers.
Pictiure 1. Sanding set up.
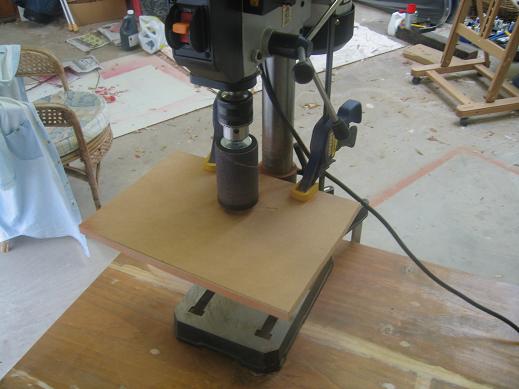
Picture 2. Body, template & spacer

The spacer is necessary to allow the guide wheel on the sanding drum wheel to run against the template which as I've said is thin,
As it turned out it wasn't such a good setup and here's the result.
Picture 3. I tilted the workpiece!!
Hand sanding required!!..but ..hey...check out my Marshall 2x12 50w combo in the left corner. So that's where it's been!! LOL!
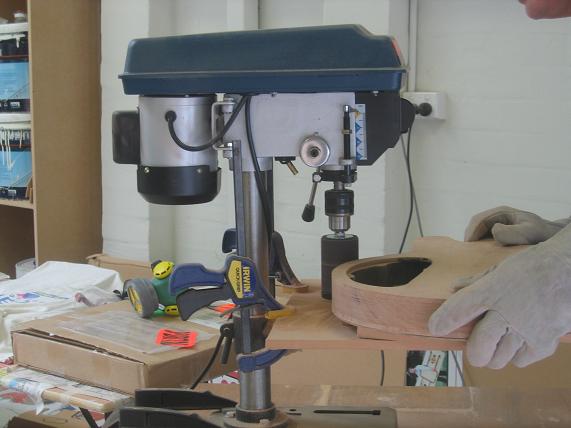
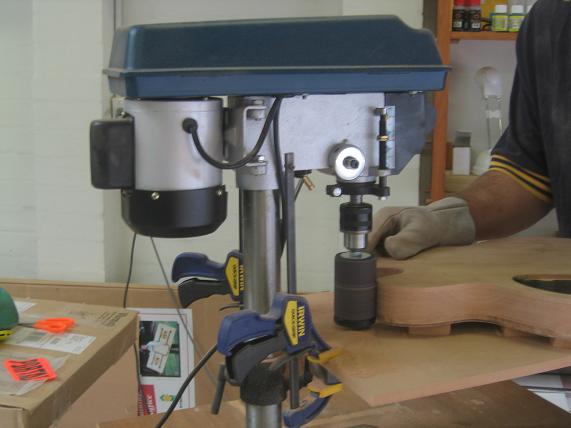
OK. So I cut myself a larger tray to clamp to the drill press table and made sure the spacer pieces on the CS 336 body were placed to minimise chances of another tilt!
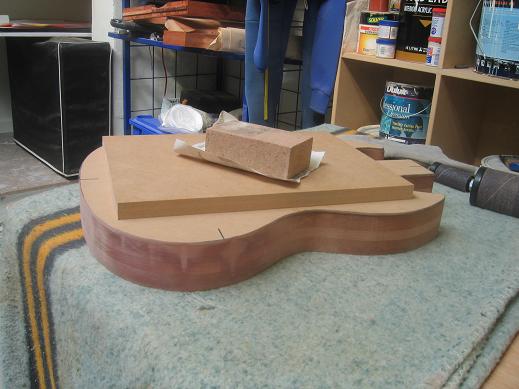
Picture 4. Cs336 ready.
Picture 5. Underway...
Wear that respirator you goon!!
Picture 6. Slowly round the curvey bits!!
no problems this time......and now some hand sanding...
Picture 7......from this...
.
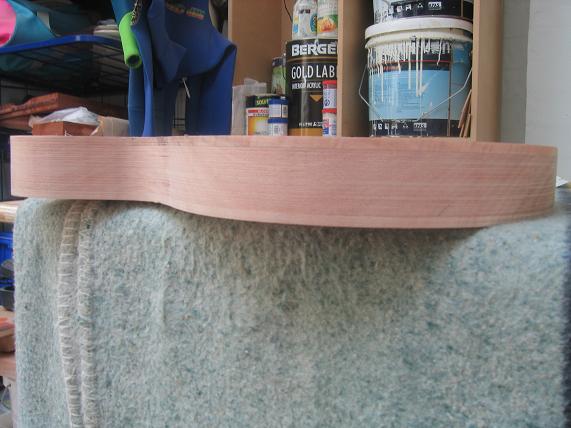
Picture 8. .... to this
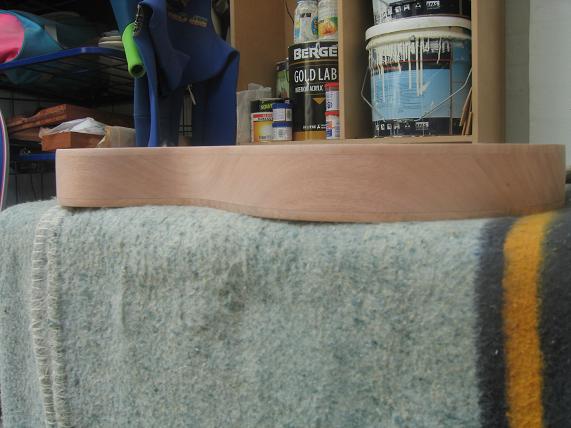
man ...nothing like hand sanding on a hot day to make a beer taste good!! The pictures aren't able to show the contrast as clearly as it is in reality. Dirty hot work but it was worth it.
The guide wheel on the sanding drum is slightly larger in diameter then the sanding drum itself. The result is that it takes the new edge almost to the line of the template. This leaves a little margin for error or should I say adjustment. This is a good thing!! LOL!
Time for something easy.
Picture 9. Necks and PRS back shellaced.
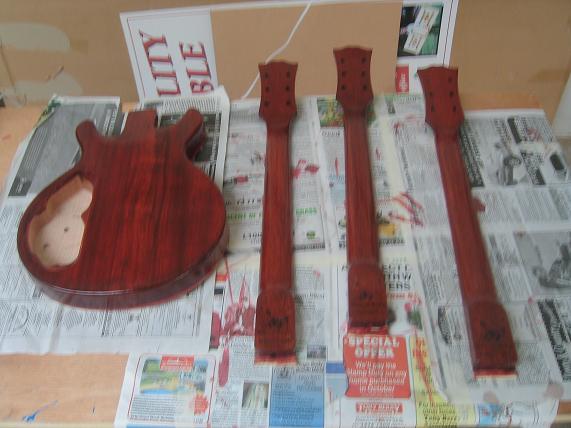
Once again the picture is inadequate. They are just shining in real light. Right now I'm very happy!! LOL!
Picture 10. .....AAAAAARRRRGH!!..... What the...?
The masking came off & look!! I've stuffed it up. Only on this side of this neck. The one in the background is spot on!!.
Picture 11. Touch up.
The picture's a little dark but things were saved by applying dye neat to the unstained timber with a fine brush, rubbing it off, repeating till the colours looked OK and then reapplying shellac.
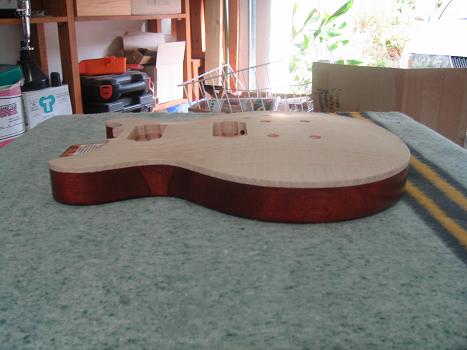
Now off come the bandages on the LPS.
Picture 12. Ta Dah!!
Picture 13...another view PRS eat your heart out.

As you might imagine I was very worried what I'd find after the cock-up with the neck, but this was good. Perfect? No there are a couple of spots where tiny dots of dye have coloured the maple. I tried to get them of with sandpaper, scrapers & other things, but it became obvious quicklly that I was doing more harm than good so I gave myself a very high mark and resolved to live with those damned spots!!
Picture 14. Masked up so the maple rim can be sealed & lacquered.
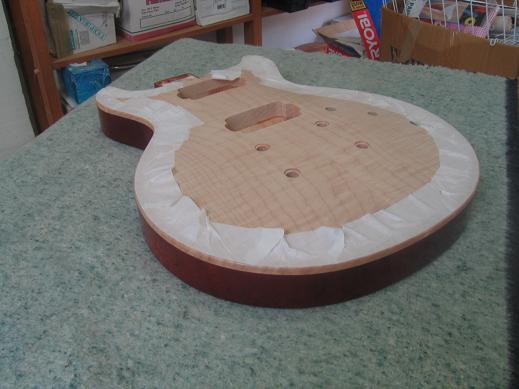
For this I'm using shellac followed by u Beaut 'hard' shellac which is polymerised in some way so that after a about 3 weeks it is very hard , durable and water & corrosion resistant. When I build the surface levels up to all even I will wait 3 weeks and ...gasp!! ....stain that beautiful maple top!! Things are now serious!!.
On reflection....here are some things I'd like to pass on...Make your templates out of thick ply or mdf. They're easier to work with using routers & power tools. I mismatched the colour of my filler so that after the initial coats of shellac over the stained timber, the filler llooked hot pink!! Ghastly. So lesson two always use a filler that will take stain. In my case I simply restained the filler and it came up beautifully. I used a water based filler called Timbermate. I don't know whether it's available overseas.
You might think I've done the LPS top dyeing and rim protection arse about....well I have. Ideally seal & lacquer the rim, stain the top then finish & lacquer up the back & sides. I did things in this order because I had no experience with dye staining and what scrap I had is limited to other types of timber ie the flamed Cs336 off cuts & SG off cuts, and I was NOT going to stain the maple top of the Warmoth LPS at my first ever attempt. So I decided to stain the necks and the back & sides of the LPS as a 'practice' for the LPS top. It's a litle more fidlley this way, but I am now confident of applying the dye stains with cloth and I can't wait!!LOL!!
More soon I hope!!
CYA...Robbo