12
Feb 2006.
Page
7.
I
didn't think I would have anything interesting to photograph at this
stage but
I got through a bit more than anticipated.
I
have been making templates out of ¾” mdf for a
couple of reasons.
1.
Stew Mac make their neck templates oversize on purpose.
2.
The plastic out of which they're made is 3/16” thick and a
real pain to use
since they must be shimmed to use with ball bearing flush cut router
bits.
3.
TOOL PRACTICE!!
On
testing the StewMac template against the Warmoth necks I found the
difference
in sizes would be far more than taken up with 'finish'
So
I practised the StewMac method of reduction which is to wrap masking
tape
around the ball bearing so the edge of the cut is no longer flush,
giving a
slightly smaller cavity.
Three
wraps produced a smaller pocket but still too big I think. 6 wraps gave
a
smaller pocket..still bigger than the neck, but of a size that seems to give a reasonable
allowance for layers of
finish.
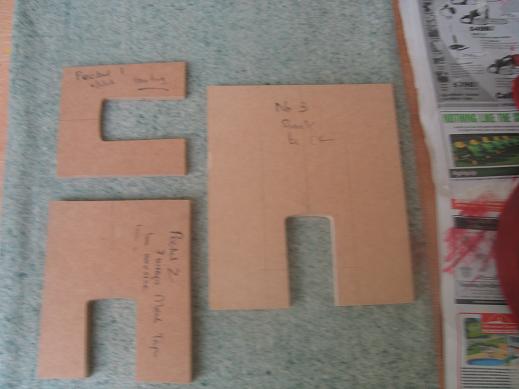
Photo1.NeckPocketTemplates I
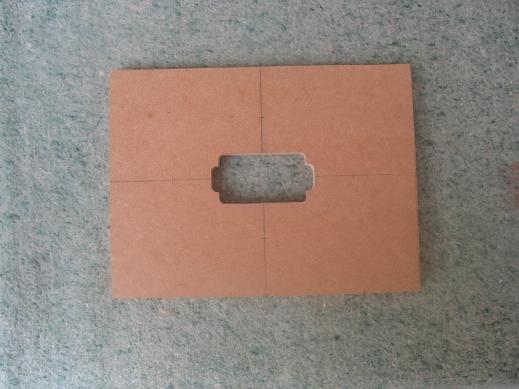
also made a thicker template for the pickup recess routing mainly for
practice,
but also to make a template that would be of a size & shape
that's easy to
use. Photo 2. Pickup
recess Template. Now
as a newbie trying to help other newbies I can offer a few opinions
here. It is not
necessary to buy readymade templates since the
dimensions of necks and pickup recesses are readily available in books
(which
you should buy) and in various fora, BUT they're
cheap, they're what
they say they are and the clincher for me is the excellent service
provided by
StewMac. I
recommend buying router bits with the ball bearings on the tip, as
well as
bits on which the ball bearing slides on over the shank. This gives
many more
options on ways to do shaping. Bear in mind to make a lot of very small
cuts
rather than 1 or 2 big ones!! You can fix the template for one
direction, make
a few cuts, then change bits and the bearing will run on the freshly
cut to
size sides. When
using templates, be careful of 'tilting' the router. This is alluded to
in
Melvyn Hiscock's book but he doesn't dwell on it. This occurred in the
first
cut on the pickup template but I didn't realise it until a little
later. There
was a slight 'valley' in the side that I'd cut. At first I figured I'd wrecked the template
....... but it was
perfect. It took me a while to figure out how it could happen with the
template
secure and the right shape. I'd
somehow
tilted the router. As this was a practice template of sorts it doesn't
matter.
I filled in the 'valley' with wood filler and sanded back. On the side
of the
guitar though it would be a definite blemish. I
have decided to use a wheel guided sanding drum on the drill press to
do the
final shaping & smoothing of the bodies mainly because it's a
far more
'user friendly' and less drastic way to proceed. Before
I do much more the neck pockets need to be made, the tail piece mounted
and a
'string up done to correctly position the bridge. To make sure the neck
pockets
the right size, I decided that I should first 'finish' the necks and
see how my
templates fit on the 'end product' necks so to speak. From
previous colour testing I'd decided that I'd use water soluble dyes,
seal with
shellac, fill, sand back then clear coat...probably with nitrocellulose
lacquer
since it is available in spray cans. I
would do one neck and then adjust for the others if necessary. I
mixed red dye with cedar dye 7 mls plus 3mls ie 10mls, then added to 20 mls of water.
(Sorry guys we're
metric here. LOL) I didn't know whether 30mls would be enough or not,
but had
to start somewhere. I
was happy with the way things went on the neck, and had heaps left so I
applied
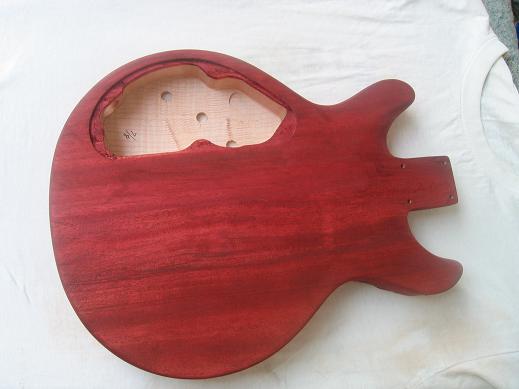
the dye to the other two necks as well. Since I still had heaps of dye
left, I
used the remainder on the back and sides of the LPS body. It was my
intention
all along to use this colour. I
applied the dye with a clean white (ex) T shirt piece since brushing
led to
free liquid on the surface...no good for curvy necks. While the cloth
absorbs
the liquid there was enough...almost perfect the quantity in fact. So
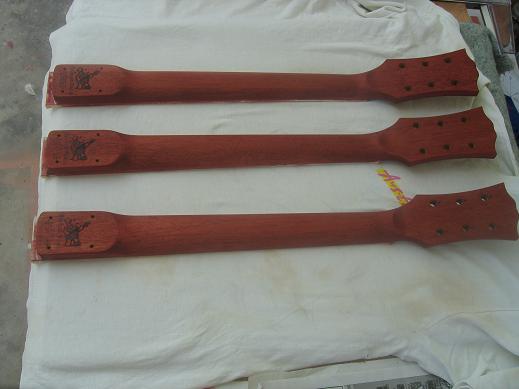
a little dye goes a long way. 30mls was sufficient for three necks and
the back
and sides of one body. Photo 3. Dyed
necks. Photo 4, Dyed
LPS body. Bear
in mind that shellacing filling sanding & lacquering will 'pop'
the
colours. When
masking the necks I
noticed what seems
to be corrosion on the truss rod ends. I've asked Warmoth tech support
what
they think, and what they think should be done. Photo 5.
Mystery deposits on truss rod ends. Hope
all the reading wasn't too boring. I'm hoping it will be helpful to
someone
somewhere. CYA RobSm