Created : 27 februari 2002
Last updated : 28 februari 2002
Classification : general technical
Copyright : restricted freeware
Status : Under construction
Comments : Co-authors : Gebhard Peitz, Kirt Simmons, Chuck Harnden
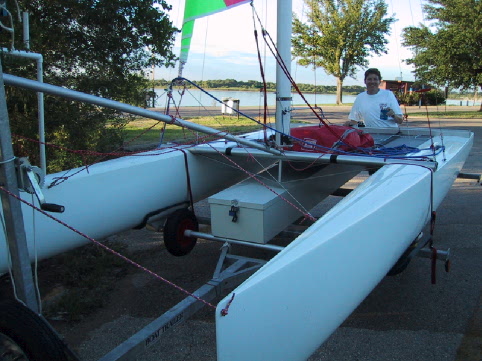
This document is written to explain some of the unusual rigging on the Taipan 4.9. We assume readers have a basic understanding of sailboat rigging specific to catamarans. This is not a complete and comprehensive guide to rigging, it is only designed to bridge the gap between Nacra/Hobie/Prindle rigging and the Taipan.

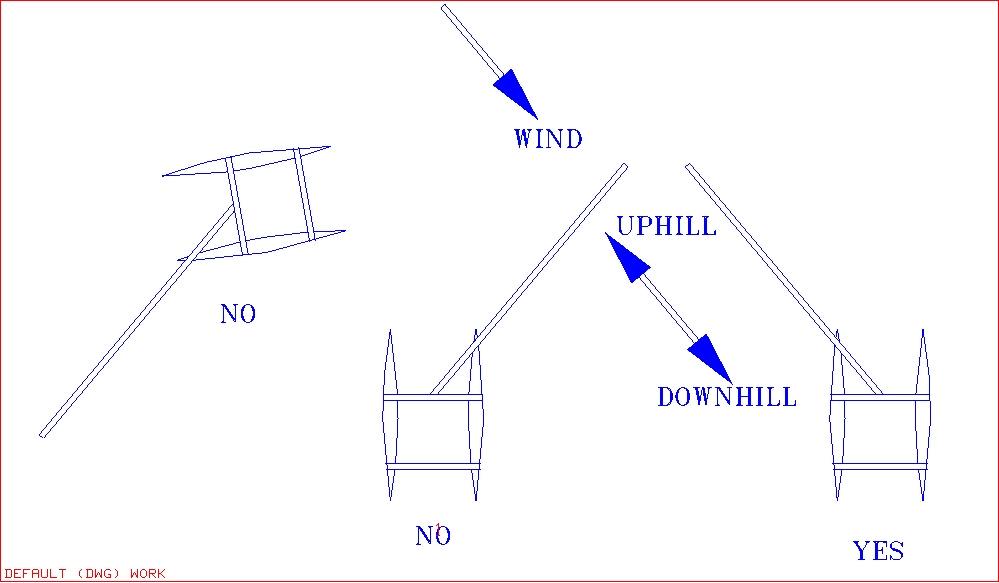
Most raise the mast from the front because of the hinge pin is on the fwd side of mast. Attach your trap lines, shrouds and forestay to the mast. Tie the jib halyard wire to the little black helper line and secure the jib halyard to the rotator bar at the base of the mast. The shrouds can either be pinned or some prefer to take the turnbuckle apart. Be sure the turnbuckles are loose with just two threads protruding thru the nut before pushing the mast up. Pin forestay and windward shroud, push up the mast and pin the other shroud. This works fine on the beach, and apparently many Aussies push the mast up on the beach. However it is tougher on the trailer while standing on the ground, because you can�t reach as high up the mast to control it. However, it is a very light mast! Be sure the little shackles attaching the bridle wire to the hull are not flipped up. It will cause excessive tension in the rig. Don�t forget to run the spin halyard if you want to fly the shute. You can raise and lower the mast by yourself, but this requires little extra planning. As sailors we like to use all the elements to our advantage, namely topography and the wind. If you plan to raise the mast from the front, try to find a spot where the wind is blowing downhill and park the boat about 40 deg from head to wind. Raise the mast from the windward side. If done correctly, the mast will stay up by itself. Do not rely on the mast staying up by itself, but this is the theoretical goal. I use a small piece of line run from the trap line, thru the spin sheet block and up to the front crossbar. After pushing up the mast, this line functions as the unpinned shroud, apply tension and tie off so you can pin the real shroud. The Taipan mast must go up with the leading edge pointed down. Mast lowering is the reverse of raising. Be absolutely sure you have control of the mast before lowering. If the mast twists as it comes down, bad things are going to happen!

Ha, you thought the mystery was solved, however T4.9 comes without a main halyard system. There is a ring at the top of the main and it engages a hook at the top of the mast, like some Hobies. Be sure all the battens are in place, especially the top one. You will never get the sail up without this top batten installed. Check the ring carefully, it should line up with the luff of the main and go straight up from the top of the grommet. A sail that has been rolled for a long time may need a small adjustment. The rubber block may need to be replaced periodically. Start the main in the track and push up with hands on either side of the sail near the luff. Be sure the mast is pointed directly into the wind. It will become more difficult as the sail goes up. When the sail is almost all the way up, get a good handhold and give it one smooth continuous push. Pull down slightly to see if you got the ring in the hook. If not pull the sail down slightly and try again. Be patient, you will get this! Mine was really hard at first, but the boltrope/track got smoother and I got better and we don�t need no stinkin� halyard anyway! If you need to stop and take a break, twist the mast so it no longer points into the wind. This will stop the sail from crashing down. To lower the sail, remove the downhaul, push the sail up slightly and rotate the mast 45 deg or so. This should disengage the ring from the hook and the sail will come down. In a big blow, the sail may tend to follow the mast when you turn it. In this case, raise the sail slightly and put some down force on the clew, then turn the mast. The sail comes down rather rapidly! You can control this by twisting the mast so it dosen�t point head to wind. A halyard can be rigged as there is a small block at the top of the mast. It might be worthwhile at first, but you can do this!


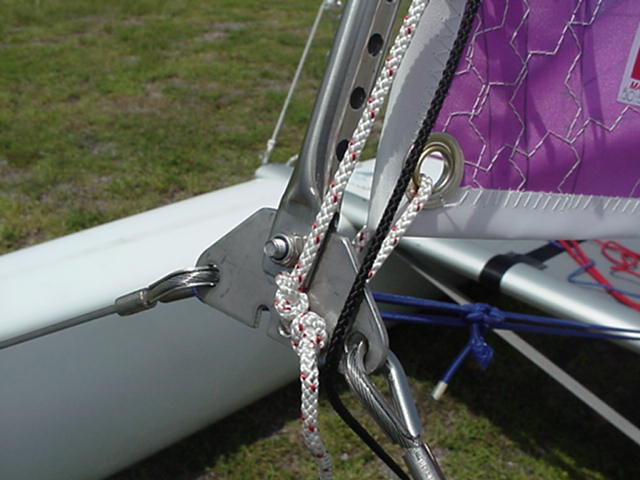
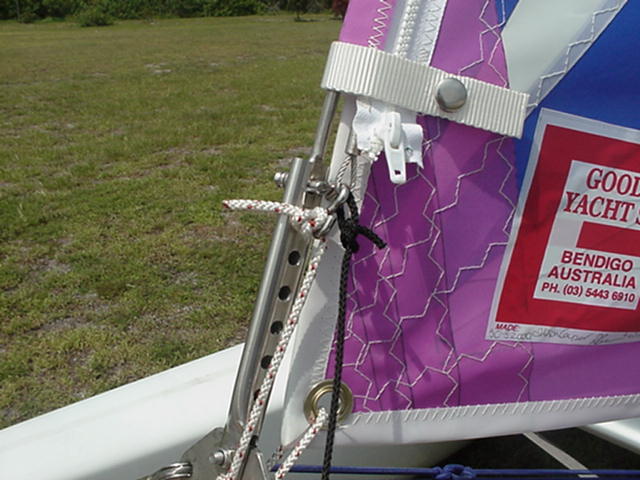
Attach the wire halyard section to the head of the jib. Raise the jib running the halyard inside the zipper. Using 1 piece of continuous line (about 3 ft.), run it thru the bridle/forestay fitting and tie a stop knot on either side. Tie the little �S� hook to one end and hook it to the wire loop of the halyard. Run the other end thru the grommet at the tack and into one of the slots in the bridle/forestay fitting and secure with a stop knot. You will have to adjust this to get the luff tension you want, and you can use several stop knots on the downhaul side for different wind strength/luff tension settings. Oh yea, remove or secure the little black helper line you tied to the wire halyard. Don�t forget to snap the strap at the tack as well.
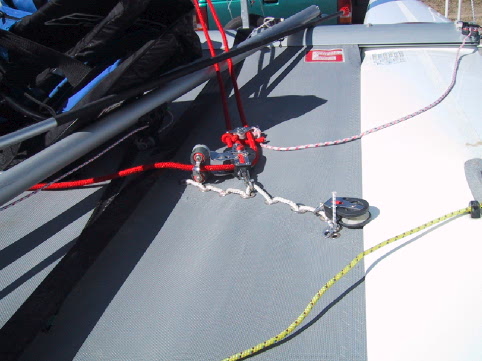
The T4.9 jibsheet is standard catamaran hardware. The blocks attach to the little rope loops on the tramp. The jury is still out on the ideal setting here. Probably inboard in a blow and middle in light air. The outboard loop is for the spin sheet block. I had to make a small leader line from the forward blocks to the jib clew. I also put a stainless snap so I could remove the sheet quickly.
The daggerboards should be marked, port and starboard. There should be a hole and a groove on the inboard side. Run one continuous line thru the hole, thru the fairlead on the inboard side of the daggerboard trunk, across the tramp, thru the other fairlead and thru the hole in the other daggerboard. Tie stop knots in the ends. The line should be long enough to reach from the trapeze and is used to raise the leeward board without going down there. Not having this system rigged cost me a capsize in a recent race!

This is an ingenuous, simple system. You will be the envy of every other cat sailor with the weight and simplicity of these rudders! Put a dab of vaseline on the transom pins to keep the plastic bushings from pushing out when you install the rudders. Some also �smear� the ends of the plastic bushings with a soldering iron to help keep the bushings in place. The tiller extension goes in and twists 90 deg on the tiller crossbar to lock and does not telescope. To lock rudders, push the rudder all the way down, hold the pin on the lock down arm over the hole and bend the lock down arm slightly until the pin slides in. The lock down arms have a pin to lock the rudders up too.
The rear trap lines are attached to the bungee on the tramp near the daggerboard trunk. I have had a tough time with this line fouling everything from my feet to the tiller extension. I typically leave this trap line off and just use the forward one. Eventually I�d like to put a bungee fairlead forward and outboard for the aft trap line.

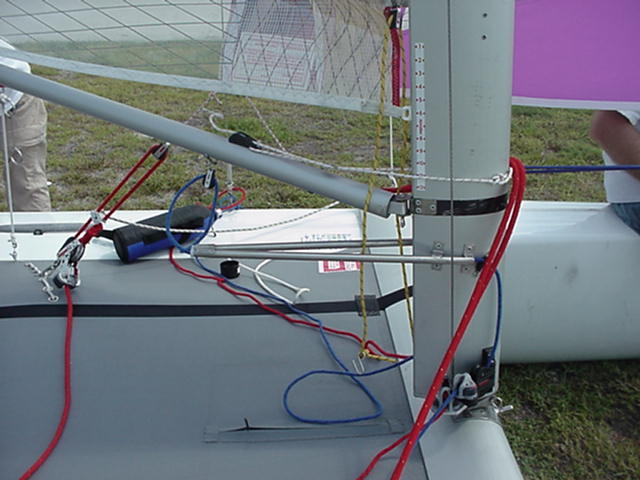
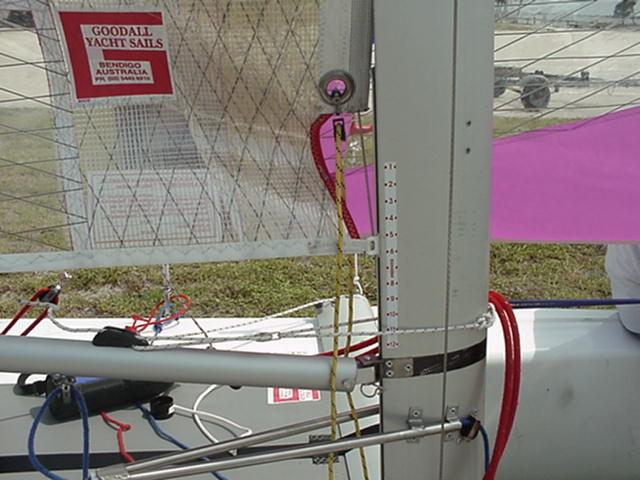
The mast base has three systems to rig, the downhaul (red/yellow line), rotator (blue line) and overrotator (white line). After raising the main, slide the aft end of the boom thru the strap on the clew of the main, pin the boom and be sure the mast overrotator line is above the boom. The mast overrotator line from the boom goes thru the block on the mast line and back to the jam cleat. The mast rotator line (blue) has a block on the end. Attach it to the fitting on the bottom of the boom about 18� from the front. Feed the plastic slug and the lower end of the luff into the mast track below the opening. The downhaul is 6:1 (interior) and is controlled by the red lines. Feed the yellow line from the mast base thru the block at the tack and attach to the mast base. Make sure the line runs inside the mast rotator bar on both sides. Run the red and blue lines outboard so you can reach them from the trapeze. It is possible to use a continuous downhaul and rotator system by tying the lines inside the front crossbar.
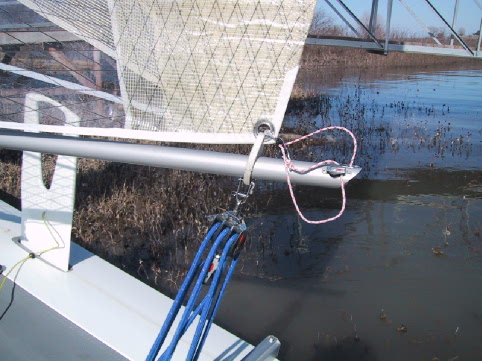
Attached directly to the strap at the clew of the sail. The sheet loads are transferred directly to the sail; the boom only reacts the outhaul loads. Clever! The boom runs though the strap; thus the boom can not be pinned to the mast until the main is hoisted. It is possible to slide the strap over the aft end of the boom if you lift the clew and boom up high enough. Attach the outhaul to the clew.
The boat number is laminated inside the port hull near the aft inspection cover.

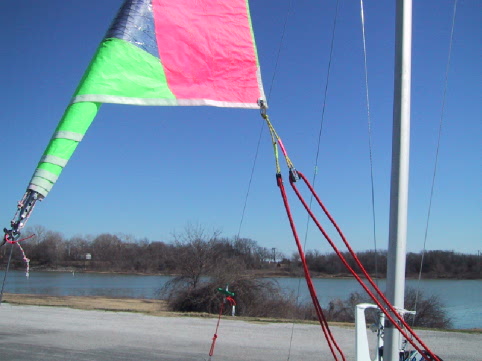
Three lines attach the spin pole. These lines probably have specific names, but I don�t know what they are. Set the pole on the protrusion on the fwd crossbar and hang it temporarily with a spare piece of line at the bridle/forestay fitting. Hang it slightly lower than you want to rig it. Attach the forward line with a clove hitch at the fwd end of the pole and stop knots at the left and right hulls. Attach the second line to the hull/bridle attach points and a clove hitch around the pole. This should be a little loose at this point and the forward line should be snug. Now the third line goes from the bridle/forestay fitting around the pole and back to the fitting. No clove hitch required here. This last line can have a clip for easy attachment. This last line pulls the middle of the pole up inducing the 2-3� prebend. The lines to the bridle attach should be tight and the forward line should be tight. The loads on the pole can be quite high, so check that you can lift the front of the boat off the beach with the end of the pole. The common problem is the pole pulling off the front crossbar protrusion. Adjust the lines as required and mark or somehow preserve the settings. The 17.5 m^2 spin sheets off the outboard rope loops on the tramp. See the photos after the jib sheet and daggerboard raise sections. Visualize the spin up to run the sheets. From a point just outboard and fwd of shroud 1, run the sheet aft of the shroud, thru the block, across the tramp, thru the other block, aft of shroud 2, forward around the forestay (aft of the spin halyard) and back to the original point outboard of shroud 1. Whew, what a mouthful! This original point attaches to the clew of the spin forward of the shrouds. You ran the spin halyard before you raised the mast, right? If the spin sheet blocks ratchet, be sure to run the line thru so they ratchet in the right direction. I�m no expert on this spinnaker thing and I�m not here to tell you how to sail, but Randy Smyth has a great writeup on sailing the asym spin:
http://www.smythteam.com/smyth_new/f_home.htm
click sailing then click asymetrical spinnaker
Technical contributors: Gebhard Peitz, Kirt Simmons
Photos courtesy of Chuck Harnden and David Swingle
Enjoy your Taipan
Have Fun &
Slay some Dragons!
