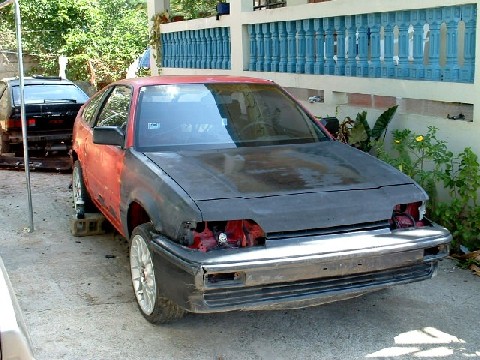
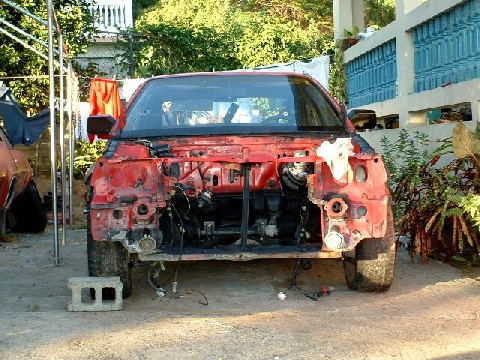
This was my CRX when I first began the Project.
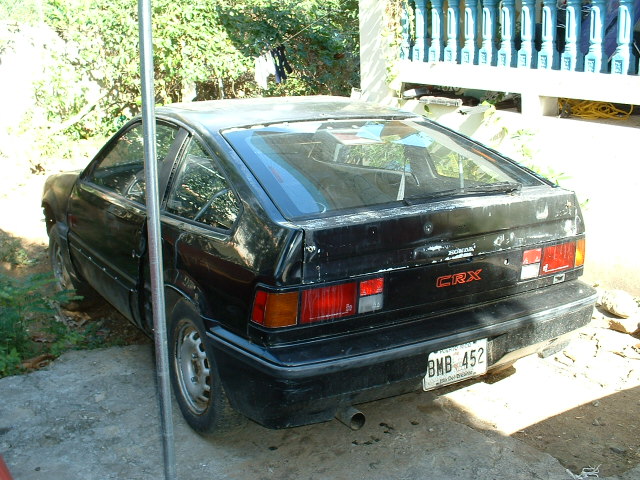
The black CRX on the back was the donor car for the parts needed for the
swap.
Since my CRX was a DX model, I got from the Si donor car the following parts.
1- Complete Wiring Harness Including the MAP and PA Sensors.
2- Fuel Tank and Intake Fuel line.
3- Front and Rear Bumper (Not needed for the swap lol but makes my car looks better)
1rst Step Installing all the Si Parts
FUEL
Since the CRX was a DX model I need to upgrade the fuel system to be able to use it for the MPFI B16A.
I took out the Stock fuel tank and return fuel line.
Then I moved the stock inlet line where the thin stock return line was.
Installed the Si Fuel tank and Si Inlet fuel line. The tank was bigger than the stock one but it fit without any modification.
Then I installed a Wallbro inline fuel Pump since the stock Si fuel pump was bad.
WIRING
I replaced the complete CRX wiring harness for the Si one. No major modification needed beside taking all the dash out to make it easier removing the dash wiring and fuses.
Other Parts Needed for the swap in my case.
1 - Hasport engine mounts, AFB1 kit.
2 - Hasport Axles
3 - Rear 99-2000 Civic Si rear engine bracket.
4 - 86-89 Integra front knuckles and hubs.
5 - 90 Integra throttle Cable.
6 - 88-91 Civic/CRX, 86/89 Integra Clutch cable.
7 - 90-91 Integra lower Radiator Hose.
8 - 92-92 Integra upper radiator hose.
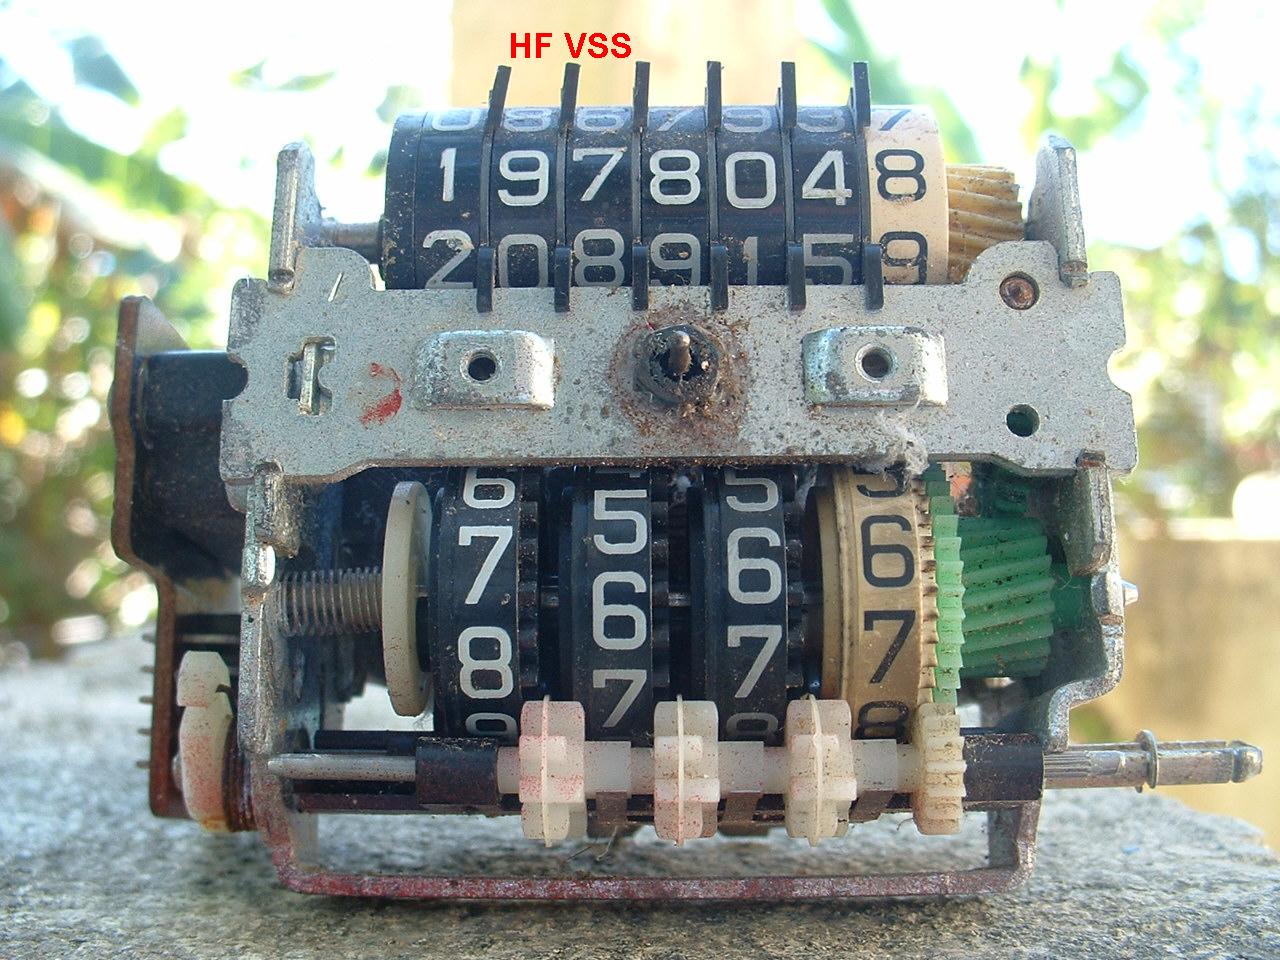
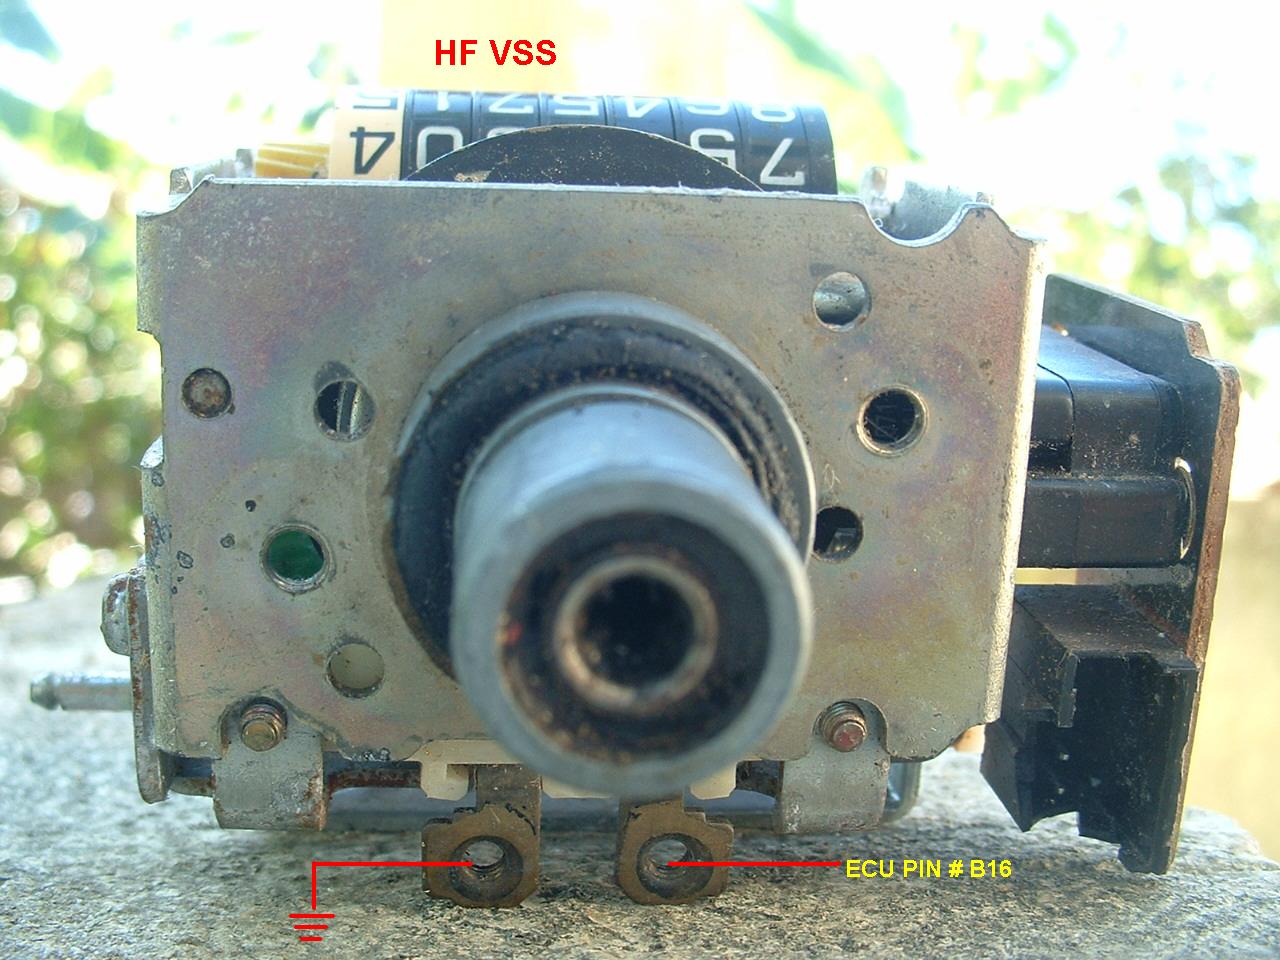
9 - 88-91 Civic/CRX, Integra, VSS if using PR3 or PW0 ECU
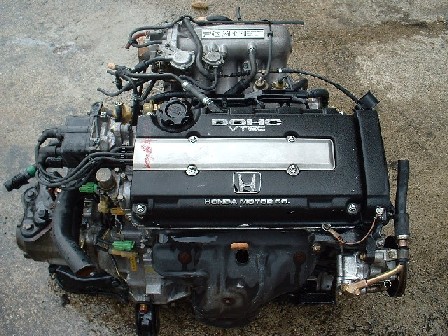
The B16A
The engine looks clean also like the Civic B16A. The intake have more vacuum hoses. Apparently this engine came out of an Integra XSi or RSi.
Good opportunity to do a tune up to the engine while its out of the car, timing belt, water pump, clutch kit, etc.
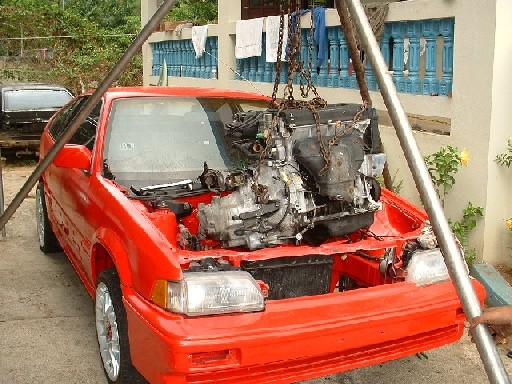
Installing the Engine
Before installing the engine make sure you make a dent in the left-hand frame rail for alternator pulley clearance. The engine its big so be careful when lowering the engine to the car.
Wiring Final Touches
After I swapped in the complete Si wiring harness I began modifying it for he B16A. Here is the list of changes I made to the wiring.
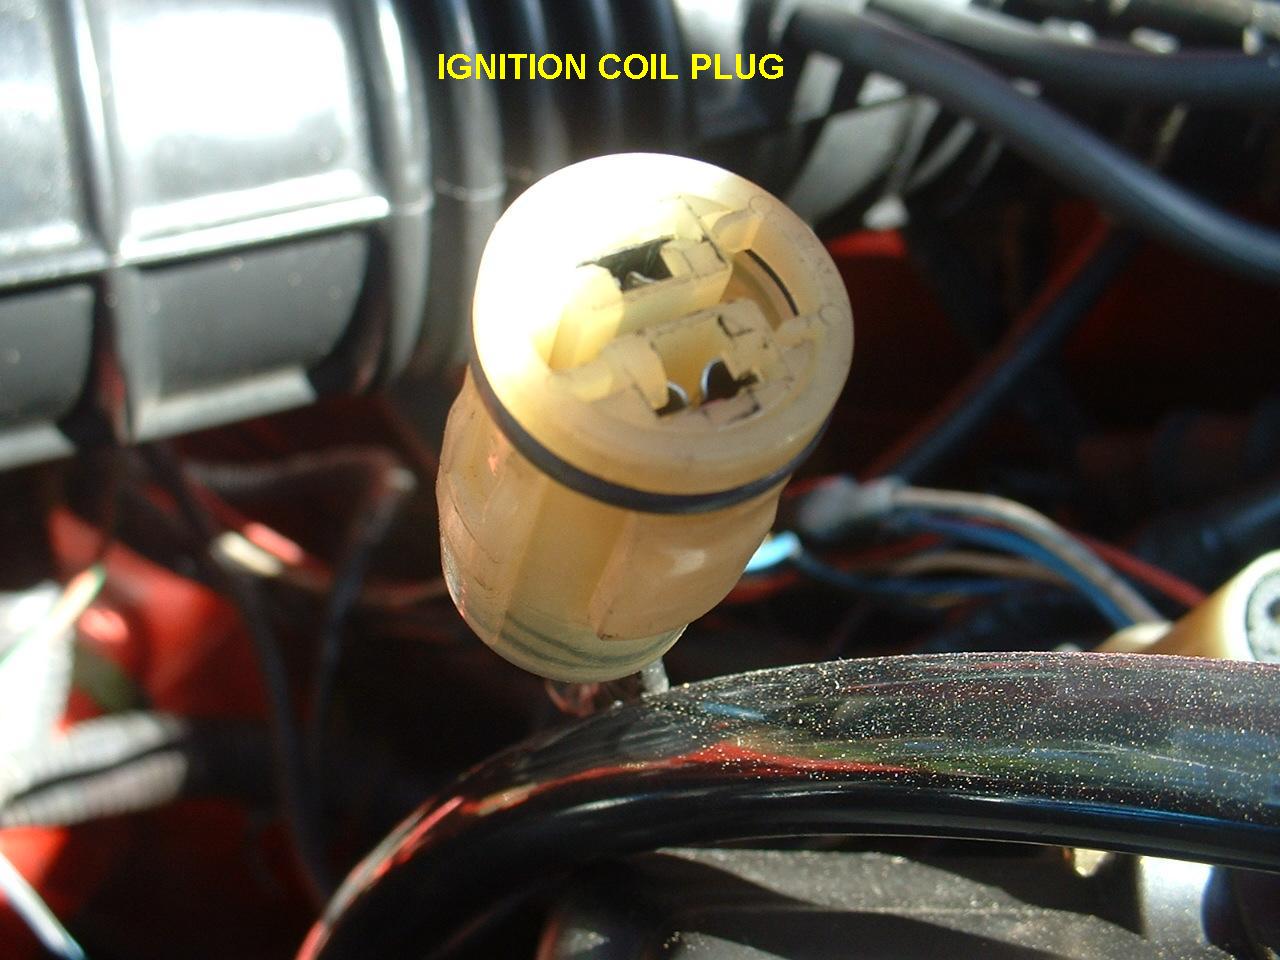
1 - Have extend and change the Ignition coil plug.
2 - Have to change the Ignition Plug and add Wires for:
a - TDC sensor B10 (Orange)
b - TDC sensor B12 (white).
c - Igniter Signal B15 & B17 (White on Ignition plug)
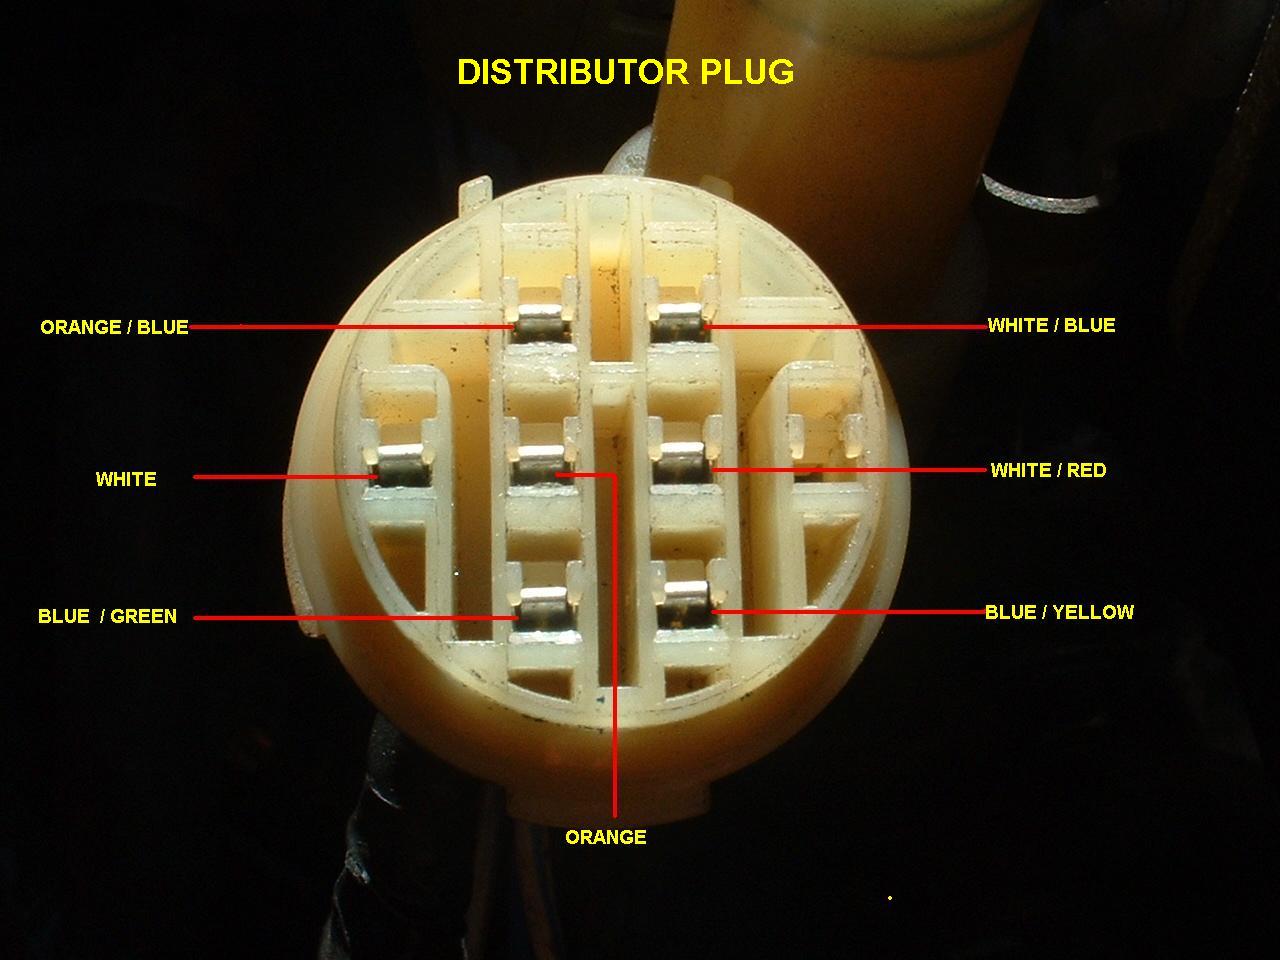
Its easy with a needle remove the pins from the Si Ignition Plug and connect them back to the B16 Ignition plug on its corresponding position. You can follow the Diagram that I have made of the B16 Ignition plug on the right side.
3 - Add wire (fused) from battery to pin B1 on ECU (ECU memory)
4 - Add wire from EACV blue yellow wire to ECU pin A11.
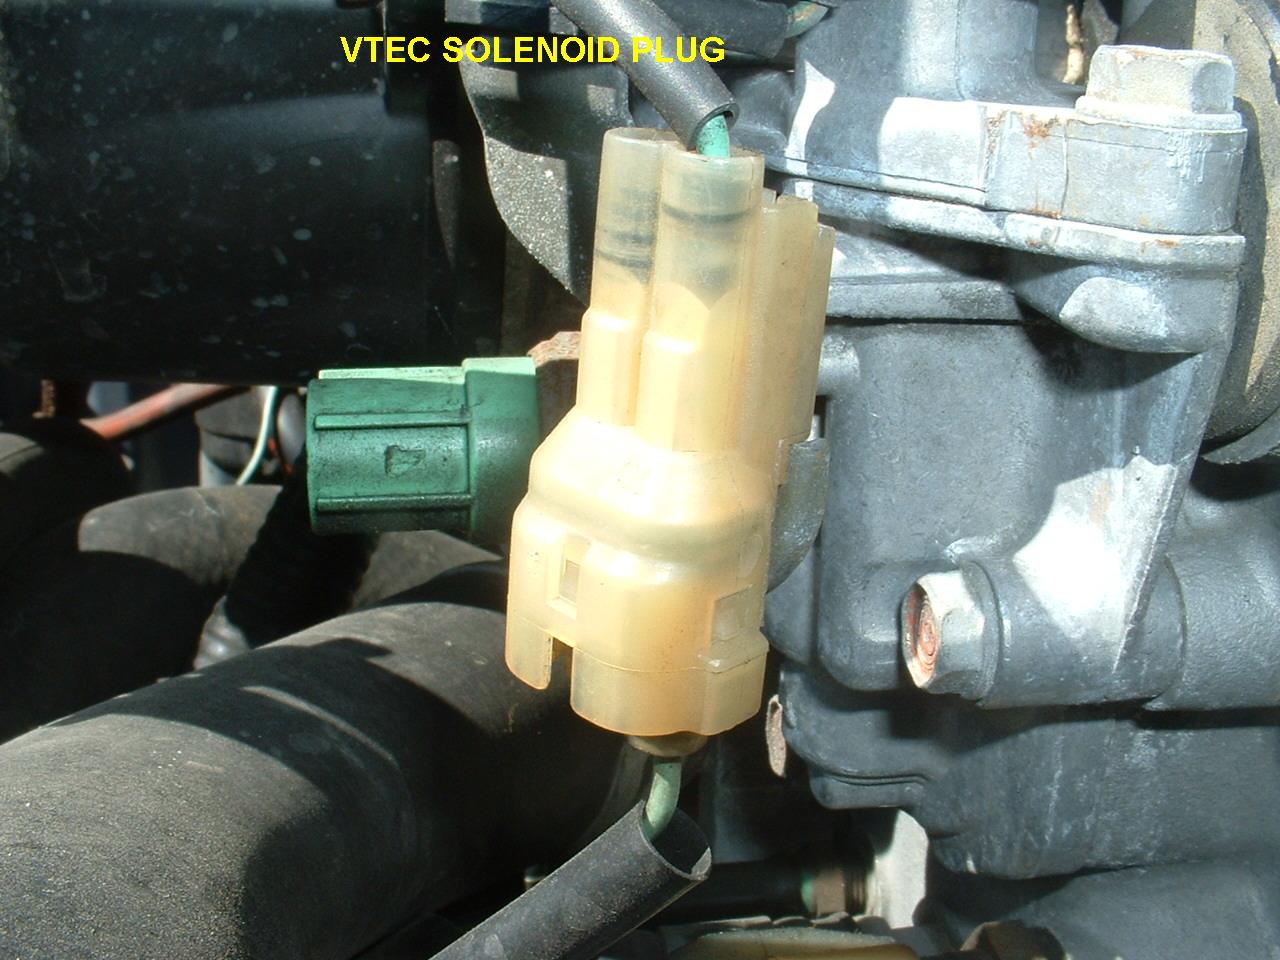
5 - Add wire from VTEC solenoid to ECU pin A8.
For those of you that will use a PR3 or PW0 ECU; the following wires need to be added also.
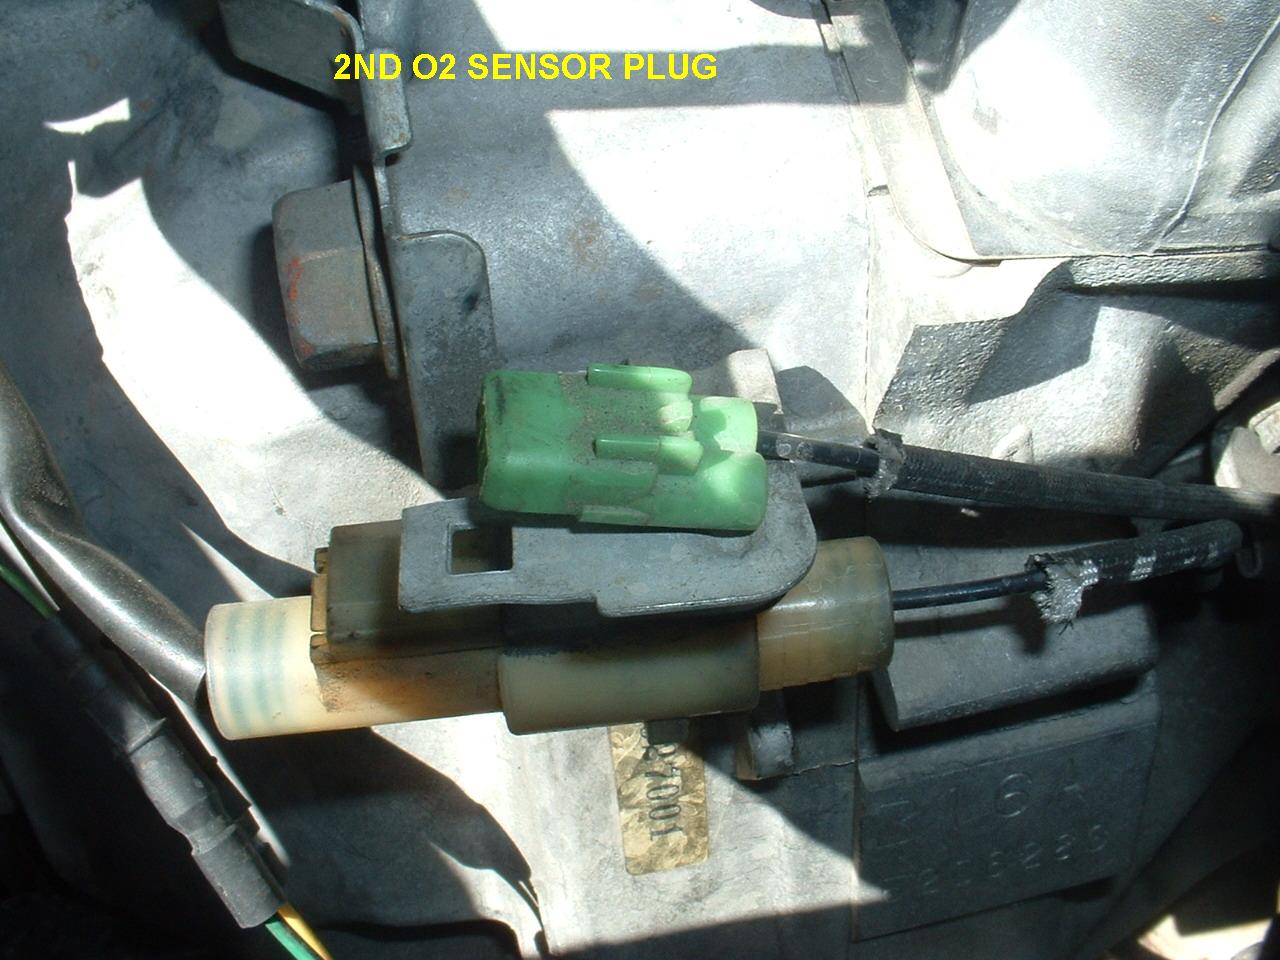
1 - Add wire from 2nd O2 sensor (Green Plug) to ECU Pin # C8.
2 - Add wire from Knock Sensor ( Located next to the engine Oil Pressure sensor) to ECU Pin # B19
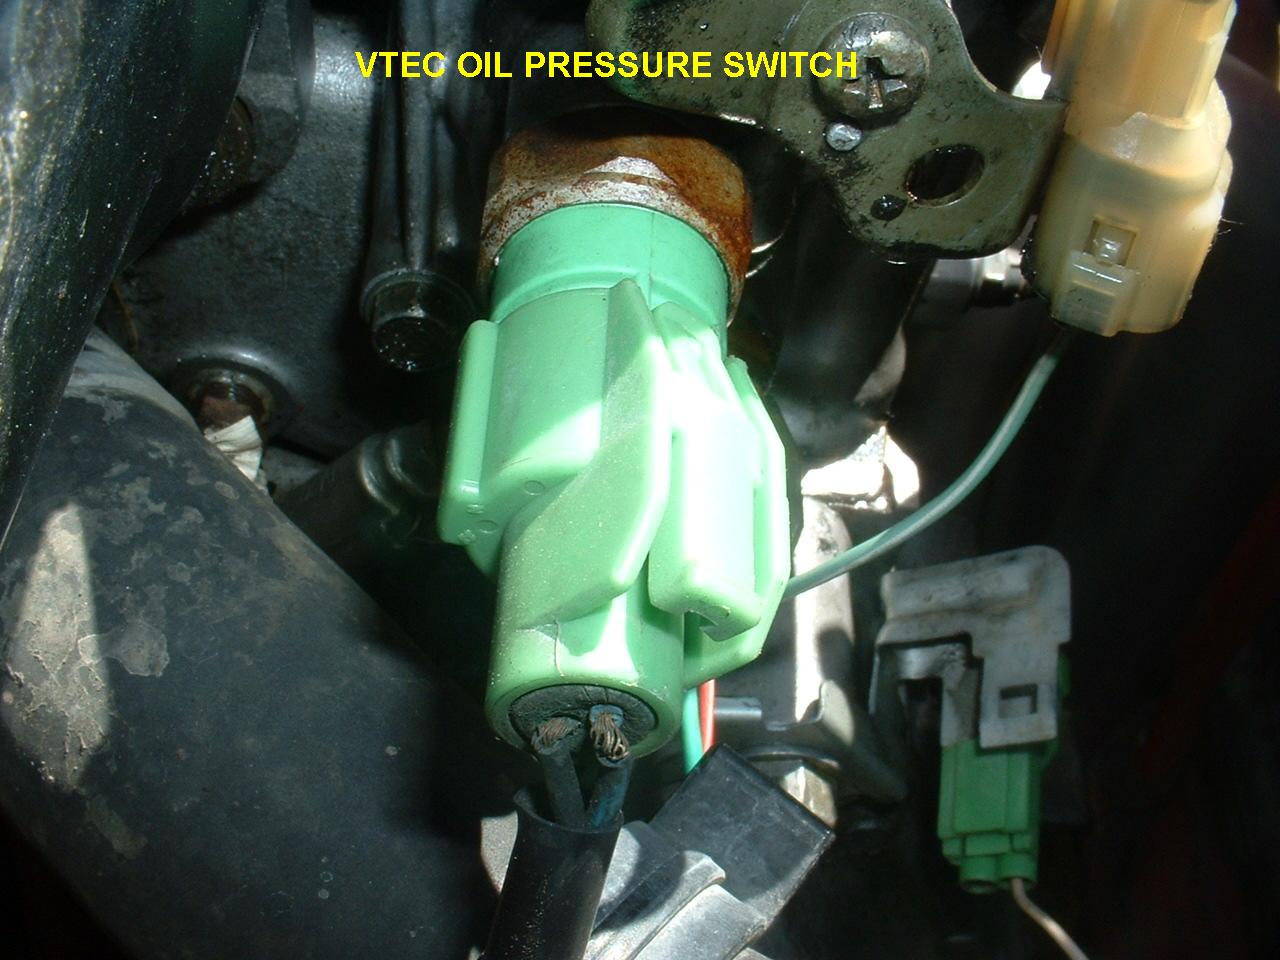
3 - Add wire from VTEC Oil pressure switch to ECU Pin # B5.
4 - Need to get a HF or 88/91 Civic/CRX VSS. And Connect one wire from the VSS to ECU Pin # B16 ant the other to ground.
Other modifications needed on my case
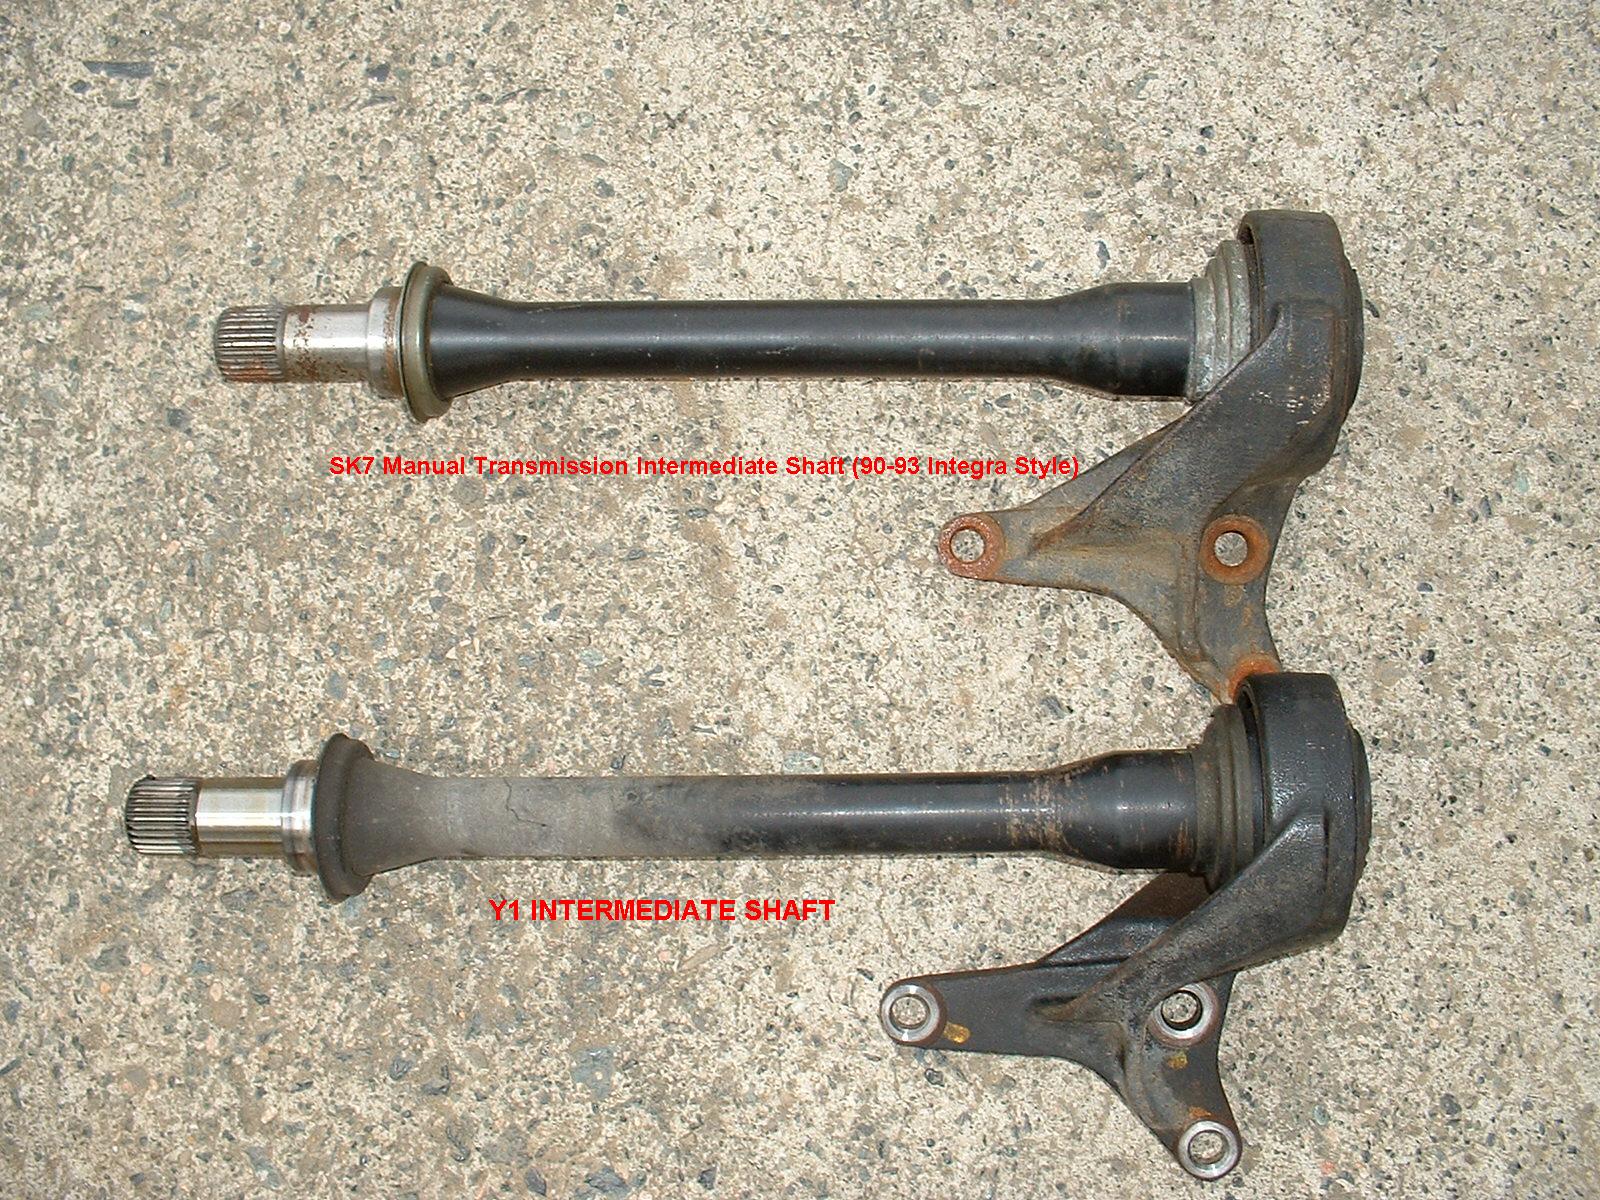
1 - When I tried to install the driver side Hasport axle, it appears to be longer. So I took out the Intermediate shaft and change it to a SK7 Manual Transmission Intermediate Shaft (90-93 Integra Style)
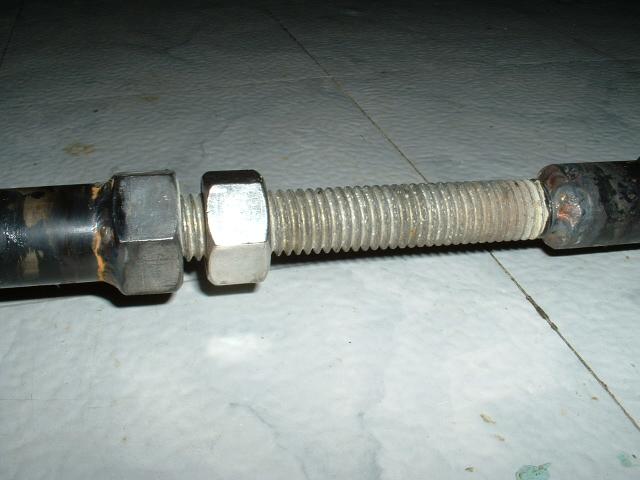
2- The shift linkage I modified it like I did on my fist swap on the Civic. Simply I took the CRX shift linkage cut it both of them. At one side (the CRX shift linkage side) I welded a long screw, and in the other side (The tranny side) I welded a nut. I did this with both sides of the shift linkage. This setup let me adjust it just by turning one end of the shift linkage.