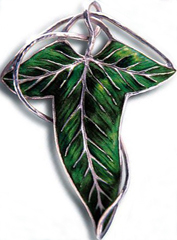
 Print out this real-sized copy of the Noble pin three times. Keep one as is for general reference and for the wire work.
Print out this real-sized copy of the Noble pin three times. Keep one as is for general reference and for the wire work.
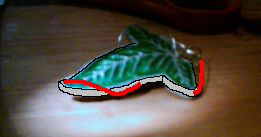
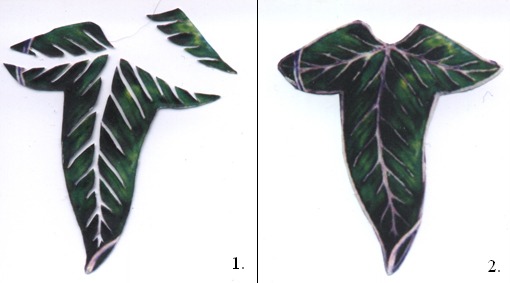 On another, cut out the leaf shape including the silver rim (as shown in 2). For the final leaf, cut away all the silver until you're left with the green enamel. This will give you three pieces (see 1). I used a pair of nail scissors and the curved shape and minute size worked perfectly.
Flatten out a piece of modeling clay until it is about 1/8" thick. Lay the leaf shape over the top and cut around it. Remove the paper and smooth out any uneven edges on the clay. Next, lay the three enamel pieces over the top, matching against the reference picture and leaving clay showing evenly around the edges. Now comes the hard part. Push the paper into the clay starting from the middle of each small section and working to the edge. Do this until all of the paper is sunk into the clay and the remaining veins are raised above it. I practiced this four times before I attempted the first brooch. Look for any bits of paper that have popped back out of the clay and use a toothpick or other sharp tool to carefully lift the paper out. Put the leaf aside.
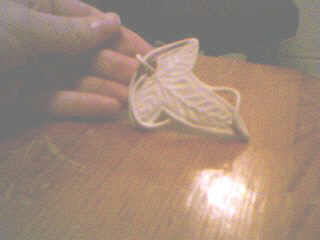 This version is from before I started using wire.
I took Jadzia's advice and wrapped my needle-nose pliers in tape so I wouldn't scuff up the wire. There are four pieces of wire: two bridge pieces, the twist, and the bottom.
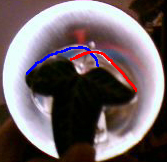 The bridge pieces are shown here, blue under and red over.
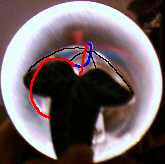 Form the twist so that the bridge pieces can cross each other within the loop as shown here.
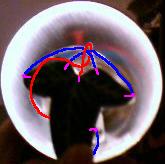 I left about 1/4" at the end of each piece of wire to bury into the clay, shown in purple here. The three middle connections can go directly into the clay but at the other connections I bent the wire at a right angle.
 Note that the wire enters into the sides of the leaf everywhere except for the bottom point, which plugs into the front face. You'll have to estimate where the wire will meet the clay since the reference picture is only in two dimensions. Once you're satisfied, carefully bury the wire into the clay, trying not to poke the wire through the back as this will weaken the structure of your pin.
Follow the directions to oven bake the clay. I took a piece of aluminum foil and folded it four times, then lay it underneath the leaf to bow out the middle a bit. This is a very subtle thing that helped to make the pin look less cookie-cutter and gave the shape more life.
Cover the entire pin in silver with the calligraphy pen, including the back and underneath where you're going to fill in green. It takes a day or two to dry to the point that the silver doesn't rub off onto your hands, but if that doesn't bother you you can start with the green immediately. With the tiniest brush you can find, fill in the green. I put on four coats, paying special attention to the edges with the first two. Wash your brush frequently and only squeeze a few drops of paint out of the bottle at a time as it dries quickly. By the time I finished one coat it was dry enough to start the next, so the only thing slowing me down was eye-strain. The last touch is to run a line of yellow paint through each section of green. This step is skipable if you don't feel like buying two bottles of paint, but adds a nice, subtle touch to the piece.
Put a thick layer of glue across the back and lay in the pin back. Note that the back won't be completely flat if you've baked it with something to raise the middle, but the pin should still be secure enough to wear within a couple of hours.
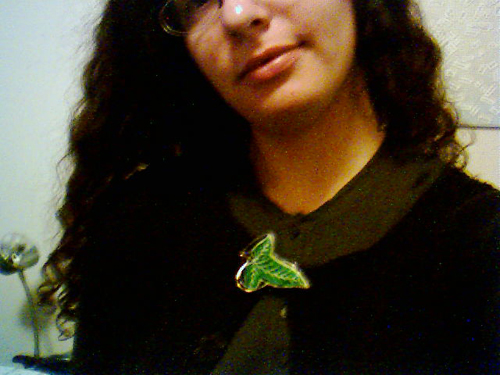
Now you're done! I'd like to know if anyone has found these instructions helpful, so please give me an email.
***I realize that it's a little late to add this, but if anyone out there is interested in trading their own, homegrown LOTR items for a pin I'd love to work something out. I'd really like to have a Pippin scarf but I'll entertain all offers!*** Created December, 2003