This is how I constructed my Zagi XS, so this might not be exactly the same thing as the Trick R/c assembling manual. I made this to help assist you in building the Zagi XS, not to completly build your Zagi off these intructions. If something is confusing and you do not understand and asume something do not do it until i get pictures in here so you will be more accurate
-Strapping Tape
-Needle Nose plyers
-Super 77 enhesive (made by 3M)
-Soldering Iron
-Sand Paper 150 to 320
-Sand block
-Or instead of the sand paper and sanding block, you can buy a sand
block and sand bult in together. The brand i used was 3M and it is
called, "SandBlaster", They called it a Sand Spounge, and it cost like $3.00
-Wire Cutters
The first thing you do is when you get your Zagi XS, is to open the box gently and lay out everything that is in the box. You need to get out all the pieces that are in plastic bag that has ALL of the Styrofoam in it.
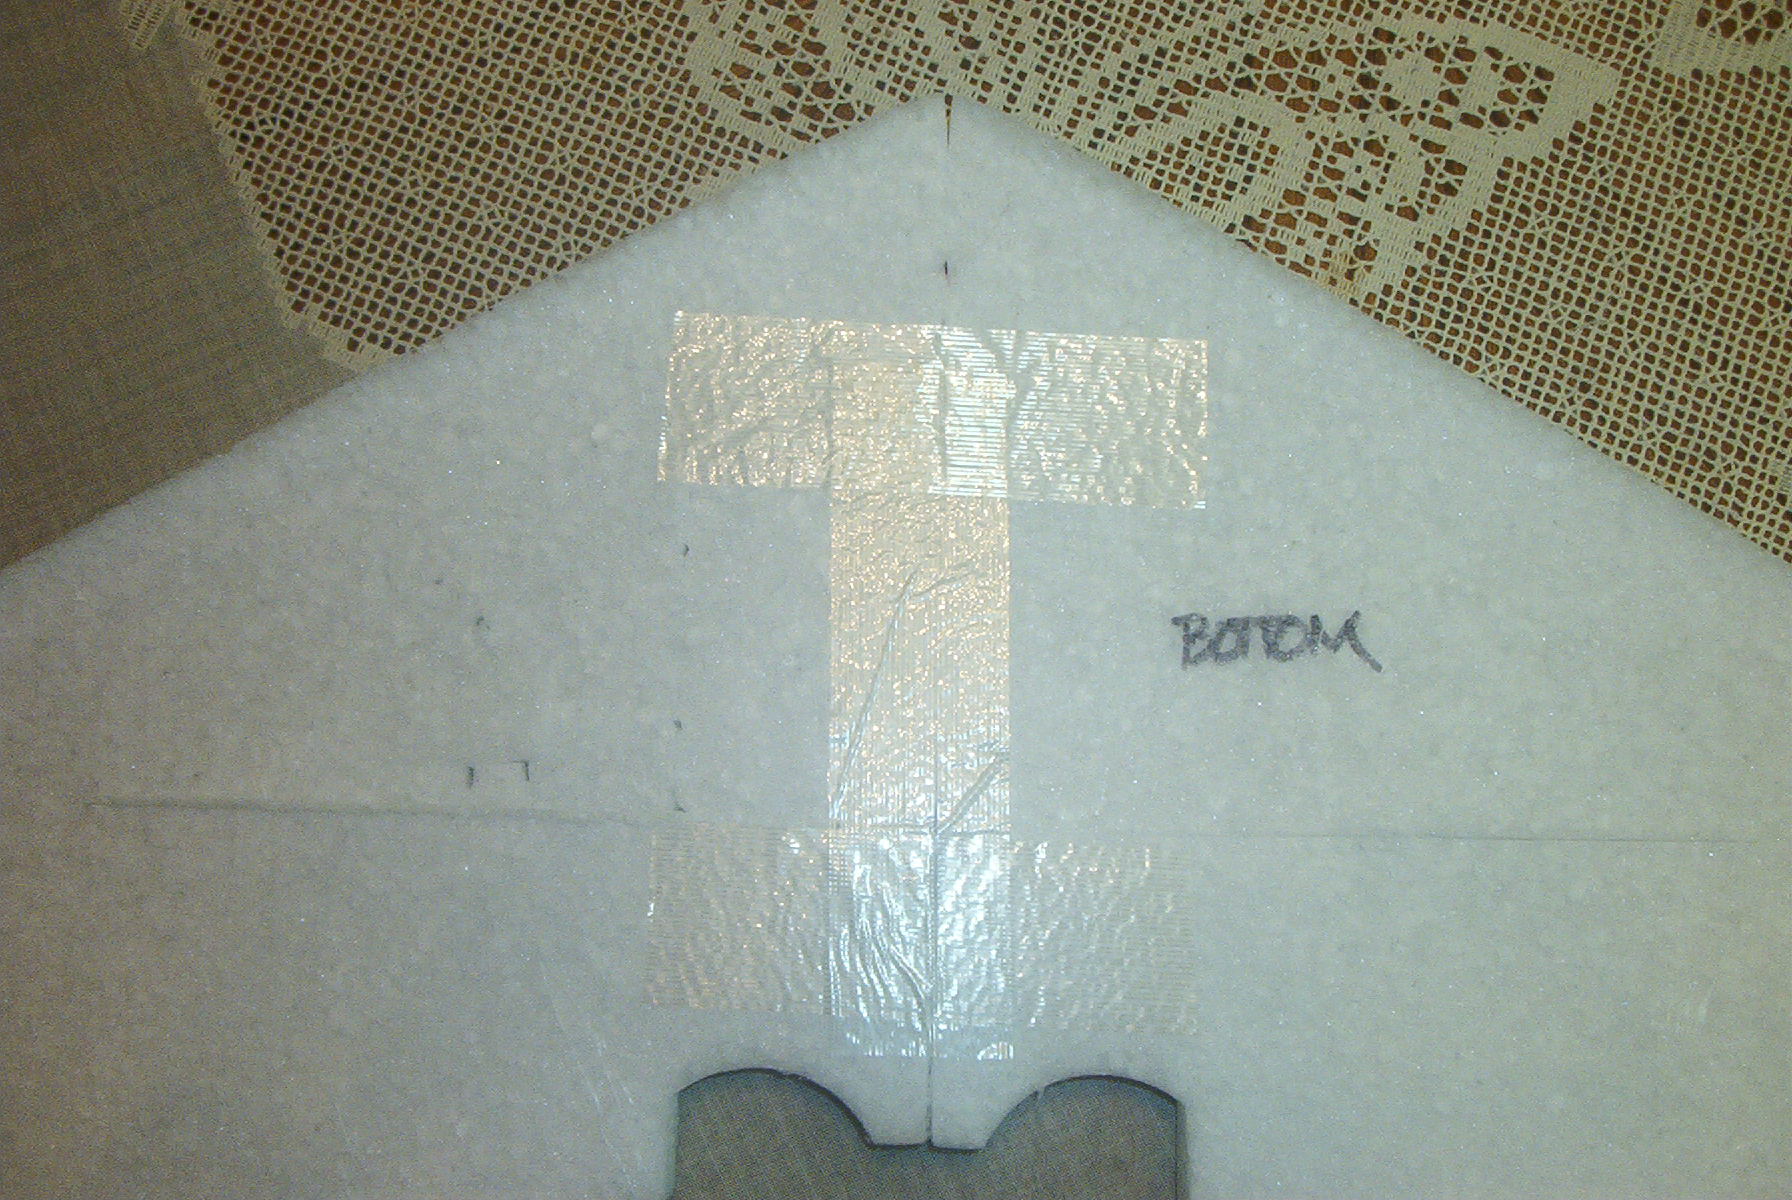
There should be six peices of styrofoam. In this order it should be , top, base, bottom, top, base, bottom. At this stage while you have the wings in order label the two "top" peices, [see pictures on right ]and the two "bottom" peices. Just put the two base peices aside until we need them later.The base is what the actually wing that is going to be flying when your done. You may find little precut patterns. DO NOT REMOVE ANY OF THE PRE-CUT PATTERNS!!!!!(until directed to)
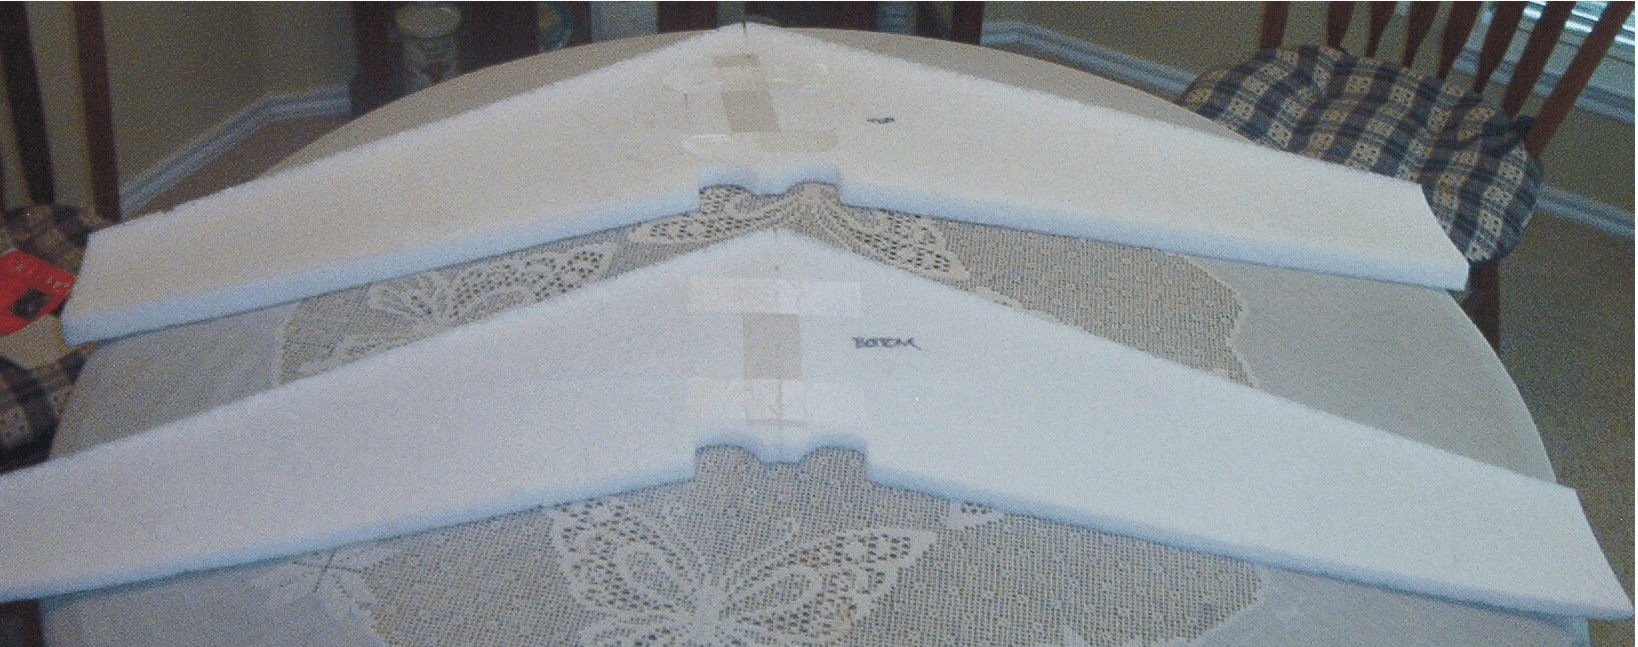
Now get the two bottom peices that have been labeled "bottom" and get the two top peices labeled "top" and put them together (the two top peices in on stack and the two bottom peices in a stack). Look at the two top peices and look for the one that has a red mark on it. The red marked wing always goes on the right! Now get the red marked top wing and put it on the right side and grab the other top wing which should be labeled black for always being on the left. Put the two together so the top two wings are put together and line them up together equaly and put one peice of strapping tape down the middle, and one small peice of tape accross the top and bottom of the Zagi. I would recommend you do both sides. All you is repeat the same why you did as you did the front.
Grab the bottom two peices and do the same way as the top. So in the end you will have two looking complete wings.
These bottom and top peices will act like a form keeper when constructing your Zagi XS. It is very important to be able to keep your arrow dynamic shape as good as can be so thats way Trick R/c put these in your kit.
Now you will need your sand paper, or sand spounge (what every you have) and sand down the base wings so it will be smooth( if you notice there is this hairy like things and you have to get rid of them). If you did not read the meterials list and you need your zagi made quick, then get the extra piece of styrofoam and rub it against the base wing and most of it should come of. Now that the wing on both side are smooth.
Both of the base wings are now smooth. Now get your can of super77 enhesive and take off the cap and put it aside for a little while. Get the two base wings together and make sure the wing with the red mark is on the right side and the black mark is on the left side. Now before we start gluing the two base wings together remember once you put those wings together you must have them aligned. IF did not align them right you might have to take it apart and sand down the enhesive once it has dried. But if I were you be VERY CAREFULL when putting it togther and align it correctly don't worry about taking it apart again. Ok now that I told you to be carefull when putting it together now we can start putting it together. Spray the enhesive on both sides of the wing on the inside (or the center were the are going to meet). Let the enhisive dry for like a minute on the wing and then join them together. As soon as the are joined put peice straping tape across were you sprayed the enhesive on both sides so the plane will dry in th correct position. Let the enhisive dry for like 40 minutes to insure it is completly dry. Once it has been 40 minutes remover the tape CAREFULLY. What I did I went ahead and spray the enhisive over the center again so it will be more sturdy. Get the popcicle stick and spread it along the creese. Let that dry for at least 20 minutes.
Now lay your bottom wing on a flat surface. Get the complete base wing and lay it on top of the "bottom" wing.
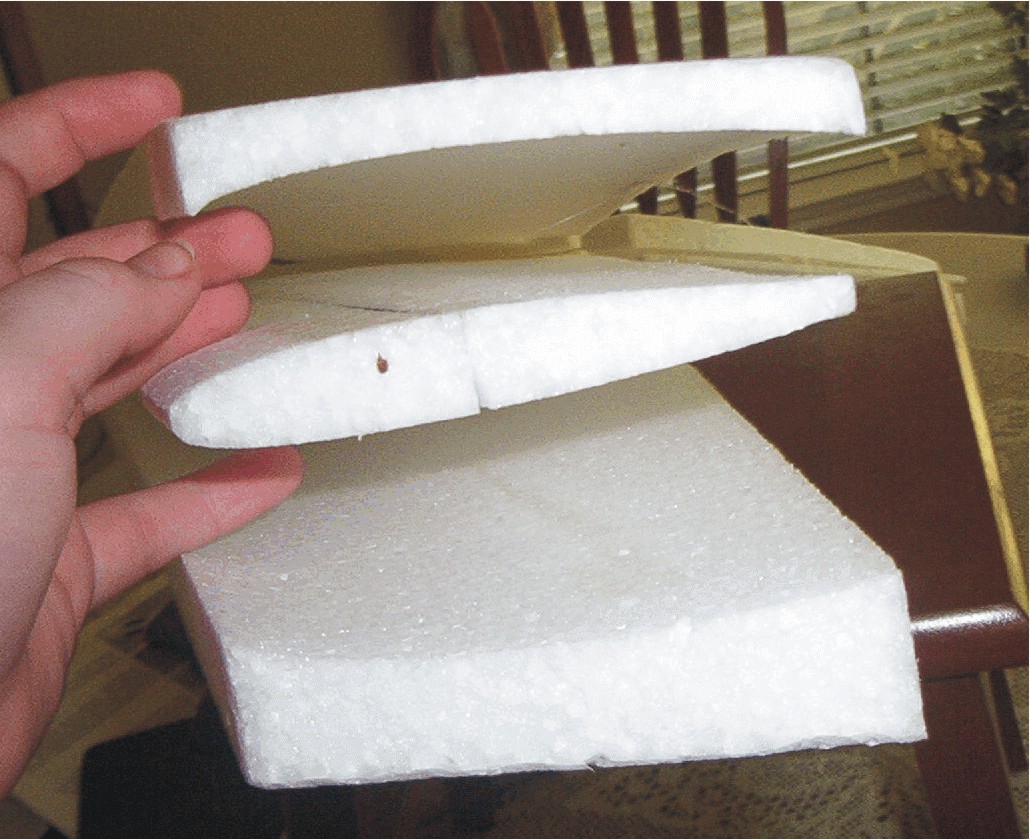
If you notice you see it the from of the base wing you see a creese (it is like a pre cut line on boith sides) that goes to a point and goes all the way down to the end of the wing. that is were you are goin to put the Carbon fiber spars (like 2 feet long , black)
Now spray some enhesive along the creese and start from the edge on one side and spray all the way to the other. and crap the popcicle stick and see if you can puch some of the glue in the creese. Grab two of the carbin fiber spars and spray both sides of the spars with enhisive and starting with one end of the Spar and put it at the end of the wing and push it into the creese until it is all the way in so it is not poping out of the creese. do the same to the other side of the zagi the same way. Now let those sit in the creese for about 3 minitues, and follow the same instructiom on the bottom side of the base. So in the end you have a total of four carbon fiber spars on base of the Zagi. (if you notice from the picture on the previous stepp it shows the black line that is were the spars go) Do not get rid of the last carbon spar, we will need it later so do not throw it away!
Now that all of the carbon spars are in let it dry for like 20 minutes.
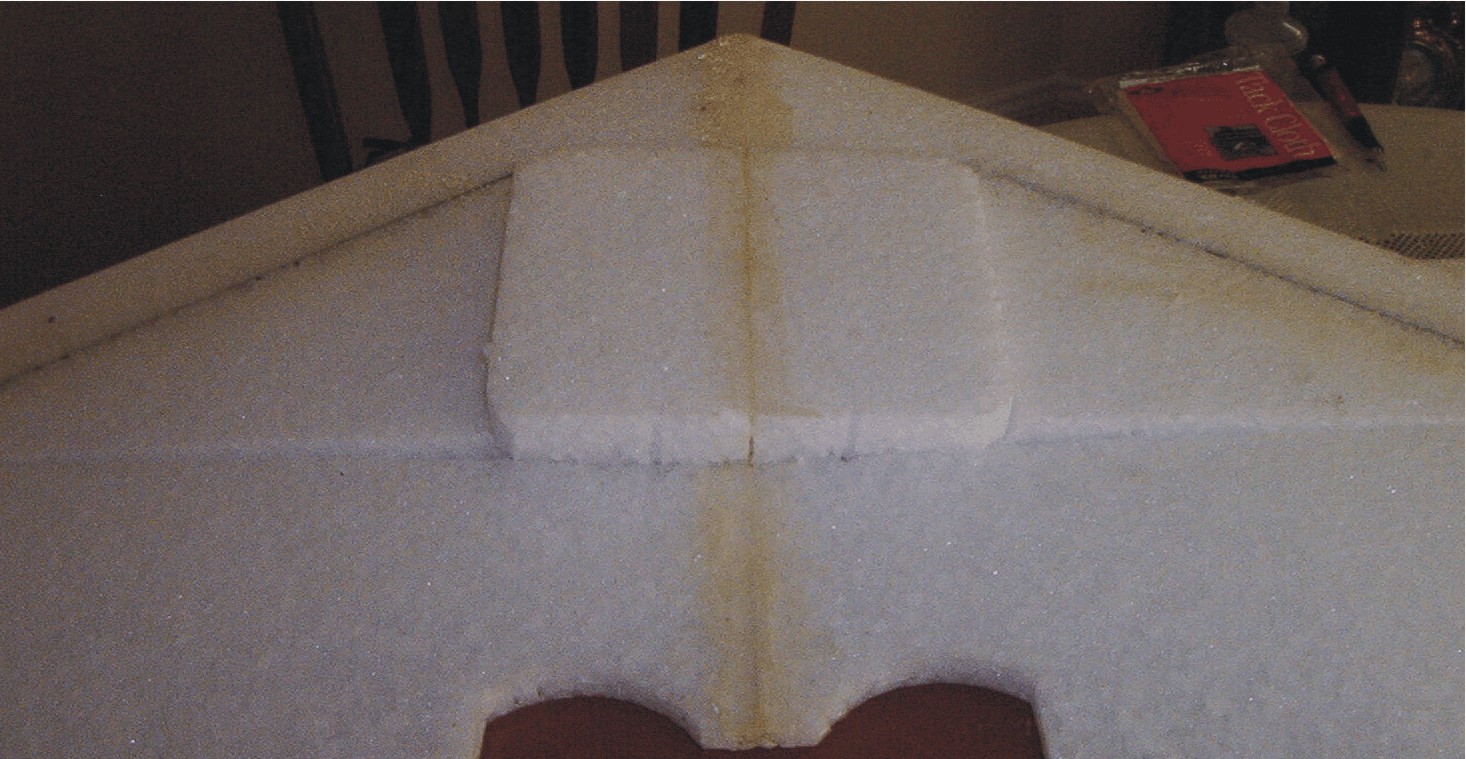
Once it has dried for 20 minutes, we can now remove the electronics bay which is in the middle and it is like a square. Once you find the pre-cut creese you want to push it out gently not wanting the two wings to split.( if you look to the picture on the right it shows the electronics bay mostly pushed out) If it does not come farly easy then get a Hobby knife and cut along the pre cut square to make it easier to come out. Keep pushing nicely so not to make it split. As you are pushing out you will notice another piece of styrofoam is coming out with it pull it out as well you will need it if it doesn't you may need a hobby knife to cut it out.
Since half of the support of the binding holding the zagi together are gone i would recommend wrap a peice of strapping tape around the part that is still holding it together as smoothly as you can so it does not make it areo dynamicly not as clear when flying it later.
Grab the peice of plywood that is 18 inches long and the last carbon fiber spar. Line the end of the spar with the end of the peice of plywood and with the part hanging over cut it off so that the carbin fiber spar is the same lenth as the peices of plywood. Do not throw away the 6 inch carbin fiber spar that is left. Now line the long spar about little bit less than an inch from the bottom and use the Zagi lock that is in your zagi kit. Use a good amount of the zagi lock to make sure it is secure. With your finger holding it down for about 30 second. After this take the second (smaller one) carbin fiber that was cut and center it in the middle of the plywood and the glue it with the zagi lock and hold it down for about 30 seconds. ( Remember when pushing in the brace put the base wing on top of the "bottom" wing) underneth it Now push the brace in were the channel is on the base that is behind the electronics bay. Now push the brace with the carbon fiber spars facing the electronics bay. If you notice the brace is taller than the actual zagi. Therefore you push the brace from the bottom so it is flush and make a line on the top side making it flush to the wing. (take it out) Cut the along the line and sand it down, so that it is smooth. Now spray the channel that the brace goes in with enhisive, and spray both sides of the brace and carfully slide it in place. Now that the brace is in place put weights on the zagi to keep the brace from poping out. Let it dry for about 20 minutes.
I am not going to go over how to cut the pre-cuts (black plastic) so, just get a Hobby Knife and look at the assembling manual and cut what it says.
Now I am going to asume that you know how to solder. The first step you need to do is to get the template that mounts the motor. Now get the motor and put it on the side of the template. Now get the the speed control and the wire and put the red wire throw the right hole and put the black wire throgh the left hole. And solder the red wire to the termanel next to the red dot. And sodler the black wire next to the termanel on the opposite. Now Get one of the (black) ties and put it throgh one of the hole and bring it to the other side and through the other hole and thread them together. With the excese wire that is hanging over cut it of.
More Coming Soon...
Top
Base
Bottom