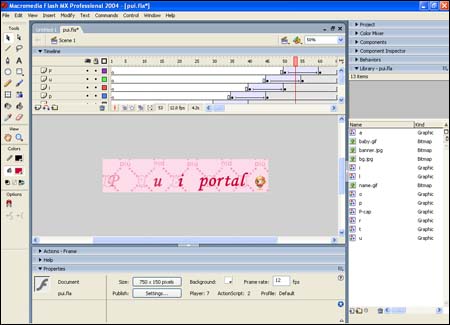
| Macromedia Flash MX
Tutorial Contains - Tools Describtion - Animation Describtion - Shortcuts key & Hotkeys setting -------------------------------------------------------------------- Basic shaping tools Circle, Square, Line and Arrow tool
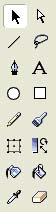
Circle tool: Use to draw a circle, line color and fill color should be set before begin to draw a circle Square tool: Use to draw a square object, line color and fill color should be set before begin to draw Line tool: Line tool use to draw a straight line Arrow tool: Known as a selection tool, use to select any material in Flash MX Pencil tool: Pencil tool has 3 different drawing styles Straighten line Flash MX will calculate and modify your line to a straight line Smooth line Flash MX will calculate and convert your line to a straight line Ink Free hand drawing Brush tool Brush tool is different from pencil tool. Size of the brush can be select and come with 4 unique painting styles Paint behind = paint behind the picture Pen tool Pen tool can be continuously draw a line and the line you draw can be modify later Refine shapes Use black arrow tool (selection tool) to modify rim of all object by click at the object and drag mouse in and out of the rim of any objects Use white arrow tool (sub selection tool) to modify the object delicately Eraser tool Eraser mode Same as options in brush tool option selection Eraser faucet: Eraser faucet use to erase all same (Duplicate) color on the object Soft fill edge option: Soften fill edge option use to soften the edge of an object. The more level of soften light you put in an object, the more slower computer can process the information of an image Transformation tool: Transform and modify size, light level, color pattern, gradient color, gradient level, and can rotate an object as well. -------------------------------------------------------------------------------------------- Breaking apart groups and objects
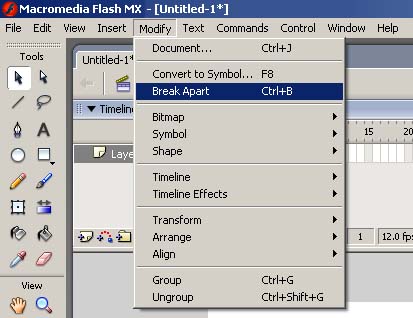
To separate groups, instances, and bitmaps into ungrouped, editable elements, you use the Break Apart command. Breaking apart significantly reduces the file size of imported graphics. To break apart groups or objects: 1 Select the group, bitmap, or symbol that you want to break apart. unpredictable results. Breaking apart complex symbols and large blocks of text can take a long time. You might need to increase the application's memory allocation to properly break apart complex objects. Duplicating and removing colors You can duplicate colors in the palette, delete individual colors, or clear all colors from the palette. To duplicate a color or delete a color: 1 If the Color Swatches panel is not visible, choose Window > Color Swatches. Using the default palette and the Web-safe palette You can save the current palette as the default palette, replace the current palette with the default palette defined for the file, or load the Web-safe palette to replace the current palette. -------------------------------------------------------------------------------- Load or save the default palette: In the Color Swatches panel, choose one of the following commands from the pop-up menu in the upper right corner: Load Default Colors replaces the current palette with the default palette. ----------------------------------------------------------------- Adding sounds to buttons You can associate sounds with the different states of a button symbol. Because the sounds are stored with the symbol, they work for all instances of the symbol.
1 Select the button in the Library panel. --------------------------------------------------------------------------- Using sounds with Sound objects You can use the Sound object in ActionScript to add sounds to a movie and to control sound objects in a movie. Controlling sounds includes adjusting the volume or the right and left balance while a sound is playing. See Creating sound controls. To use a sound in a Sound action, you assign an identifier string to the sound in the Symbol Linkage dialog box.
1 Select the sound in the Library panel. ---------------------------------------------------------------------------------- Creating frame-by-frame animations
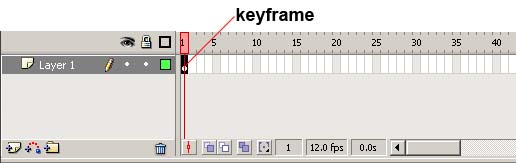
To create a frame-by-frame animation, you define each frame as a keyframe and create a different image for each frame. Each new keyframe initially contains the same contents as the keyframe preceding it, so you can modify the frames in the animation incrementally.
1 Click a layer name to make it the current layer, and select a frame in the layer where you want the animation to start. -------------------------------------------------------------------------------------------- Tweening shapes
By tweening shapes, you can create an effect similar to morphing, making one shape appear to change into another shape over time. Flash can also tween the location, size, and color of shapes. Tweening one shape at a time usually yields the best results. If you tween multiple shapes at one time, all the shapes must be on the same layer. ------------------------------------------------------------------------------- Technical Corner - Keyboard Shortcuts Keyboard shortcut let user can call into a tool more faster than pointing a mouse and search for a tool Ex. Once you setup your hotkeys for Flash MX, next time you type on a shortkey a certain tool suddenly selected Customizing keyboard shortcuts To create a custom keyboard shortcut set, you duplicate an existing set, and then add or remove shortcuts from the new set. You can delete custom shortcut sets. To select a keyboard shortcut set: 1 Choose Edit > Keyboard Shortcuts.
1 Select a keyboard shortcut set as described above.
1 In the Keyboard Shortcuts dialog box, choose a shortcut set from the Current Set pop-up menu.
1 Choose Edit > Keyboard Shortcuts and select the set that you want to modify. To delete a keyboard shortcut set: 1 Choose Edit > Keyboard Shortcuts. In the Keyboard Shortcuts dialog box, click the Delete Set button. ---------------------------------------------------------------------------------------
Close this window to go back |