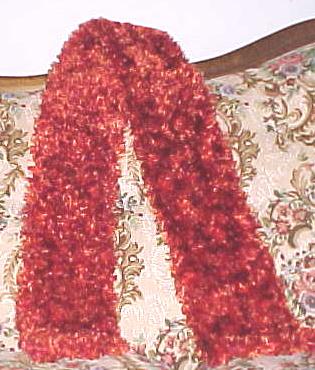
The Boa Scarf
Materials
2 balls of Bernat Boa (1 3/4 ounce / 50 grams/ 71 yards), color Phoenix
For a scarf approximately 6 inches wide by 49 inches long, use size US 9 (5 1/2 mm) needles or size needed for gauge.
Gauge: 14 stitches = 4 inches, 17 rows = 4 inches in stockinette stitch.
Cast on 23 stitches. Knit 4 rows.
Next row: (wrong side) Knit 3 stitches, purl 17 stitches, knit last 3 stitches.
Next row: (right side) Knit all stitches.
Repeat the last two rows until the scarf measures 48 inches, ending with a purled row.
Knit 4 rows and bind off. Weave in the yarn ends.
Note: This pattern was printed on the paper band around the yarn skeins. Some companies give you free patterns this way, so always check the band and see if it has one. You may want to get the yarn for this pattern too, a clever bit of marketing. Even more clever, you may find lots of nice free patterns on the company's web site as well as useful information about their products. This company is at www.bernat.com.
This scarf is knitted with a garter stitch selvage. The stockinette stitch pattern will tend to curl without a selvage to hold the edges flat. However, you can knit a longer, thinner piece for the same amount of yarn in stockinette stitch and it will stretch the garter stitch. The furry surface hides the difference in the patterns.
When you switch from a knit stitch to a purl stitch, remember to move your yarn into the correct position to make the stitch. The yarn should be behind the piece for a knit stitch and in front for a purl stitch. When you go from a knit stitch to a purl stitch, you make the knit stitch, move the yarn between the needles to the front, and then make the purl stitch. When you go from a purl stitch to a knit stitch, you make the purl stitch, move the yarn between the needles to the back, and then make the knit stitch.
Tip: The knitting patterns are easy, but you should spread the stitches apart enough to see the woven band that holds the furry fibers. If you accidentally knit into a clump of fibers and miss the band, it will be difficult to find the dropped stitch among the fur. Be sure you knit into the loop formed by that woven band!
Tip: You can use markers to find the spot between the three knit stitch edges and the purled center stitches more easily. A marker is slipped over the needle between stitches to mark a point in the knitting that you need to find again easily without having to count the stitches again. You slip the marker from the left needle to the right needle when you come to it. While there are plastic rings sold for this purpose, you can make a cheap marker that is highly visible out of a twist tie. Just double it and twist it to make a loop in the middle big enough to fit your needle. The long ends stick up above the fur and you won't have to fish around and count to make sure you've reached the last three stitches that you need to knit instead of purling.
Tip: Since you use two balls for this scarf, you will tie on the second ball at the mid-point of the scarf. When you are getting close to 48 inches, double the scarf with the fold at the row where you tied the second ball to the side of the knitting. It is better to finish the last four rows to complete the garter stitch border with some yarn left over than to run out. A trip to the store for more yarn would be easier than trying to back up among the fur if you run out.
Tip: Always end with a knit row if you have to put the knitting down for a while. Then you know where you are in the pattern when you start knitting again. This is a good idea for many stitch patterns, especially the complicated ones.
Care instructions: Hand wash cool, dry flat.
Last update: December 16, 2003