Using Tables
To arrange the colors and backgrounds to form the pages and puzzles, I used a table, which is a simple way to arrange text but can use colors and backgrounds to fill in spaces and arrange blocks of text on your page in an orderly way. The table that forms your puzzle will go between the <BODY> and </BODY> tags in place of the text "This is where your puzzle will go.". A simple table looks like this:
| Row 1, Column 1 | Row 1, Column 2 |
| Row 2, Column 1 | Row 2, Column 2 |
and is produced by this code:
<TABLE BORDER=1 CELLPADDING=20>
<TR>
<TD>
Row 1, Column 1
</TD>
<TD>
Row 1, Column 2
</TD>
</TR>
<TR>
<TD>
Row 2, Column 1
</TD>
<TD>
Row 2, Column 2
</TD>
</TR>
</TABLE>
It looks like a group of boxes, formally called "cells", which hold the text I included to label them. The <TABLE> and </TABLE> tags tell the browser that the cells described within them belong to the same table. The BORDER=1 in the <TABLE> tag sets the width of the white lines connecting the cells to one pixel. For the puzzles, you will use BORDER=0 and CELLSPACING=0 to eliminate these lines and put the boxes next to each other. Pages have BORDER=0 and the CELLPADDING set to whatever value gives you a nice blank area called "white space" around the text. I set the border to 1 pixel here so you could tell the cells apart more easily. Note: CELLSPACING is the distance that separates the cells; CELLPADDING is extra blank space around the text within the cell. If you don't set these two values, they default to the minimum size and the cells shrink to the size that will just hold the text.
Each cell is defined by the <TD> and </TD> tags and any information in the tags. The <TR> and </TR> tags group each horizontal line of boxes into a row. The cell immediately following a <TR> tag is the leftmost cell of the row, and the cell immediately before the </TR> tag is the last (rightmost) cell of the row. A group of cells going from the top to the bottom of the table is called a column.
You can use BGCOLOR and BACKGROUND in the <TABLE>, <TR> and <TD> tags to specify their color or background pattern as well as the <BODY> tag. You can set the background color or background graphic for the entire row within the <TR> tag, but background color or graphic set in the <TD> tag will override that for that particular cell. You can't set the color or graphic for a whole column in the <TD>: tag.
Now let's add some color and a background graphic to our table. I'm also going to remove the CELLPADDING code to let it default to the minimum value. Note the difference in the size of the table compared to the previous one.
| Row 1, Column 1 | Row 1, Column 2 |
| Row 2, Column 1 | Row 2, Column 2 |
| Row 3, Column 1 | Row 3, Column 2 |
It is produced by this code:
<TABLE BORDER=1 BGCOLOR="yellow">
<TR BGCOLOR="aqua">
<TD BGCOLOR="fuchsia">
Row 1, Column 1
</TD>
<TD>
Row 1, Column 2
</TD>
</TR>
<TR BGCOLOR="lime">
<TD>
Row 2, Column 1
</TD>
<TD BACKGROUND="../backgrounds/cloth027.jpg">
Row 2, Column 2
</TD>
</TR>
<TR>
<TD>
Row 3, Column 1
</TD>
<TD>
Row 3, Column 2
</TD>
</TR>
</TABLE>
I set the table background color to yellow and added a third row to the table with no background color or pattern specified. This row has both cells colored yellow. The first row has an aqua background color set and the right cell is aqua (its tag has no color or graphics file specified) but the left cell is fuchsia (its tag specifies BGCOLOR="fuchsia"). Similarly, on the second row, the <TR> tag specifies a lime background, so the left cell with no color or graphic specified is lime, but the right cell with a graphics file specified for the background has a colorful print in it. The whole table is on a page with a body background specified to produce the colorful strip on the left. You can stack colors and backgrounds this way in all sorts of interesting combinations.
One final detail, and that is setting the size of the box. You can use a WIDTH="number-of-pixels" and HEIGHT="number-of-pixels" in the <TD> tag to set the size of the cell, where number-of-pixels is the desired size (remember, the border of this example table is set for 1 pixel, and most screens are about 600 pixels across depending on your computer). However, you still need to have something in the cell, and for the puzzles you wouldn't want lettering across the colors or graphics.
You can use a transparent spacer graphic to fill in the space without hiding your selected background. This is a little file one pixel in size which is stored as a transparent background. If you don't have one, right click here, click on Save Link As (for Netscape) or Save Target As (for Internet Explorer) and save this file in your graphics folder as 1x1.gif. Please note: You must right click on this link to get the pop-up menu to save this file.
To use it, use the code <IMG SRC="your-graphics-folder/1x1.gif" width=width-in-pixels height=height-in-pixels> in the cell in place of the text to make a transparent rectangle that is width-in-pixels by height-in-pixels in size. That will hold the cell open to display the color or graphic you chose. Note: There is a small margin around the spacer graphic, so your cell will be slightly larger than this unless you set the WIDTH and HEIGHT at a large enough value to hold the rectangle with room to spare. You can adjust your spacer and WIDTH and HEIGHT to make the cell the size you wish.
Practice making some simple tables by opening your puzzleform.html file in Notepad and and copying the tables above between the <BODY> and </BODY> tags. Be sure to use your browser to view the file to see that your file produces the table on screen. You can double click on your puzzleform.html icon to tell the browser to load the edited file, then click on the Back button on your browser to return to this tutorial.
 Here's the cloth027.jpg graphic that you will need for the cell
background. To save a graphic, right click on it and click on
"Save Image As" (Netscape) or "Save Picture As" (Internet Explorer),
then follow the instructions on the box which pops up on your screen.
Be sure to save it in your backgrounds folder.
Here's the cloth027.jpg graphic that you will need for the cell
background. To save a graphic, right click on it and click on
"Save Image As" (Netscape) or "Save Picture As" (Internet Explorer),
then follow the instructions on the box which pops up on your screen.
Be sure to save it in your backgrounds folder.
Pretty pages
Now that we know about tables, let's look at that simulated page again.
|
|
Here's my text on a simulated page, nicely confined to a box with left and right margins defined by the cells held open with the spacer graphic. I can define top and bottom margins by using line break tags <BR> to add extra blank lines above and below the text. I have used border=1 in the table tag so you can see the three cells of this table. |
|
The code for an actual page looks like this:
<HTML>
<HEAD>
<TITLE>My first web page</TITLE>
</HEAD>
<BODY BACKGROUND="../backgrounds/multi018bor.gif" bgcolor="#FFFFFF">
<table width=100% border=0 cellpadding=5>
<tr>
<td>
<img src="../graphics/1x1.gif" height=1 width=100>
</td>
<td>
<br>
<br>
Here's my text on a simulated page, nicely confined to a box with
left and right margins defined by the cells held open with the
spacer graphic. I can define top and bottom margins by using line
break tags <BR> to add extra blank lines above and below the
text. I have used border=1 in the table tag so you can see the three
cells of this table.
<br>
<br>
<br>
</td>
<td>
<img src="../graphics/1x1.gif" height=1 width=20>
</td>
</tr>
</table>
</BODY>
</HTML>
Those three adjacent cells displayed over the simulated page with the stone mosaic border graphic at the left set the right and left margins and confine the text to the center cell. Adjust the cellpadding in the <table> tag to add more space around all sides of the text. Adjust the spacer graphic width to change the right and left margins. The spacer graphic is that 1x1.gif file in the <img src> tag. The use of a right side cell to set that margin is optional if you don't need it.
Also note that I set the table width to 100%, that is, 100 percent of the available width of your page as displayed on the browser. While you can set table and cell widths to precise pixel values when you need to, it is often useful to allow your table to expand to fill all the available space on the browser when you are displaying text. Different computers may have different screen resolutions, that is, different numbers of pixels per inch of screen that they can display, and a table written with a fixed width may be too large or too small to exactly fit that screen. A page too wide will appear with a scroll bar across the bottom, and it is extremely annoying to have to scroll back and forth to read the complete lines. A page too small will have wasted space on the side and may force your viewer to scroll down to see the whole page.
Use a width as a percentage of available space when the arrangement of your graphics will not be seriously altered, and the text will be arranged to fit the available space. You can use a fixed cell width to set the size of the left and right margin cells and leave the center cell unspecified. The browser will alter the center cell to fill the space not used by the margins, and display the text within it accordingly.
Copy the code for our simulated page into a file called pageform.html and try different colors and patterns in the page. Change the settings for the border and cellpadding to see the effect. Note: to display a tag on your page, you have to use the code < for the left bracket and > for the right bracket, as in <BR> for the line break code <BR>. If you display the pageform.html file with the <BR> in the middle of the text left as it is, the browser will treat it like the other line break codes and put a line break in instead of displaying it as text.
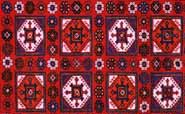
Here is the border graphic multi018bor.gif (shown one-quarter size) to save into your backgrounds folder as you saved the cloth027.jpg file above. You will be saving the full size version of the graphic. Other graphics are available in my Graphics section. Click on the Back button on the browser to return to the tutorial if you go there.
|
|
Try using more than one cell in the center for multiple columns of text like a newsletter. Hint: you can type the full text for the newsletter in one cell to edit it, then add additional </td><td> tag combinations to split the text into additional adjacent cells to make columns of equal length. Add <br> line break tags to the end of the last column of text if needed to increase its length to match the other columns. We'll look at this a little more and practice with tables in the next chapter, Louella's Newsletter.
Last update: August 11, 2001