Changing out mesh objects in
UVMapper Pro using Poser.
This is a tutorial on how to make a swap in a finished object file without
loosing all your coordinates or having to start over. In my particular case
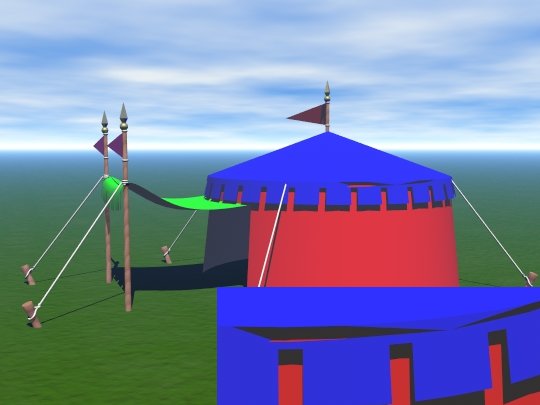
I had modeled the tent pictured below for the Traugs project. I had divided
the 33 mesh objects out and mapped onto three separate pages. I was finishing
the last object when I noticed some peculiarities in the mapping. A quick
render with basic colors confirmed my fears; converting the tent top from
nurbs to mesh objects had produced degenerate faces that were split open.
I had spent hours organizing the original maps. Surely it would be a simple
thing to redo the nurbs top and combine it with the original? It was easy
to create a closed mesh with different polys but in the exact same coordinates
as the original. Unfortunately, there is no way to add an object to another
in UVMapper 2.0. Rhino won’t load obj files, it just saves as. Any attempt
to correct in Rhino leaves a mesh with the mapping undone. I tried saving
the UVs from the mesh I completed and loading them on the corrected Rhino
mesh. UV mapper refused and gave me an error.
Here is the solution to the problem using Poser. It was given to me by mada
in the UVMapper forum. It’s so great I decided to write it in detail.
First create another corrected object in Rhino by converting an earlier nurbs
version of just the tent top object with a higher poly setting. I saved this
out as “tenttop.obj”. Whenever I model I always save sequential versions
of my file, (traugtent1, traugtent2….etc). I try to save at least a couple
of nurbs versions then do my mesh conversions last. I never save over my
work just because I might create an error like this torn mesh that I can’t
recover from.
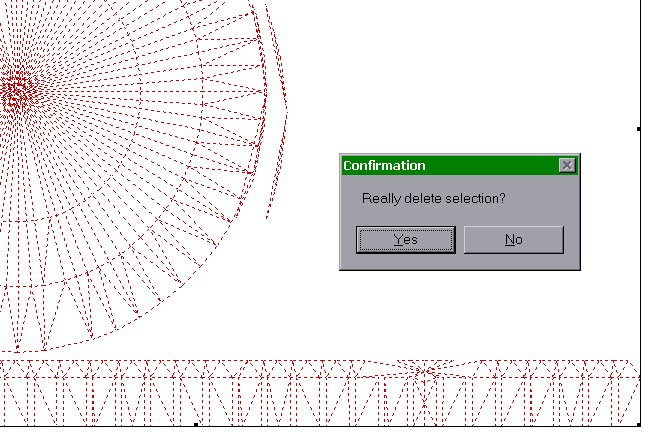
Go into UVMapper and open the mesh with the problem. Select that object only
and press delete. When it asks, “Really delete selection?” press yes.
If you want to check to make sure you deleted the correct mesh go to the
view menu in mapper and pull down to show model (or just press the tab key).
This window of the mesh will appear.
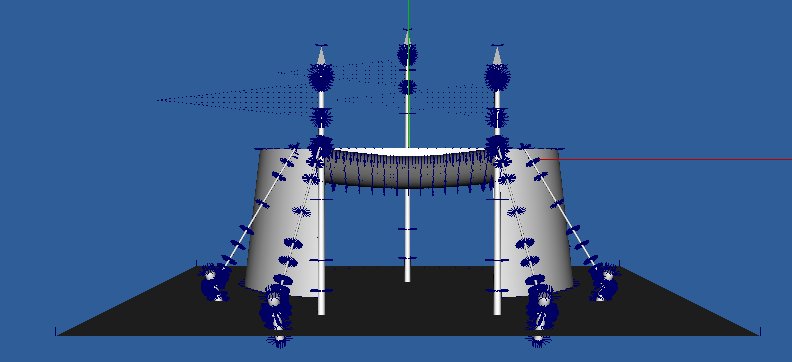
The tent top is gone so the correct mesh was selected. If you find that the
wrong mesh was grabbed or too many meshes, quit without saving. Reopen the
file and try again.
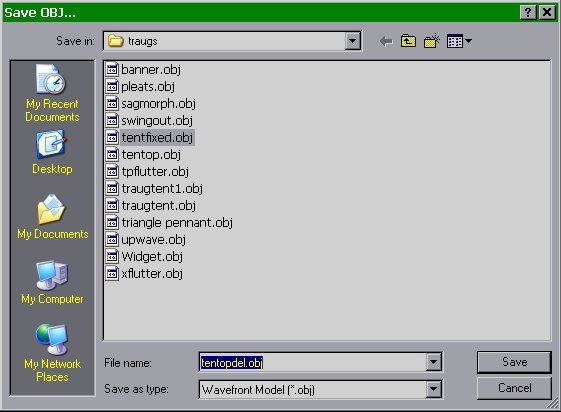
Get out of the view menu by using tab and save the object under another name.
I used tentopdel.obj for tent top deleted.
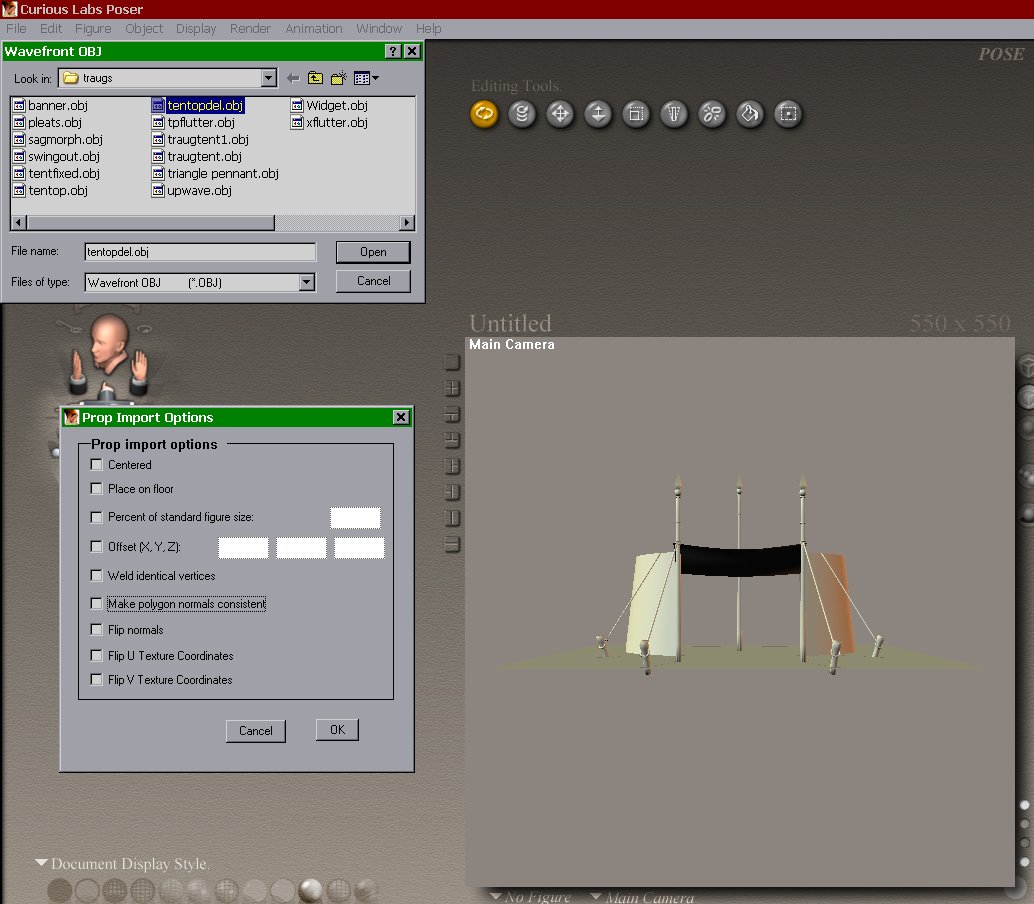
Open poser and delete posernerd. Import the tentopdel.obj with all the Prop
Import Options boxes unchecked. The image below is a composite. All the windows
don't show on the screen at the same time.
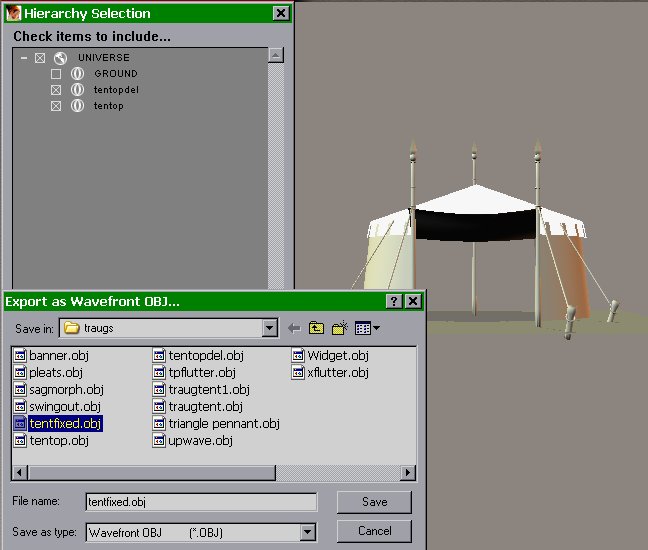
Import the corrected “tentop.obj” using unchecked settings. The object should
load into the correct position with the other mesh. Export the two objects
together as an object file. I named this one “tentfixed.obj”. Another composite
shows the windows you will see.
Go back to UVMapper and open tentfixed.obj. Vola! All the prior mapping is
still intact. The top had not been mapped yet so I positioned this using
the normal mapper tools in about five minutes. I placed it as one of three
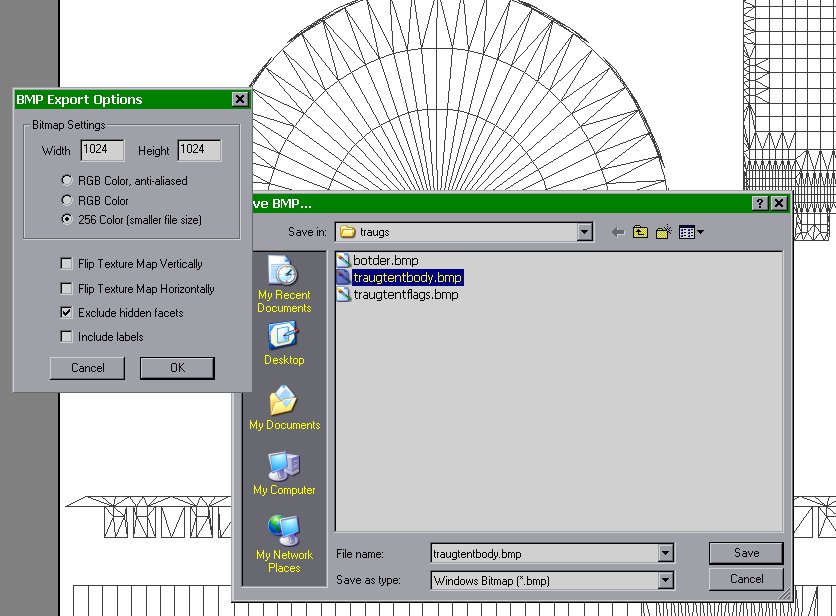
objects on a map of just the top, sides and tent flap. I hid all my other
objects and saved the map with the exclude hidden facets checked.
Finally I saved the object back as traugtent.obj. It might be a good idea
to save this as another name until you can check it to see if the fix worked
correctly.
This is a great technique that allows changes to be made in “Finished” works.
Should you need to change something in beta testing it even allows you to
keep unchanged portions of your finished textures.
John Henry [email protected]