 |
|
|
|
|
|
|
|
|
|
|
|
|
|
|
|
|
|
|
|
|
|
|
|
|
|
|
|
|
|
|
|
|
|
|
|
|
|
YSR TOP END |
|
|
|
(3/1/02) This is the first time doing this...so; hopefully I don't seize my engine at the track. I learned by watching Dave Perez take apart Craig's engine at the track to check why it was losing power. Dave found the rings were overheated due to Craig running 100+ octane race fuel he used for his RC51. Dave said minor modified YSR engines are low compression engines and high-octane fuel would actually rob power by making it run too hot. Luckily for Craig all Dave had to do was replace the rings. He almost destroyed a freshly rebuilt engine. Read more about this in race fuel. Wash your bike before you begin so dirt doesn't fall in your engine when you tear it down! |
|
|
|
 |
|
|
Start by removing |
|
|
|
|
|
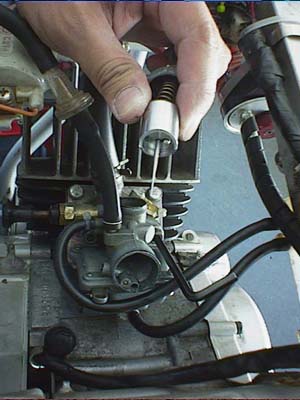
a) gas tank
b) tail section
c) airbox
d) throttle cable |
|
d) catch can hoses
e) intake hose
f) carb
d) boost bottle |
|
|
|
|
|
|
 |
|
|
|
|
|
|
|
|
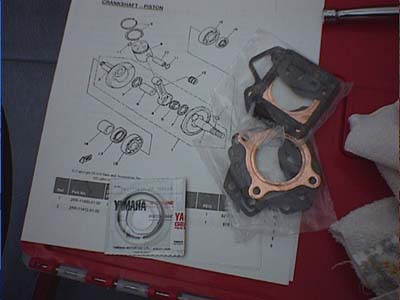
Parts you'll need to replace just the rings (my cylinder is 2nd over) |
|
|
|
|
|
|
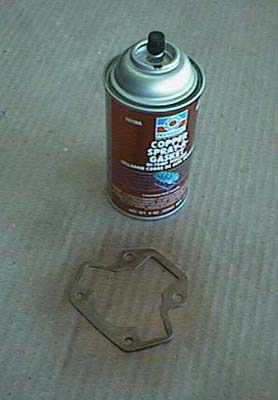
a) 1 bottom cylinder gasket
b) 1 copper head gasket
c) 2nd over (40.5 bore) rings (2W1-11610-20) for Yamaha piston...check yours before ordering!
d) Copper spray gasket |
|
|
| Now remove... |
|
|
|
 |
|
|
|
 |
|
|
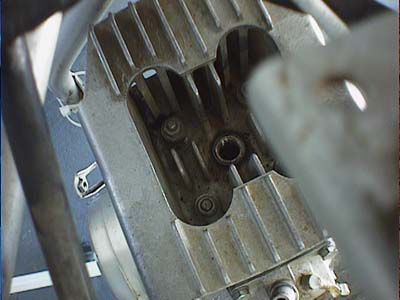
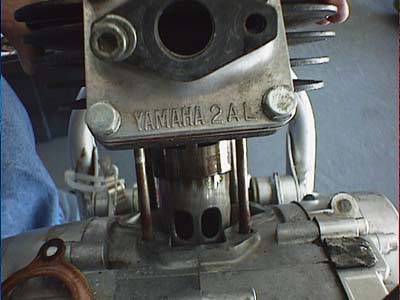
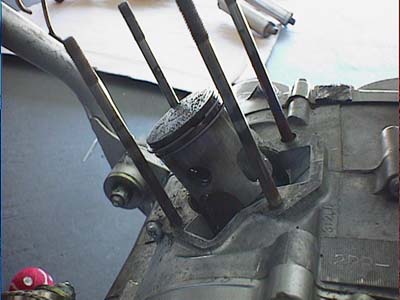
a) the spark plug & cable
b) head (4 screws)
c) cylinder
d) scrape old gaskets off (and use new ones!) |
|
|
|
|
|
|
|
|
|
Important! Always use new gaskets! Don't penny pitch and try to save money. You'll regret it when you have to redo the teardown when your engine is leaking air. Try to keep everything Yamaha. Weisco pistons need to be replaced more often than Yamaha pistons. To race in the 50cc stock or supersport class at PC your engine needs to be 40 (stock), 40.25 (1 over), or 40.50 (2nd over) bore. The next bore size a stock cylinder can take is 44, which makes your engine a 60cc machine. However, you will have to buy aftermarket Weisco junk. See what I mean.... |
|
|
|
|
|
|
 |
|
|
|
|
 |
|
|
|
|
|
|
|
|
Replace your rings |
|
|
|
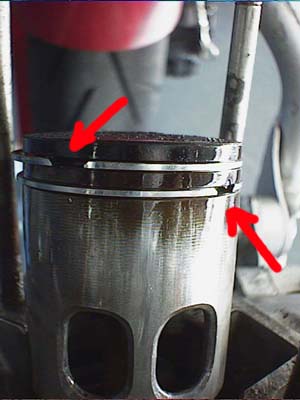
Visually, my Yamaha piston still looked fresh. Since this was my first time, I was scared to clean off the oil and carbon deposits on the piston. Anyway, you should have a package of 3 rings: 2 rings that are visible on the piston and one that is squiggly. Install this one on the bottom groove of the piston. When you install the 2 rings make sure you install it with the "V" shape facing upwards. Also line up the rings marked on the piston with dots (see pict on the right). Now with the naked eye the 2 rings look similar in size. Well luckily you got a 50/50 shot to get this right. Install one ring on the top groove. If it's tight (where you cannot squeeze the ring together in the groove), then this one belongs on the bottom. Both rings should be able to spring in and out freely in the grooves. If not then there's something wrong. |
|
|
|
 |
|
|
|
|
|
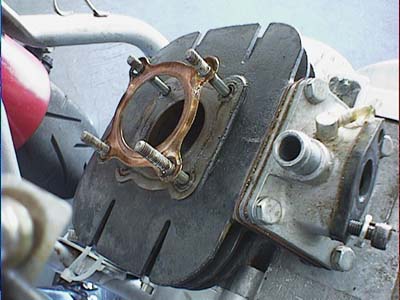
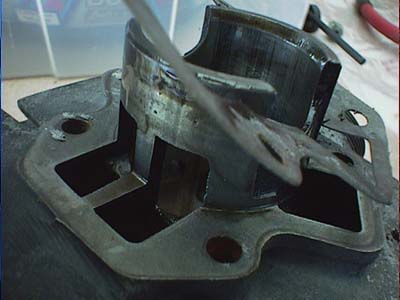
Use copper spray on the bottom gasket |
|
|
|
 |
|
|
|
|
This stuff is great. When DP originally rebuilt my top end, he had a hard time taking the cylinder off. When he put it back together, he used this copper spray on the gaskets. So, when I pulled the cylinder off to change the rings it came off easily. In fact, the gasket stayed intact (see picture above) without having to scrape off the usual excess with a razor that breaks off when peeling off the old gasket. This is a major time saver. |
|
|
|
|
|
|
 |
|
|
|
|
Now put it back together and ride! |
|
|
|
|
|
Reverse the procedures on top. Note when replacing your cylinder over the piston, make sure you depress the piston rings so you bend them or scratch up the cylinder wall. It helps to put oil on your new rings before putting on the cylinder. Remember to break-in your new rings before you haul ass on the track! |
|
|
|
|