I like to share this information with you because in most cases, I also obtained the ideas and description from third parties.
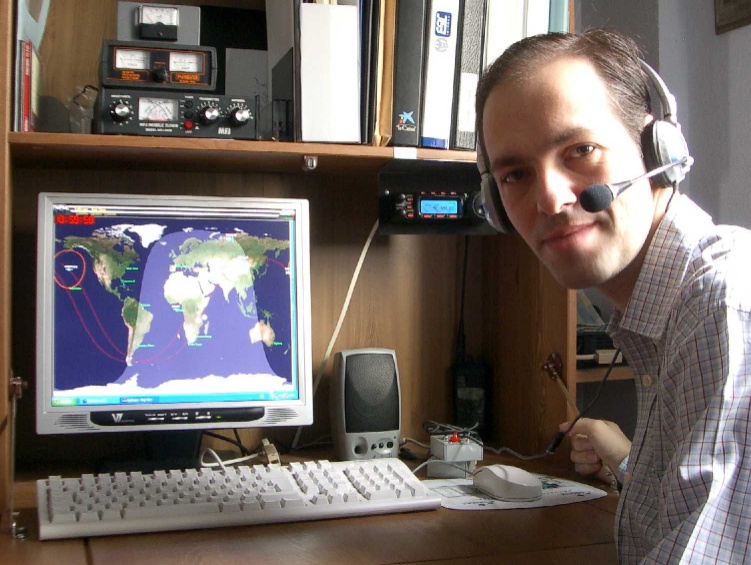
When working with this rig, I thought operation could be improved by adding some features to facilitate handling.
Then I decided to build three things:
a) Front panel remote location
b) External S-Meter
c) External connection for Headset & microphone
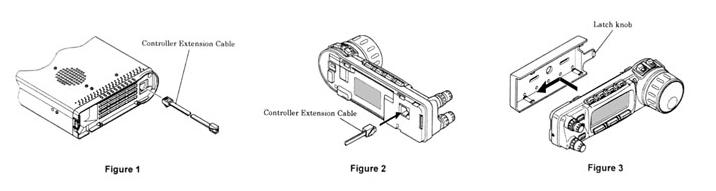
Yaesu's got their own solution for this. A face plate called YSK-857 has been prepared to separate the Front panel from the body of the rig.
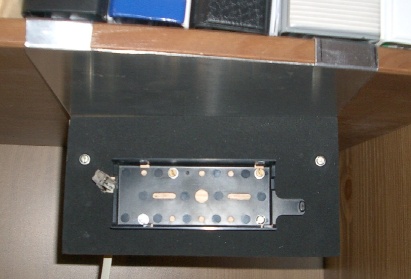
I created an Aluminum Holder to hag it for the top side of my shack.
Here you can see a picture.
Then I added cables compatible with the 857 (RJ12 & RJ45) for the control and microphone.
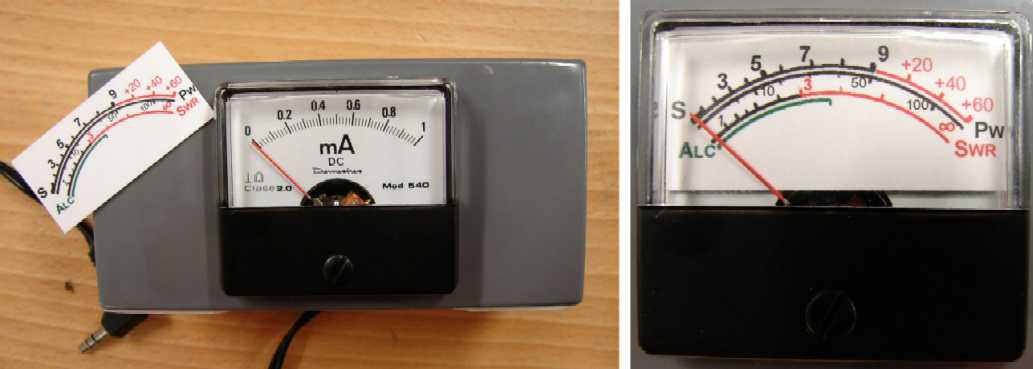
Due to the compact size of the FT-857, the screen is showing everything in a narrow space. I found S measurements hardly readable, but fortunatelly, this rig has a connector to read the values by means of an external miliamperimeter (1 mA at full scale).
This feature can be used both on reception and transmission for different values (S-meter, Power, Volts, ALC...).
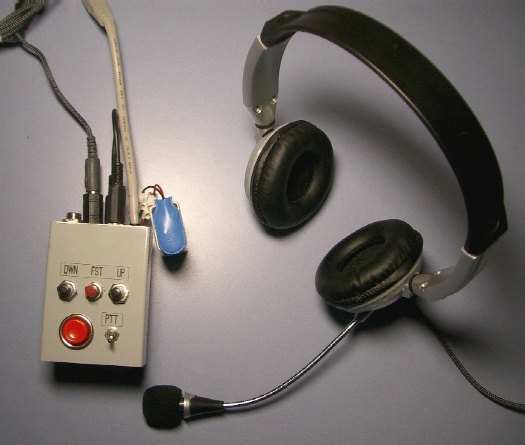
I thought it would be nice having a Headset with microphone connected with my rig. The I decided to build an interface with the actual buttons of the handheld microphone available (FAST / UP / DOWN functions).
I bought a normal PC headset, added a Mic-pre amplifier, and the buttons in two little boxes , and here it's how it looks:
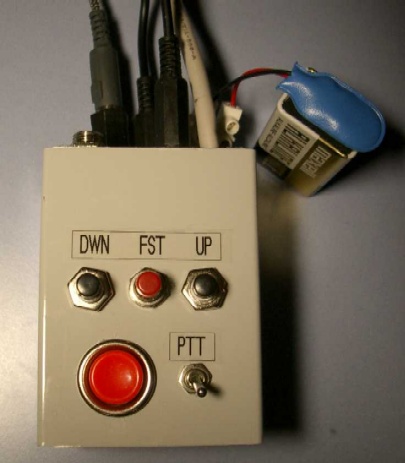
1- FAST
2- GROUND (Control)
3- PTT
4- MIC
5- MIC Ground
6- +5 Volt
7- UP
8- DOWN
I found that wind has a great importance when working in Portable conditions. Not only for the survival of the antennas, but also because it makes raising the mast a complex operation if it is windy and you are alone in the mountain, which frequently is my case.
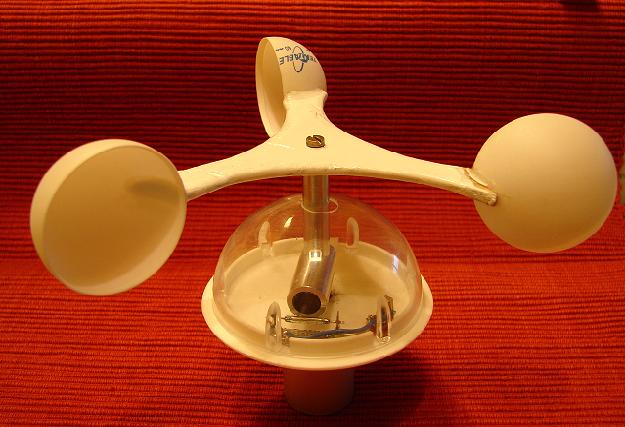
Then I decided to build this simple anemometer. I used simple available things, therefore its construction was easy, cheap, and of course, very funny !
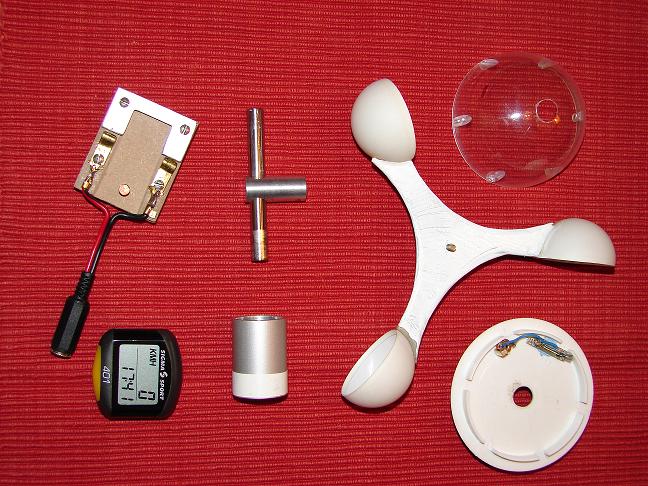
- 3 ping-pong plastic balls (later to cut them by half to get the three white cups),
- a piece of wood to hold the cups glued to it,
- an axle containing a magnet,
- a roller bearing installed inside of a cylinder to hold the assembly,
- a reed switch for the magnet detection (the most technical part, included in the bycicle speedometer set) with a normal mini audio jack for remote connection,
- a transparent plastic spherical cover,
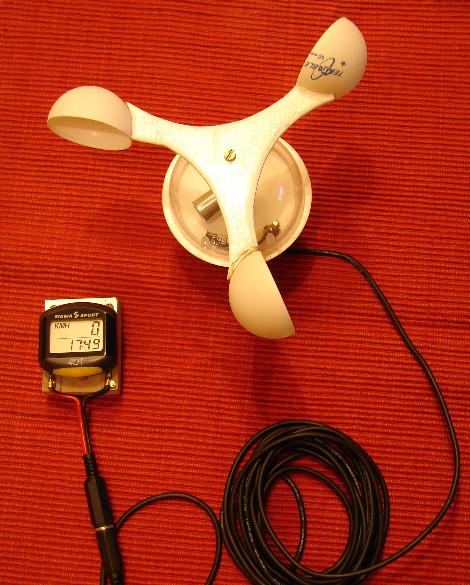
- and last, the digital bicycle speedometer to read the wind speed.
Reed has a mini audio jack to allow connection.
The white cups and its holder are tied to the Axle by means of a screw at the top.
To keep that tighten when operating must have the screw direction reverse to the wind direction by placing the cups in the correct direction !
.
In order to have an accurate wind seepd reading it is necessary to set the appropoate radius factor in the speedometer.
To help tuning it I drove in my car with the anemometer outside so that I could cross check the car speed with the measured wind speed.
It took me several trials to fine tune the correct parameter.