|
Xaggerate Frame
Created May, 2007 ©D'zines by Grace Any similarities to any other framing tutorials, is purely coincidental. Contact me if you have any questions or comments. Depending on the graphic chosen, results may be different. Feel free to experiment with the settings and most of all... HAVE FUN!!
Supplies: Paint Shop Pro version 8 and up (I used PSP version X) Graphic of choice
Filters: Funhouse - Xaggerate Find the filter here. Scroll down to Funhouse II for the Xaggerate Greg's Factory Output - Pool Shadow Filter download is on the same page as the Funhouse
Open Paint Shop Pro - version of choice
Open graphic of choice - Duplicate and close original
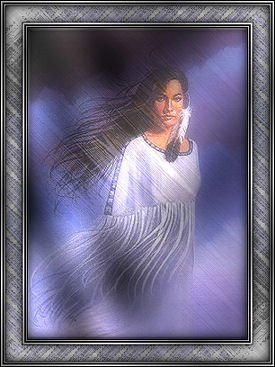
Graphic
1. Image/Resize - no more than 400 pixels wide Resampling using Bicubic, Lock aspect ratio - Checked Resize all layers - Checked OK
2. Layers - Duplicate Close off top layer Activate bottom layer Adjust/Blur/Gaussian Blur – Radius 7.00 OK Open and activate top layer - Lower opacity to around 35 Or whatever suits your taste Layers/Merge/Merge all/Flatten
3. Graphic - Layers/Duplicate Close off top layer Activate lower layer
4. Effects/Plugins/Funhouse/Xaggerate My settings: Waves – 63, 47 Play with the settings to get something you like OK
5. Open and activate top layer Lower opacity to your taste Layers/Merge/Merge All (Flatten
6. Effects/Plugins/Greg's Factory Output Vol II/Pool Shadow My Settings: Diagonal – 59, Center – 53 Horizontal – 58, Diagonal – 50 Horizontal – 73, Vertical – 50 Intensity – 66, Brightness – 110 Play with the settings to get something you like OK
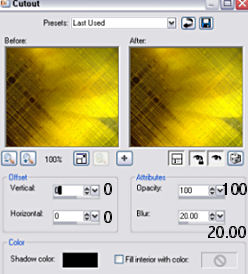
7. Selections/Select All Effects/3D Effects/Cutout Vertical - 0, Horizontal - 0 Opacity - 100, Blur - 20.00 Color - Black Fill interior with color NOT checked
Selections/Select None
Frame 1. Foreground - Gradient of choice or a medium dark color from graphic Background - Black 2. Image/Add Border - 1 pixel Black Image/Add Border - 1 pixel White Magic Wand Settings:
Select white border (You might have to zoom in to select this color)
3. Flood Fill Tool
Flood fill with gradient Selections/Select None
4. Image/Add Border - 2 pixel Black Image/Add Border - 2 pixel White Magic Wand - Select white border Flood Fill with Gradient Selections/Select None
5. Image/Add Border - 1 pixel Black
6. Image/Add Border - 20 pixel White Magic Wand - Select and Flood Fill with gradient or dark color if you're using it Leave Selected!!
7. Effects/Plugins/Funhouse/Xaggerate Same settings: Waves – 63, 47 OK
8. Selections/Promote Selection to Layer
9. Layers/Duplicate Image/Mirror Image/Flip Selections/Select None
10. Lower Opacity of top layer to your taste Layers/Merge/Merge Down
11. Selections/Select All/Float (This should be just the border)
12. Effects/3D Effects/Cutout
OK
13. Selections/Select None
14. Image/Add Border - 1 pixel Black Image/Add Border - 1 pixel White Magic Wand - Select White border Flood Fill with gradient Selections/Select None
15. Image/Add Border - 2 pixel Black Image/Add Border - 2 pixel White Magic Wand - Select white border Flood Fill with Gradient Selections/Select None
And, we're finished! You may add corners, resize, add your copyright information. Remember... if you resize, go back and use your sharpen tool!
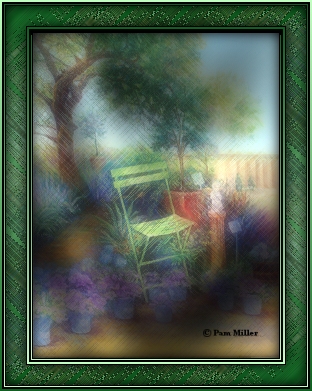
I hope you have enjoyed this tutorial and find it useful. Below is another example by Sharon Jenkins. The graphic is an original painting by Pam Miller, a friend of Sharons. Thanks to both!!
Tutorial written and created by
Grace Williamson, ©D’Zines by Grace. These Tutorials are copyrighted by law. You
may LINK to them only. You may not remove any of the graphics, or HTML within
these pages to reproduce these Tutorials, without the expressed permission of ©D’Zines
by Grace. These pages may not be removed from this website and sent via e-mail,
nor saved, stored or archived in files in YahooGroups or other mailing list
sites, nor may they be translated and placed on another site.
©D'Zines by Grace 2007 |