WOOD POST

This
is my own creation, which isn't very much. It just looks like a
lot.
And it
wasn't because I was bored... I just felt like playing.
Any
resemblance to anyone else's work, is purely coincidental.
Anything you make from this "guide" is owned solely by you.
WHAT YOU NEED:
Paint
Shop Pro - Here (I used
version X)
Alien
Skin Eye Candy 5: Textures Wood -
Here
(Demo to purchase)
Xenofex 2 - can be found at the Alien Skin link
above
(Demo to purchase)
 File>New Image - 25
x 450 Pixels (depending on the size you want)
File>New Image - 25
x 450 Pixels (depending on the size you want)
Raster Background>72 Resolution>RGB/8bits>Transparent>OK
Flood
Fill Tool - Match Mode none>Blend Mode
normal>Opacity 100
Materials
Palette - Foreground>C0C0C0,
Background>Null - Flood fill your image
This is the color I used. Use the color you would
like for your post to be.
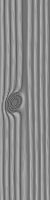
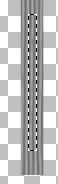
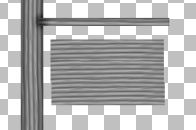
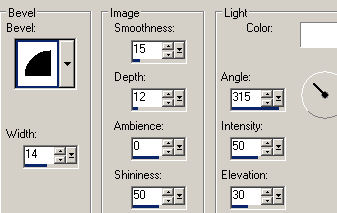
Effects>Plugins>Alien
Skin Eye Candy 5: Texture>Wood
The following is my settings, use your
imagination
Settings Tab - Factory
Default
Basic Tab - Ring
Thickness = 5.43, Cut Offset = 0, Pulp Color = #C0C0C0
Bark Color = #80808, Variation Amount = 11, Variation Roughness
= 18
Contrast = 6, Wood Orientation = 90 ( I wanted mine straight up
and down)
Seamless Tile = I checked it... matter of taste, Random Seed = 1
Knots Tab - Knots: I
chose none, but you can do what you want
Grain Tab - Grain Size
= 72, Aspect Ratio = 11.79, Density = 60, Opacity = 61
Panels Tab - I left
bank
OK **This is the part we
will be working with**
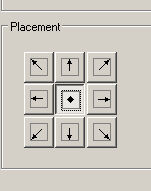
Image>Canvas
Size> 500 X 500 pixels>click on the middle button in the
Placement section to make the image centered>OK
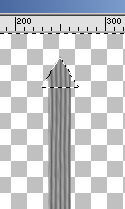
Selections
Tool>Triangle>Add(a taste
thing)>Feather 0 (zero)>Anti-alias checked
At the top, draw out a small triangle to make the
top pointy
To place it better, click on the mover tool, use
the right button on your mouse and move the selection where it
will be placed better. Once you have it placed - Selections>Invert
We are going to erase the part of the top that we
don't need
Eraser
Tool>Round>Size 28>Hardness 100>Step
25>Density, Thickness,
Opacity all set at 100
Erase the parts to make the point without fear of
erasing anything else
Selections>Select None
Selections
Tool>Rectangle>Add>Feather 0
(zero)>Anti-alias checked
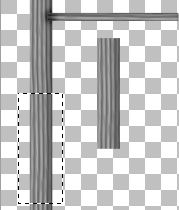
On the post, make out a small selection to make
the sign arm
Edit>Copy,
Edit>Paste as a new layer, Selections>Select None
Image>Free
Rotate>Left at 90 degrees, OK, Move into place next to the post
Back
on the Post again, Selection Tool>Rectangle>Add>Feather 0
(zero)>Anti-alias checked, Select a piece of the post image to
make the actual sign to hang :-)
Edit>Copy, Edit>Paste
as a New Layer
Image>Free Rotate>to
the left 90 degrees
Selections>Select None
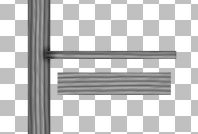
Back
to the Post - Selections>Select all, Selections>Float
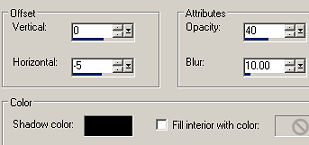
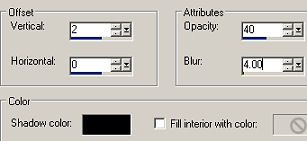
Effects>3D
Effects>Cutout, Repeat changing horizontal to 5
Highlight the small sign arm image with the
following settings
Effects>3D
Effects>Cutout,
Selections>Select None
**I used the Lighten/Darken tool to shade where
the two come together**
Be
sure the small arm of the post is above the post = Layers>Merge>Merge
Down
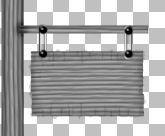
Highlight
the sign layer (should be the top)
Layers>Duplicate, Mover
Tool - Move the two pieces together
Layers>Duplicate, Mover
Tool - Move this together with the others to make a full sign
Close
off the Post so that you have 3 images active - Layers>Merge>Merge
Visible
Optional!!
Selection>Select
All, Selections>Float
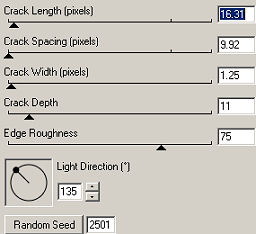
Effects>Plugins>Alien
Skin Xenofex 2>Cracks, OK
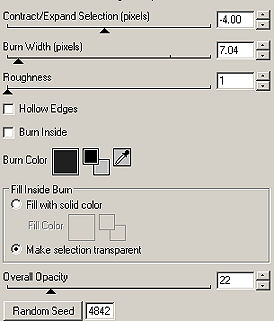
Effects>Plugins>Alien
Skin Xenofex>Burnt Edges
Selections>Select None
We need to attach the sign to the post arm... now
how will we do that??
Any number of things can be used. I used a chain
link that I made and if you want to use it, you can find it here.
Unzip and save to your computer where you can find it. :-) It
will have to be resized several times to be usable here.
Once you have it sized, Layers>Duplicate, Move
into place
Preset
Shapes>Ellipse>Create as Vector>Anti-alias checked
Materials
Palette>Foreground null, Background black #000000
Draw a small circle for holding the links on the
sign
Layers>Convert
to Raster Layer
Effects>3D
Effects>Inner Bevel, I used the Round Preset
Layers>Duplicate
- do this 4 times so you have all you need to hang you sign
Right
click on the top layer merge down till you have all the buttons
on one layer
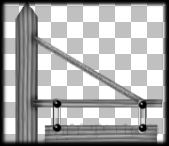
We
need some way to attach the arm again to the post. You can use
anything that fits your fancy here... decorate the way you
want... this part from here is up to you.
Here's what I did while writing this tutorial
I took another small selection from the post,
Edit>Copy, Edit>Paste as a New Layer and rotated to place it
this way.
File>New
Image>50 X 200 Pixels for the second post, if you like.
Use the same fills and settings, but add a knot
to it this time.
Mostly now, it's time to play and decorate the
way you want. I used graphics that I made and Picture Tubes that
come with PSP.