D'Zines by
Grace
Vizros
Curled Ribbon

Our goal... to make a curled
ribbon using Vizros Twist.
SUPPLIES NEEDED
Paint Shop Pro - I should
think any version would work.
Outside filter - Vizros 4

This tutorial is being presented
to PSPMadeEZ as a learning tool,
with my express permission. ©D'Zines by
Grace 2008.
Any resemblance to this tutorial
is purely coincidental.
What you create with this
information, is owned solely by you.
Let's get started...
Have your PSP open
1. File/New/New Image
800 X 800 Pixels
(we want plenty of room)
Resolution - 100.00
Raster Layer Background
16 Million Colors ( 24 bit)
Transparent
OK
2. Flood Fill Tool
Match Mode - None
Blend Mode - Normal
Opacity - 100
Materials Palette -
Foreground - White
Background - Black
Fill your image with black.
**The reason for this is so we
can see what
we're doing. When you get the
hang of this,
then change your colors to fit
your needs.**
3. Click on your Pen tool

Create as Vector
Mode - Drawing
Segment Type - Line Segment

Line Style - Solid, Width -
7.00
Now, don't hate me because I'm
beautiful...
or because I'm using the Pen
Tool... :-)
4. Material Palette
Foreground - White
5. Start from the left or right,
whichever you prefer
and draw a line.
** If you hold down the Shift key
on the keyboard
this will keep it on the straight
and narrow**
6. Object/Align/Center in Canvas
7. Layers/Convert to Raster Layer
8. Selections/Select All/Float/Defloat
**Very important to do this
particular step.
If you fail to do this, you will
end up with a
white background... and/or 2
images that
you aren't after.**
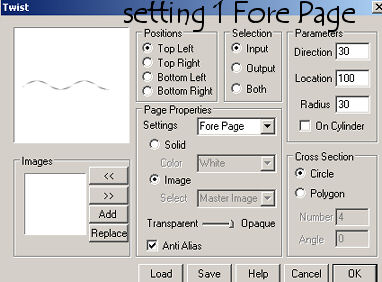
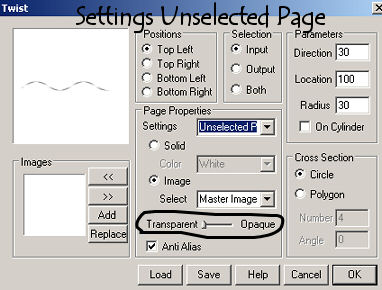
9. Effects/Vizros 4/Twist
These settings are pretty
standard
Note - Position and Selection
are the same
through the rest of this
tutorial.
There is 3 more settings before
you can say "OK" on this.
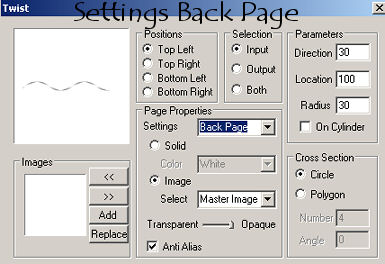
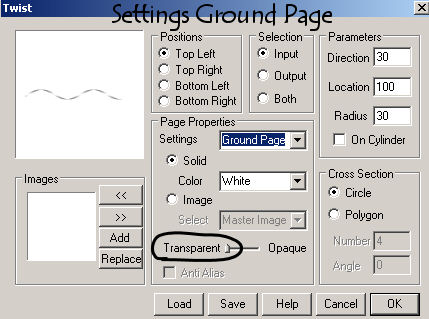
Click on the Page Properties
arrow and you will find 3 more
places to change the settings.
All these have to be set
BEFORE you click OK.
**I do NOT claim any ownership to
these settings.
This is just a guide to get you
started to PSP Play!!**
Then you can click OK
10. Selection/Select None
This hasn't been selected...

This is selected but failed to
Float then Defloat...

And that's pretty much it. Now
you can go play...
especially with the Parameters
section.
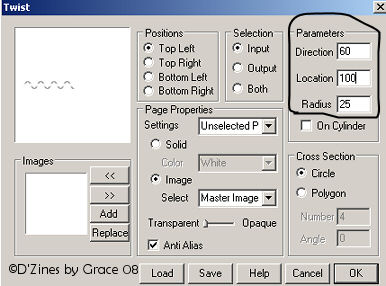
This was made using the above
settings, changing the parameters only.

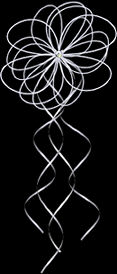
Another example. I put it on a
black
background so it could be seen.
The top part was just playing
around...
not done in Vizros. :-(
I truly hope you found something
useful in this and will continue to experiment with this.
Thanks for your attention!
 Sitemap
Back
E-Mail
Sitemap
Back
E-Mail
Sign
View