|
D'Zines by Grace Pleated Ribbon written by Judy Black, June 18, 2008 Any resemblance to this tutorial is purely coincidental. What you create with this information, is owned solely by you.
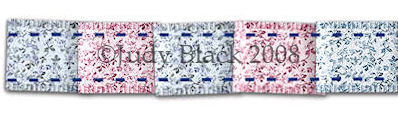
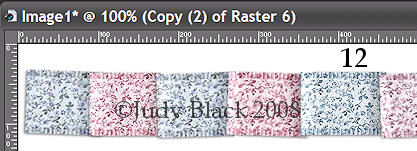
This is what we will be making. No outside filters needed.
SUPPLIES NEEDED Paint Shop Pro Ribbon fill
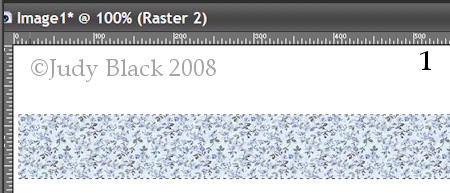
Open a new image 1000 X 200 pixels Make a selection for the size you want your ribbon. Fill with colour or a pattern. Keep selected.
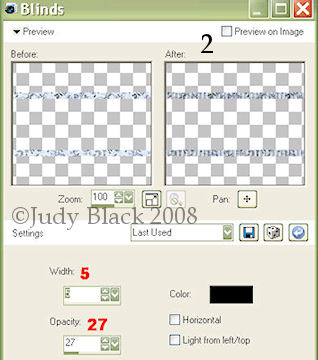
Go to - Selection - Modify - Contract by 8 Selections invert Effects - Texture - blinds
Now just take the blinds effect off the very ends of the ribbon with your eraser or selection tool.
To make it easier for the next steps we will select the ribbon and go to edit cut. Then go to edit paste as a new layer. That is just so that you end up with the ribbon in the middle of your canvas. This makes it easier when lining everything up. Duplicate the ribbon layer but turn it off. This is just in case something goes wrong and you want more ribbon.
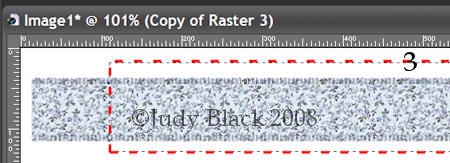
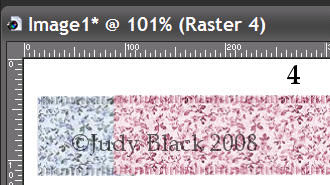
Make a selection about 120 pixels from the beginning of the ribbon like the image below. Go to Edit - cut, then Edit - paste as a new layer.
You will
have something like this then,
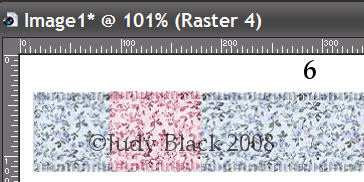
I have colourized mine to make it easier for you to see. Position the bigger piece by overlapping the end just a small amount . You can use your arrow keys to move the section around till it is where you want it.
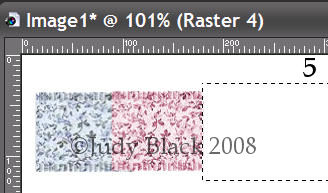
Now make a selection over the newly pasted ribbon about the same size and go to edit/cut, edit/paste as a new layer.
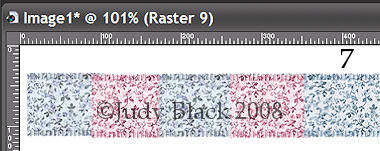
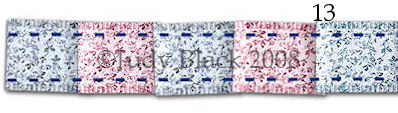
Continue like this till you get to the end of the ribbon and you should have something like this Without the different colours tho :-))) Selections/Select None
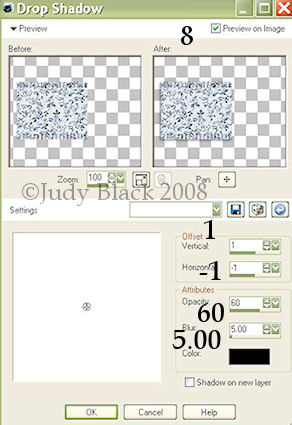
Next we will add a little dropped shadow to each piece of the ribbon. I worked from the bottom up in the layer palette.
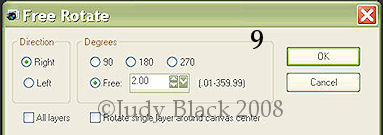
When each piece has a shadow we are going to turn the pieces very slightly. So start at the bottom again and do each layer separately. Leave the first section as it is and highlight the second one. Then go to image - free rotate - use these settings.
Leave the next piece as it is then do the third piece at 2 left. Continue doing this till the end.
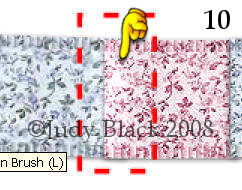
We now need to add some highlight and shadows to the sections so it really looks like it is folded. Use the lighten- darken tool ....... again working up from the bottom layer. We don't need to lighten the first section so start on the second one along. I had my brush set to size 20 and ran it along the edge a couple of times.
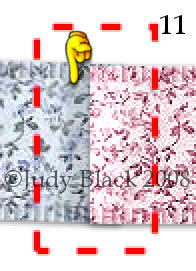
Can't see a big difference on the screen shot but it does make a big difference. When all the pieces have been lightened on the fold, we are going to use the right mouse button and do the shading part. This time you DO need to do the very bottom piece. Same thing here just swipe the brush along the edge a couple of times. Do the little bits that go above and below the overlapping bit as well with some shadow.
So the bit that goes under has the shading and the bit that is on top has the highlight. Now you should have something like this
Now we can merge the layers and add a shadow to the length of the ribbon. Just use whatever you think looks good there.
If you would like some stitching to hold it together, now is the time for that. I used the small dashes in a contrasting colour.
You could use a different stitch or some other kind of fastening. Hope you enjoy making your pleated ribbon. Hugs, Judy If there is a problem with the page or graphics contact me, Grace, here. Return to Tutorials page here.
Thanks so much for stopping by!! 06/29/2008
|