Missie Fish
This is what we will be making... This will be
fun, I guarantee it!!
This tutorial, and
Missy Fish, was
created by ©D'zines by Grace 2008.
Any resemblance to any other like it, is
purely coincidental.
Please do not rip any of it apart and claim it as your own.
Please do not post my tutorial
to any other site, group,
or forum without my permission. Contact me
here
You may print my tutorials for
your own personal use.
What you create from my tutorial,
is yours to do with what you please.
If
there are any problems, let me know.
SUPPLIES NEEDED:
Paint Shop
Pro -
Here
Any version should be okay. I'm using PSP Photo
X2
Knowledge of Preset Shape Tool, Pen Tool and
Nodes
BODY
1. File>New Image - 500 X 500 Pixels,
Transparent or a dark background your choice
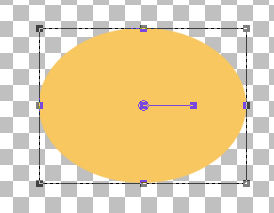
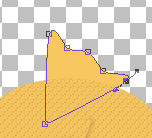
2. Preset Shape Tool>Ellipse, Create as
Vector, Anti-alias
3. Materials Palette>Foreground null,
Background #F7C760, the color I used
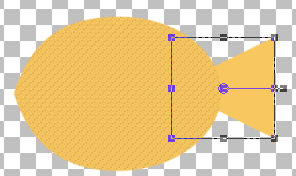
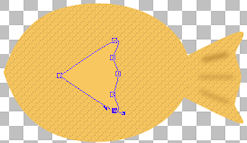
4. Draw out a very fat oval shape
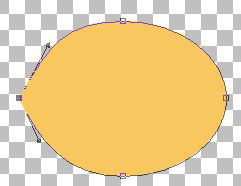
5. Click on the Pen
Tool and the nodes will show up. Pull the arrow handles so it
looks something like the above image
** The reason for this
shape comes from one I saw recently at a Zoo and I thought...
I can make one of those!
**
When you're satisfied with
the way it looks
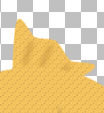
6. Layers>Convert to
Raster Layer
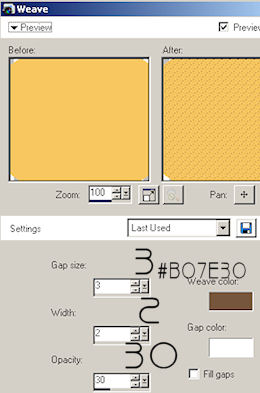
7. Effects>Texture
Effects>Weave
8. Preset Shape Tool>Triangle, Create as
Vector, Anti-alias
Foreground null,
Background #F7C760 or the color of choice
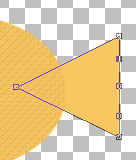
Tail Fin
9. Draw out a rather small triangle - Image>Free
Rotate>90 degrees to the left
10. Layers>Arrange>Move Down ** I like mine this
way so I can see to fit it better **
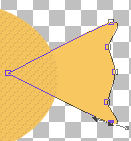
11. Click on the Pen Tool and add three nodes to
the widest part by holding the "Ctrl" key down and left click
three times
12. The middle node - pull out just a bit
The 2 inner nodes - push
in just a bit
Then Right click on each one, Node
Type>Symmetric... that's all you need to do to each one of the
nodes unless you want a different look and that's okay1 :-)
13. Layers>Convert to Raster Layer
14. Apply the same texture weave as before
Shading the Tail Fin
15. Click on the Pen Tool>Create as Vector,
Anti-alias, Point to Point,
Style solid, Width 2-3
16. Make lines for the shading, Layers>Convert to
Raster Layer
17. Adjust>Blur>Gaussian Blur> set at Radius of
3.00
Repeat this step until you have 3 blur lines on
the fin
Layers>Merge Down till the shading and fin are on
one layer
Side Fin
18. Preset Shape Tool>Triangle, Create as Vector,
Anti-alias, Foreground null,
Background #F7C760
19. Draw out a smaller triangle for the gill
** If you're not on the top layer,
Layers>Arrange>Bring to Top**
20. Image>Free Rotate>90 degrees to the left, you
may have to move it into place
21. Apply the same steps for adding nodes and
shaping as was done with the fin
Layers>Convert to Raster Layer
22. Effects>Texture Effects>Weave - Same settings
as before
**You'll see that it seems to have disappeared...
not to worry!! **
23. Effects>3D Effects>Drop Shadow with these
settings
Vertical - 0, Horizontal - 3, Opacity - 15, Blur
- 7.00, Shadow on it's on layer CHECKED!

24. Ever so gently, erase the front part of the
fin shadow so it looks as though it's part of the body of the
fish
Layers>Merge Down - the shadow and the fin are on
the same layer
Shading the Side Fin
25. Apply the same shading as was done to the
tail fin merging down til you have all the shading and fin on
the same layer
Eyes
26. Preset Shape Tool>Ellipse, Create as Vector,
Anti-alias,
Foreground null, Background white #FFFFFF
Draw out a small white oval for the eye
background
Position it where you like and use the Inner
Bevel or one of your choice
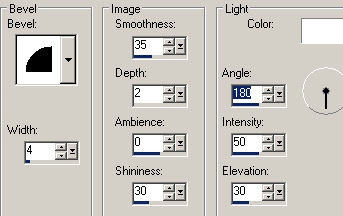
27. Effects>3D Effects>Inner Bevel
Bevel # 2, Width - 4, Smoothness - 35, Depth - 2,
ambience - 0 (zero)
Shininess - 30, Color white #FFFFFF, Angle 180,
Intensity - 50, Elevation - 30
28. Layer>New Raster Layer
29. Paint Brush Tool - Set on round

Size - 10, Hardness - 50, Step - 10, Density =
100, Thickness - 100
Rotation - 0 (zero), Opacity - 100, Blend Mode -
Normal
Foreground black #000000, Background okay...
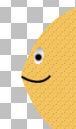
Place a black dot on top of the white of the eye

30. Pen Tool>Create as Vector, Anti-alias, Point
to Point, Line solid, Width - 2-3
Right at the "point" of the front, under the eye,
draw a line to make a smile
31. Right click on one of the nodes, Edit
Type>Symmetric and pull on a handle to make a curve
Top Fin
32. Preset Shape Tool>Triangle, Create as Vector,
Anti-alias checked
Foreground null, Background #F7C760
Draw out a small triangle making sure this is
under the body layer
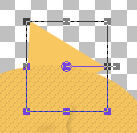
33. With the handle, rotate it to left a bit, add
the nodes as before and edit as before
34. Layers>Convert to Raster Layer
35. Effects>Texture Effects>Weave - settings as
before
36. Add shading as before using the Pen Tool
37. Decorate how you would like to. I think I'll
add a bow
38. If you're finished, go to Layers>Merge>Merge
Visible
Missies Cousin that likes denim. :-) Click on the
fish to send me a message.
Sign Guestbook
View
07/14/2008