|
|
D'Zines By Grace
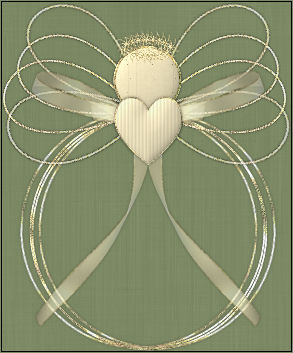
Angel Patty This idea came from a special friend of mine who made one for me. It doesn't do it justice, but you will get the general idea of how to make it. The tutorial is only a guide. There are many ways to dress it up and I hope that you use your artistic imagination to do just that.
This tutorial was written and presented by me, ©D'Zines by Grace, 2008. Any resemblance to this tutorial is purely coincidental. What you create with this information, is owned solely by you. If you are interested in using this for any group, please contact me here.
SUPPLIES I have used Av Bros. Curl Pro 2.2 here This is a demo to purchase. The results can be attained by using Vizros here Unfortunately, this is a purchase for registration. Paint Shop Pro - I'm using Corel Paint Shop Pro Photo X2 Super Blade Pro Optional
An understanding of Vectors, Pen Tool and Bezier Now that we have the supplies and tools in place... Let's get started! Have your Paint Shop Pro open
1. Open a 500 X 500 pixel transparent image. I have mine set at 72.000 resolution RGB at 8/bits... OK
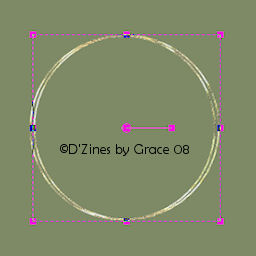
2. Click on Preset tool and find your Ellipse Anti-alias checked, and Create as Vector checked Solid line set at 2.00 width Material palette - Foreground white Background null Draw out a fair size circle. Hold down the Shift key while doing this to keep it round. Object/Align/Center in Canvas Layers/Convert to Raster Layer
3. Selections/Select All, Selections Float Selections Defloat
4. Effects/Plugins/Super Blade Pro Find a preset that you like You can use PSP Effects/Texture Effects/Texture/Sculpture Look for the gold preset You are free to use any substitute for this effect.
5. Layers/Duplicate Using your Deform tool, turn it to one side or the other about 5 pixels then move to the right or left a few pixels We want the effect of wire being circled together
6. Layers/Duplicate Image/Mirror
7. Click on the first circle Layers/Duplicate With the Deform Tool, move this circle down a few pixels NOW... close off the bottom layer (mine is green so I can see!) Layers/Merge/Merge Visible
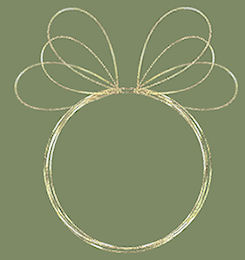
Now for the fun part... The Bezier!! A tutorial by SuzShook will help you with this part if you haven't already tried it. here
8. Once you have your initial Bezier made then you can duplicate and move these "wings" into place.
9. Close off the bottom layer and the merged layer Layers/Merge/Merge Visible
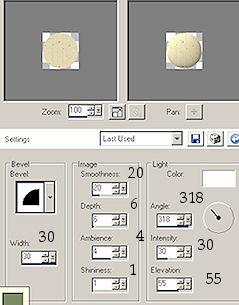
10. Now for the Head Click on your Preset tool set to Ellipse Foreground white, Solid Line set at 2.00, Background to #F1E6BF Draw out a circle... hold the shift key down while doing this so as to get a nice, neat, perfect circle. :-) Place it so it's just on top of the "rings" Objects/Align/Horizontal Center in Canvas
11. Selections/Select All Selections/Float, Selections/Defloat Selections/Modify/Contract - 2, OK Selections/Invert, Selections Float I used the Super Blade Pro preset I used on the wings. You can substitute anything you like, or use the Sculpture in PSP Selections/Select None Layers/Convert to Raster Layer
12. Selections/Select All, Selections/Float, Selections/Defloat Selections/Modify/Contract - 2, OK (No I'm not repeating myself! LOL) I used Filters Unlimited/Photo Aging Kit/Dust and Scratches If you don't have the Filters Unlimited, replace it with some Noise, or maybe the Blinds texture in PSP Do not deselect!
13. Inner Bevel
Selections/Select None
14. The Heart Click on Preset tool, set to Ellipse as before Foreground white, Solid line, 2.00 width Background #F1E6BF I used Heart 1 but any heart will work Draw out the heart Objects/Align/Horizontal Center in Canvas Layers/Convert to Raster Layer
15. Selections/Select All, Selections/Float Selections/Defloat, Selections/Modify/Contract - 2, OK I used the same Super Blade Pro preset as before Again, use something you like or use the Sculpture on it... or not at all! It's a matter of taste!
16. Selections/Select all, Selections/Float, Selections/Defloat Selections/Modify/Contract - 2, OK Add some texture that you like. While selected, add the same Inner Bevel as before except I changed the depth to 3. It gives some depth without being overpowering. Selections/Select None
17. Now, you can add a bow that you have, or make one from Av Bros Curl or Vizros, or just make some string type lines with your Pen tool
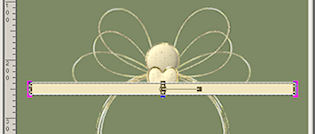
If you are using Av Bros Curl, here's what we will do The Bow 18. Pen Tool set on Rectangle, Solid Line - 2.00 Foreground White, Background F1E6BF Draw out a rather narrow rectangle, side to side Objects/Align/Center in Canvas
Layers/Convert to Raster Layer
19. Selections/Select All, Selections/Float, Selections/Defloat Selections/Modify/Contract - 2, OK Selections/Invert, Selections/Float Again, I'm using my Super Blade Pro preset Selections/Select None Very important... duplicate this ribbon 2 or 3 times.
20. Effects/Plugins/Av Bros Curl Pro 2.2 Settings I used for the Ribbon part Surface Angle - 153, Curl Direction - Up Level - 100.0 Radius - 45 Obliquity - -1 (minus 1) Torsion - 30.0 Optional setting Content Page Opacity - 60% OK There may be some adjusting depending on the size you are working with None of the ribbons/bows will be the same and you don't really want them to be. Place this under the Heart Layers/Duplicate, Image/Mirror
Bow part settings - be sure you are on one of duplicated layers! Surface Angle - 0, Curl Direction - Up Level - 92.0 Radius - 138 Obliquity - 2 Torsion - 0 OK
Place this hafl of the bow to your liking Layers/Duplicate, Image/Mirror
The settings are just a guide. They will vary with the size of ribbon you are using.
21. The Halo Click on the Preset Tool Ellipse, Solid line - 2.00 Foreground F1E6BF, Background null Draw out a small ellipse just above the head Objects/Align/Horizontal Center in Canvas
22. I used the Vector Paint using a brush preset. MUCH EASIER! You can find the script for the Vector Paint, here Just follow the instructions for saving then it should show up in your Scripts Tool bar If your Script Tool is not showing, go to View/Toolbars/Script
I used the Twirly Star Brush with the following settings:
Size - 20, Hardness - 100, Step - 32, Density - 100 Rotation - 0, Opacity - 100, Blend Mode - Normal When your settings are in place, just click on the arrow to the right (that's where it is in X2) and then watch the magic happen!
23. Click on the Vector Layer Layers/Convert to Raster Layer On top layer... Layers/Merge/Merge Down
24. I added some noise to mine to give it some pizzazz Adjust/Add/Remove Noise/Add Noise Uniform, Noise at 43%, Monochrome checked
25. Layers/Merge/Merge All (Flatten) Save your image. I usually save in jpg form.
And unless you need or want anything else, we're done!
Click here to see testers results. :-)
06/19/2008 Page built and designed by ©D'zines by Grace 2003-2008 |
 |