 |
|
|
|
|
|
|
|
|
|
|
|
|
|
|
|
|
|
|
|
|
|
|
|
|
|
|
|
|
|
|
|
|
|
 |
|
|
|
|
|
|
Points and Setups Trow |
|
|
|
|
|
|
 |
|
|
|
 |
|
|
Links: |
|
|
|
|
|
Myth doesn't seperate players abilities based on skill alone. A good unit trade setup can mean the difference between victory and defeat. This tutorial will give you insight into how to correctly distribute points. what units are worth, and how to correctly size up your army.
UNIT TRADE SETUPS
It is important to note that you can hold down the shift key and hit the arrow trade button up or down to quickly remove or add up to as much men as feasible. This is essential for 15 sec pt, 30 sec pt with teams, or just to show off how fast you are =).
If I had a Trow (click to enlarge) |
|
|
|
|
|
 |
|
|
|
|
|
|
|
 |
|
|
|
|
|
|
|
 |
|
|
|
|
|
|
|
 |
|
|
|
|
|
|
|
 |
|
|
|
|
|
|
|
 |
|
|
|
|
|
|
 |
|
|
|
|
|
 |
|
|
|
|
|
|
|
 |
|
|
|
|
|
|
|
|
|
|
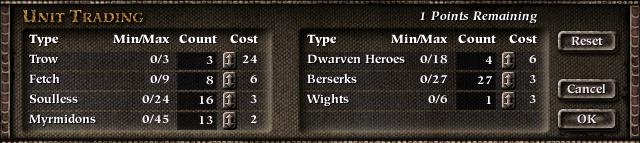
This is the trade that I get when I am alone. It is important to note that this is a VERY fragile and risky trade. You will notice I only get 4 Dwarf Heroes and 8 Fetch. Many players prefer much more than this. Why such a small bridge army? This is because I am simply good enough not to lose them. My 4 Dwarf Heroes and 8 Fetch are more than enough to outlast me the usual 12-14 minute Trow match durations. I prefer instead of bridge units to opt for more Myrimodons and 2 additional soulless. The Myrimodons go up front with my Trow for a quick mini rush with my Trow leading in an attempt to destroy the enemies Trows and sneak in a few Myrimodons in to hack away at the opponents front Dwarves. For most players, I actually recommend the unit setup I get when I am on a team with others: |
|
|
 |
|
|
The difference in this setup is 6 Dwarves instead of 4 and a reduction to 14 Souls instead of 16 and 10 Myrimodon instead of 13. I realize that when others are on my team they are not, well......as good as I am so they may lose the Dwarves. The additional 2 Dwarves are for insurance to last my fellow bridge teammate members a little longer. I still rush with this setup, as 10 Myrimodons are still capable of doing good damage. I have to be a more careful and conservative at how I move my Myrimodons to make up for the shortage of the other 3 I deducted.
It is important to ALWAYS get 1-2 Wights. If you don't get at least a Wight then opponents who have played you consistenly will catch on to this after many games and consider you a "no-wighter" and use the water more to their advantage. More than two wights is too risky and shouldn't even be considered. Use one wight for the north waters and the other for the south waters.
If you don't feel comfortable at all rushing then this setup would perhaps be to your better interest: |
|
|
 |
|
|
This setup completely removes most all the Myrimodons, making any attempts at rushing the enemy obsolete. You would have to pull from your Berserk army pool, which would put you at too much risk afterwards when you complete the rush whether successful or not because more than likely you will lose any berserks that rush with your Trow. This setup also concentrates more on bridging which you will be doing throughout the battle. The Trows and Berserks should never charge past the waters and you should assume a defensive position at all times to protect your Fetch at the bridge. The 4 Myrmidons should act as scouts with two going south and two going north. If they encounter wights, good for them; however, the real goal of the Myrmidons is to act as flankers and to get a few good surprise stabs in at the enemy.
HOW TO SETUP YOUR UNITS FOR A MATCH
This is a replay I made demonstrating where to position all your units. It is important to get used to this positioning and perform it as fast as possible so you will have more time to concentrate at the bridge. The enemy will not wait on you and if you are slow to act then the enemy may run you over with a Trow rush. Practice what I do in this tutorial and take note at what units I move first. Movement priority is essential. I also discuss a bit in the .zip recording below on what I do just as an overview. The recording is 4 minutes long. A lesson on how to perform with your units after this setup will be reserved for another section.
How to Setup on Trow.zip
UNIT POINT VALUES
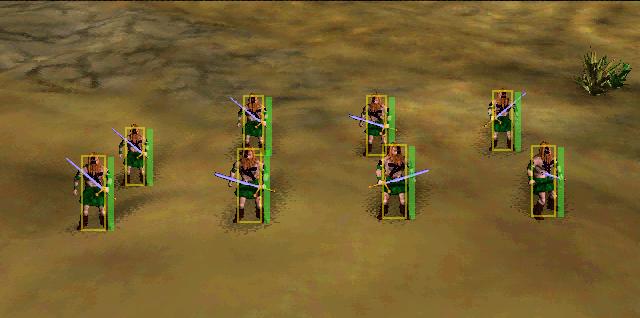
By now, most of you are aware that every unit has a given individual point value portrayed on the unit setup screen. These numbers are given to each unit based on their overall strength and their influence on the battlefield. Memorize the unit values for every unit in Myth. It is important to know when you are considering sacrificing units to claim the lives of your opponents. A sacrifice is in vain if you don't take a greater point advantage over your opponent in place of it. Take a look at these 8 zerks: |
|
|
 |
|
|
Believe it or not, you are looking at a Trow. Confused? Lets take a closer look: 8 Berserks x 3 (each Berserk is worth 3 points) = 24 points. A Trow = 24 points. What I am saying is those 8 Berserks are worth a whole trow! There are many players I see sacrificing too much melee in an attempt to get at the opponents bridge, only to end in vain as all his melee get shot up. Your melee are worth a lot of points! Don't sacrifice them recklessly and don't take too many risks. Needless to say, it is of the utmost importance that you PROTECT YOUR FETCH! If a trow gets to your fetch then it could mean major point gains for him. A Fetch is 6 points = 1/4 a Trow. If he gets in two good kicks at two Fetches then that's a half a Trow right there! Fetch are also quite scarce so don't let that happen.
This concludes the tutorial on Points and Setups. |
|