
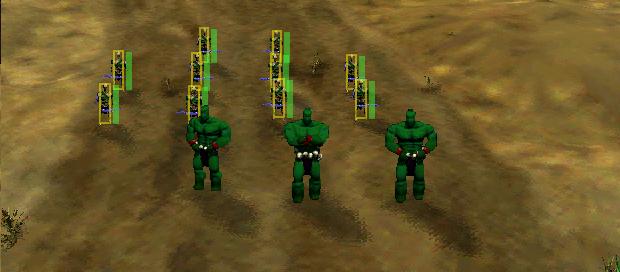
TROW
Ahh the Trow, the big 24 pointer. But what is it that makes this brute so costly? For one his influence on the battlefield is inmeasurable. His mere presence causes his opponents to reconsider many options including rushing, fetching distance, and unit positioning. He is also a very adaptable and dynamic unit. He can block lighting bolts, kick stray melee aside, is fast as hell, can take a helluva lot of damage, and can herd melee. In fact, about the only thing he cant do is make cappuccino Here is how to use him:
- POSITION: Have him at the front line at ALL TIMES. If he is not guarding the bridge then he should be on the opponent's side rushing or distracting.
- WHAT TO ATTACK:: Trow should have their eyes fixed on Fetch, lone melee, and wights to kick. Attempt to reach and kick these units without being pummeled by the enemies own Trow/melee.
- FORMATION: Formation 3 always. The trow are too big that they get too congested trying to squeeze into a close formation.
- KICKING DWARVES: Bet ya didnt know Dwarves blow up when you kick them. Nah didnt think so, SO DONT KICK THEM! ::knows a few who still do:: I dont even care if its an accident, theres no excuse for kicking a duff unless you look for opportunities where the enemy has 2 or 3 of his Trow and or a bunch of melee surrounding one of his Dwarves. Kicking that Dwarf will result in a major dent to your opponents score. Negative damage for him perhaps?
- VS SOULS: Soulless' javelins hurt very badly. Just two souls can dish out severe damage. Your Trows should stay away from the opponent's Soulless at all times. If your opponent starts to pull the souls down the hill to meet your rushing Trow then that's your cue to hightail it out.
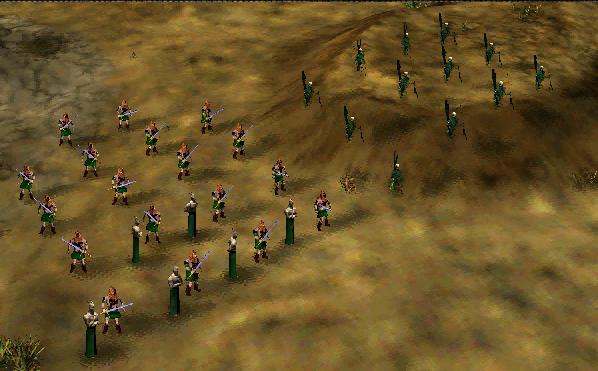
- SUPPORT: Always have melee to support yout Trow in case your opponent does a quick small rush with his own Trow and melee. Myrimodons and or Berzerks will work fine. Put them in formation 3 right behind Trow or close to their left or right sides. Just make sure they dont congest your bridging. The below picture is a good example.
- CARPET KICKING: This will be discussed in a later section.
- FUN STRATEGY: A fun strategy I try to play around with is blocking Fetch lighting so my Dwarf Heroes can kill the fetch. The Dwarves can throw over the head of your Trow to get to the Fetch. The Fetch cannot do this, so they are forced to take the molotov from the protected Dwarf. Be wary though as the Fetch lightining can bend around the Trow to hit the Dwarf if the Trow has just been standing there. There is a much less probability of lightning bend if the Trow steps in the path of the lighting bolt while the Fetch is firing.
- FUN STRATEGY 2: If your unit colors happen to comprise of nothing but black coloring then try putting a Trow in the water. It will camoflage perfectly and force the opponent to keep a watchful eye on the water. This strategy is not all too effective, but it has worked for me sometimes as an element of surprise =).
Soulless are the territory kings, being the only unit who can move anywhere on any part of any map. Their accuracy; however, is a different issue as they couldn't hit the side of a red barn if it smacked them in the face.
-POSITION: Always keep your Soulless on a high plain of elevation. When playing If I had a Trow, always have most of them on the huge hill on your side of the river in formation 3 along the side of the hill but not on the ground to protect your Fetch from enemy Trow rushes as shown below. (Click to enlarge).
- ACCURACY: To compensate for their accuracy, always use a minimum of 2 souls at a time. You may not have noticed, but ground clicking is more accurate than newbie clicking enemy units.
- GROUND CLICKING: Ground click when fighting strafing Soulless and Fetch from afar. The time the javelin leaves your hand is different from the time it hits the ground. The enemy may charge into the accurate ground clicked javelin, thus getting struck.
- VS FETCH: Ground clicking is the key to fighting enemy Fetch as they are hard to hit even if they are standing still due to their skinny body proportion. Good players will also randomly strike anywhere on the ground to repel incoming javelins. If you throw javelins with all your Soulless at once then the javelins will be easy prey to falling dead as the Fetch blasts them away. The key is to multi task your Soulless to throw at seperate times. The Fetch will not be able to react to seperate javelins, hopefully getting hit. If you manage to hit a Fetch just once then it is all worth it. That Fetch will be much easier to kill at the bridge when it eventually comes down to an all out Fetch war.
- DODGING: When fighting other Soulless, learn to dodge their javelins. The enemy A.I. throws the javelin at the designated target as soon as the javeliin leaves their hand. Once it leaves their hand is your cue to dodge. If you dodge before the javelin leaves their hand then the Soulless will adjust his aim accordingly to your movements and may hit you while your moving. It is important not to dodge too much as this slashes some of your opportunities to throw your own javelins. Find a correct balance between throwing and dodging.
- FORMATION: Soulless should always be in formation 3 so they aren't as prone to flying dud's and congestion. They are also more adaptable to throwing in any direction to react to surprises. Many players have used formation 2 when they are cornered on a hill and need to fight incoming enemy Soulless. Don't do this, because then you will not be able to efficiently strafe to dodge other Soulless javelins.
- FUN STRATEGY: The Soulless are so good at moving across the map that they can move off the screen! If done, this will make it impossible for the opponent to get to your Soulless, thus stalling the match until the duration of the game's time limit. There really is no actual strategy in this. It's a cheap way of being a coward that will earn you a lot of criticism.
Fetch are the ultimate in bridge warfare, with their powers placed in check only by Trow, other Fetch, and a few annoying Soulless. Correct handling of the Fetch will result in claiming the bridge, an achievement that will hamper the enemies strategies and force them to fight on the edge, giving you a shitload of damage points as the enemy makes tons of unnecessary risks in an attempt to push you back.
- POSITION: Only 2 fetch should be at the bridge at one time if the enemies Trow are still present. All other Fetch should be protected by Berserks in a formation 3 setup near their respectful hillside with the Soulless on top in formation 3. If only 1 or 2 enemy Trows are present then 4 fetch are perimissible at the front as long as you have Trow and melee support to protect them. When no Trow are present there is no further need to protect your Fetch so you can rid yourself of the Berserk formation 3 setup and move the Fetch up, but keep them close by in case of flanking surprise melee.