|
|
||||||||||||||||||||||||||||||
|
Leitz Micro-Ibsor - MIKAS-M
The Photomicrography Attachment |
||||||||||||||||||||||||||||||
|
By Dushan Grujich, on October 6th. 2013 |
||||||||||||||||||||||||||||||
|
|
||||||||||||||||||||||||||||||
|
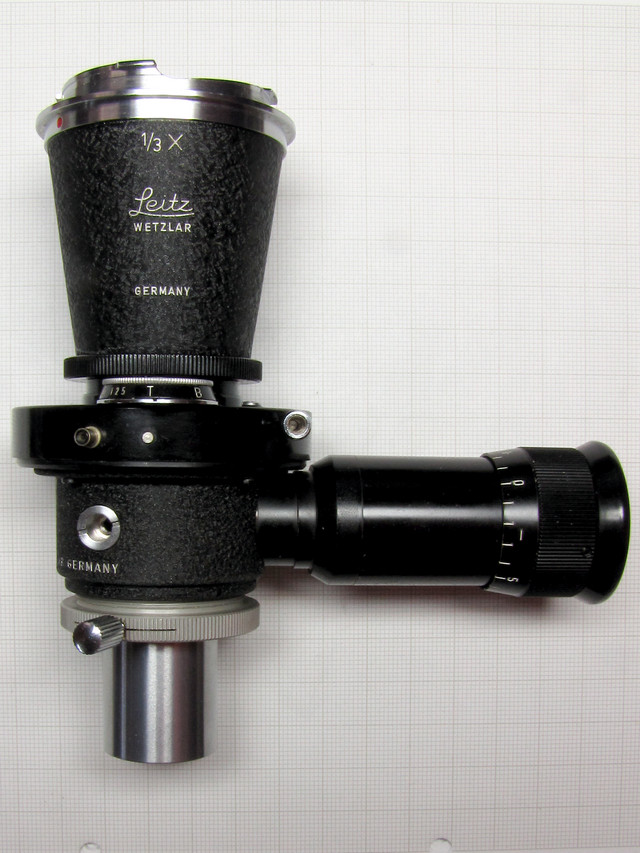
The Leitz Micro Attachment the Micro-Ibsor MIKAS-M with relay lens 1/3X |
||||||||||||||||||||||||||||||
|
||||||||||||||||||||||||||||||
| Before I go ahead and describe Leitz Micro attachment I will attempt to explain the reasons behind going into trouble, and the expense, of acquiring and setting up new means of digital imaging in microscopy when there already was an operational setup. | ||||||||||||||||||||||||||||||
|
|
||||||||||||||||||||||||||||||
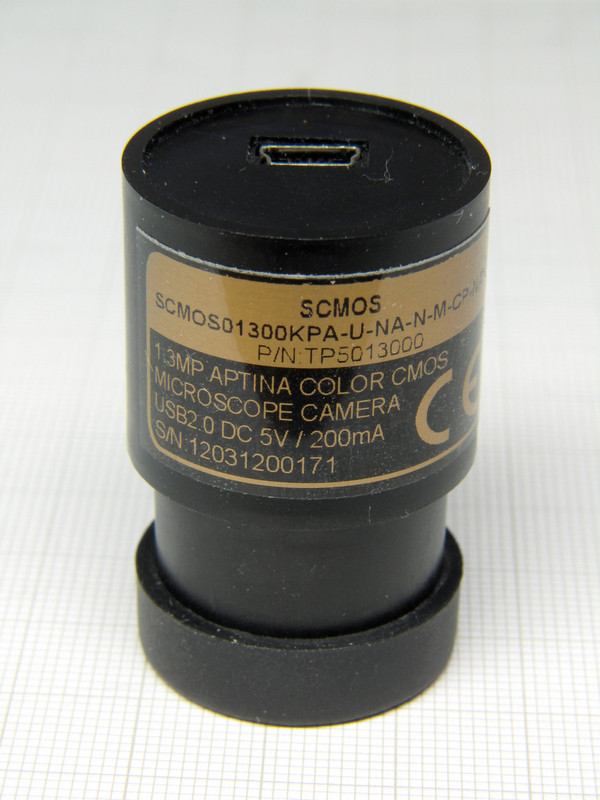
| The image above shows the "inexpensive" Chinese made USB digital eyepiece, 1.3 Mp, seemingly adequate for most amateur applications in microscopy except the most demanding. The closer study of the specs reveals that it is not so, especially when the study is done after the results have proven to be unsatisfactory. My own fault for not doing proper and complete research prior to buying this tool. Problems were encountered after the purchase and during the subsequent use, and they are: low dynamic range, low signal to noise, white balance preset to two values instead of continually settable. | ||||||||||||||||||||||||||||||
|
||||||||||||||||||||||||||||||
|
|
||||||||||||||||||||||||||||||
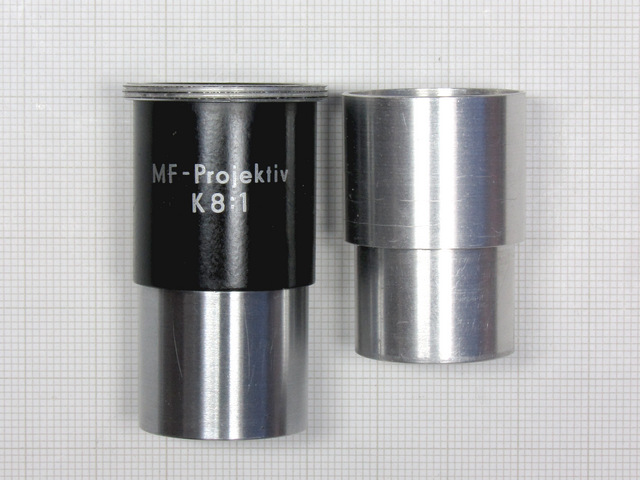
| To improve imaging quality I have used camera in combination with Carl Zeiss MF Projektiv K 8:1 eyepiece, it serving as a relay lens for which I have manufactured a special adapter which fits on top and inside of MF Projektiv and accepts digital eyepiece camera in it. | ||||||||||||||||||||||||||||||
| I am not at all saying that it is impossible to use this digital camera, but the resulting images are of very low contrast without hope of correcting, particularly disappointing when used in bright field imaging. The problem becomes obvious when visually observing the specimen, when one is satisfied with both resolution and contrast achieved with microscope optics and then the recording of it does not show any of it, but only a very poor representation. | ||||||||||||||||||||||||||||||
|
|
||||||||||||||||||||||||||||||
| I have spent countless hours in futile attempts to get better results with the CMOS camera which simply was not man enough for the task. Thus I started looking for the more suitable and affordable means of achieving acceptable imaging results that will record images closer to what I have observed by eye. As a result when the opportunity arose allowing me to get the Leitz Micro Attachment I went ahead and grabbed it. | ||||||||||||||||||||||||||||||
|
||||||||||||||||||||||||||||||
|
Leitz Micro Attachment, Micro-Ibsor MIKAS-M, can be used for both roll
film and digital imaging. It is simply fitted to the microscope like a
normal eyepiece, automatically centred and ready for immediate use. To
use with roll film one needs a Leica or similar rangefinder camera, for
digital imaging one needs a mirrorless camera with a suitable adapter.
All the details of the microscope image are clearly visible through the
focusing telescope obviating focusing the camera, as once set properly
it needs not additional attention. Micro attachment can be focused
accurately at high magnification or with dark objects. The section of
the microscope field of vision is indicated by observing graticule
markings visible in the eyepiece.
The focusing arrangement is fitted with a beam-splitting swing-out prism which can be used to observe specimen through the focusing telescope during the exposure. No difficulties are thus experienced in imaging living or changing specimens. |
||||||||||||||||||||||||||||||
|
||||||||||||||||||||||||||||||
|
|
||||||||||||||||||||||||||||||
|
|
||||||||||||||||||||||||||||||
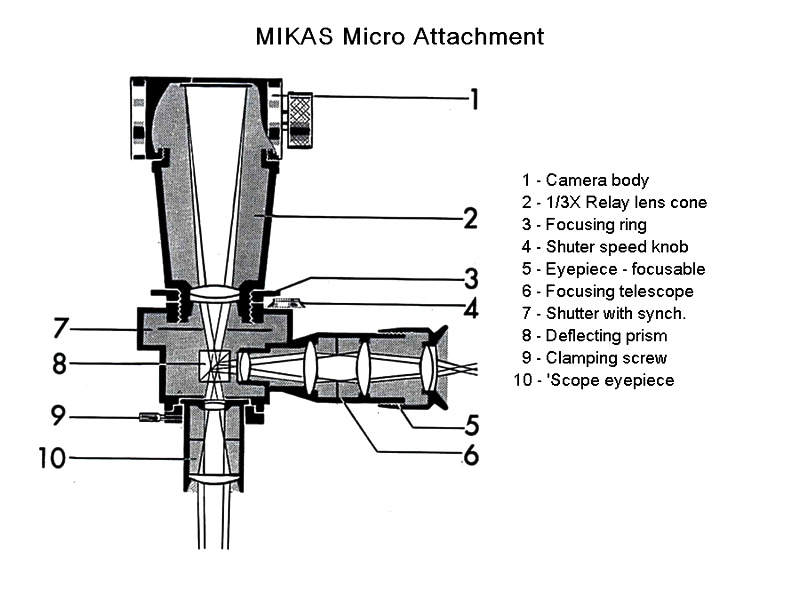
| Diagram showing the optical arrangement of the Micro Attachment device 1 | ||||||||||||||||||||||||||||||
|
||||||||||||||||||||||||||||||
|
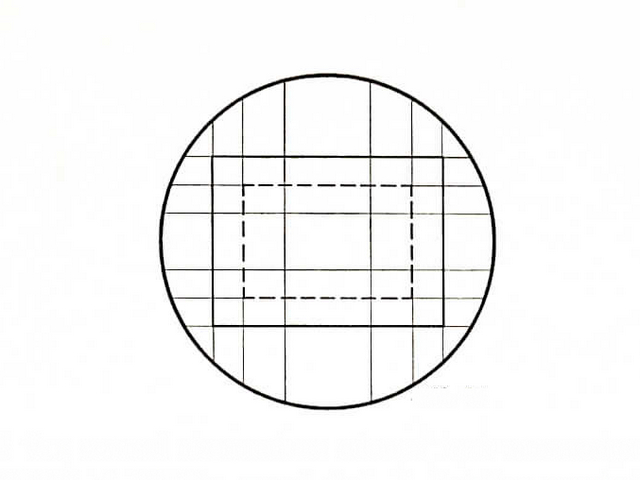
Image above represents view of the graticule, located inside of the focusing telescope, visible through the eyepiece of the MIKAS Micro Attachment. The heavy lined rectangle represents image area presented by the 1/3X relay lens, the broken line rectangle represents image area of the optional 1/2X relay lens and innermost rectangle represents image area of the relay lens 1X which is discontinued. |
||||||||||||||||||||||||||||||
|
|
||||||||||||||||||||||||||||||
|
||||||||||||||||||||||||||||||
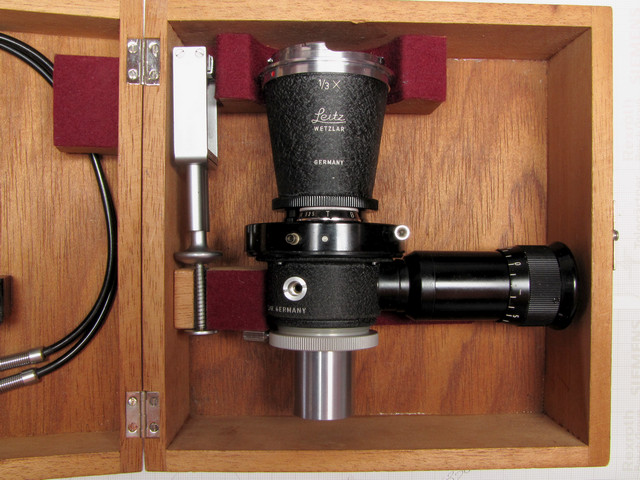
| MIKAS-M Micro Attachment Device in the box with the CALOS accessory and 10X Periplan eyepiece | ||||||||||||||||||||||||||||||
|
||||||||||||||||||||||||||||||
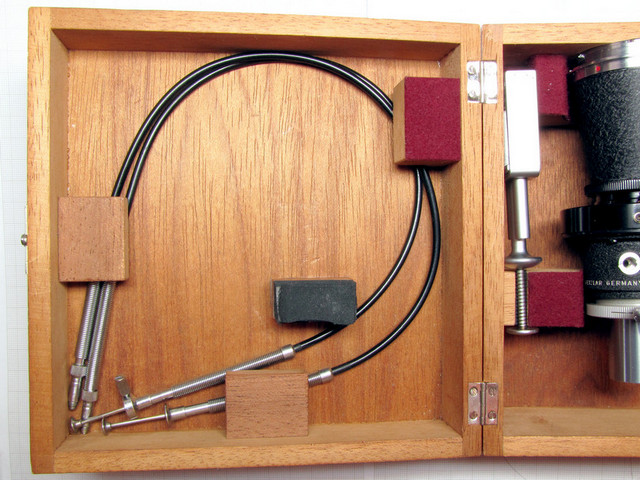
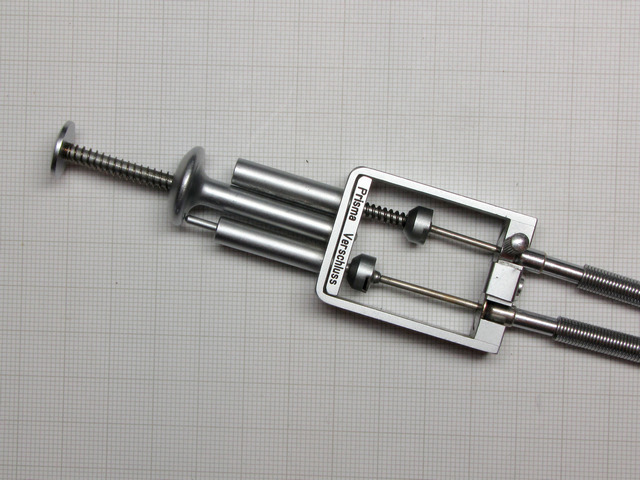
| Two remote release cables, the prism swing actuating cable with a clamping screw, GIIBR, and plain shutter release cable, GIIFT. | ||||||||||||||||||||||||||||||
|
||||||||||||||||||||||||||||||
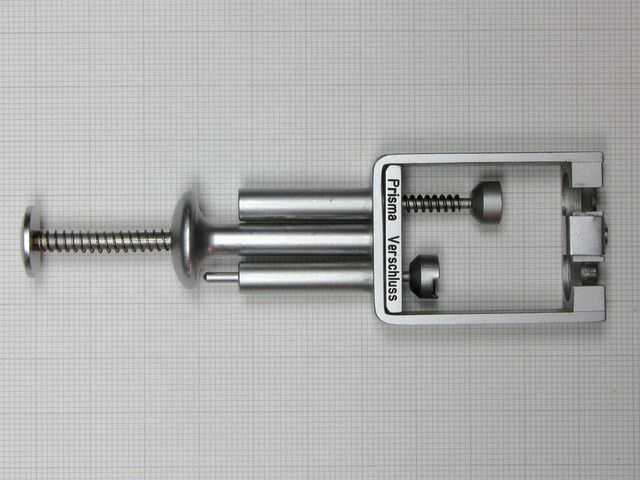
| Shutter release coupling device - CALOS will first swing prism away, out of the light path and then release the shutter. | ||||||||||||||||||||||||||||||
 |
||||||||||||||||||||||||||||||
|
|
||||||||||||||||||||||||||||||
| The two shutter release cables, mounted in trigger device CALOS, each one in its place | ||||||||||||||||||||||||||||||
|
|
||||||||||||||||||||||||||||||
|
||||||||||||||||||||||||||||||
|
||||||||||||||||||||||||||||||
|
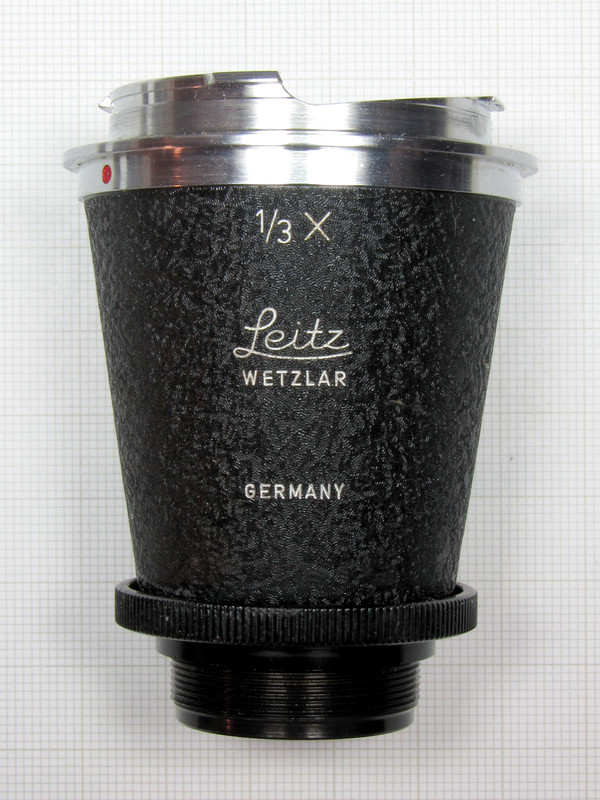
The relay lens cone, GIIEF-M, mounts onto the camera body in place of the camera lens, and it screws into the MIKAS, on top of the shutter enclosure. The position of the relay lens in relation to the eyepiece, is adjustable by about � 2 mm (~4mm total), not influencing relay lens distance from the film plane, thus allowing use of different eyepieces. Adjustment is achieved by regulating depth that the cone is screwed into the MIKAS body. When adjusted, it should be locked into position by use of counter nut, the knurled collar, seen at the bottom of the cone. |
||||||||||||||||||||||||||||||
|
The Micro Attachment device was designed to be used with a simple rangefinder roll film camera body, made by Leitz, with image area of 24 mm x 36 mm. Due to its design rangefinder camera has rather small distance from the lens mounting flange to the roll film emulsion plane. Leitz made Leica, with M39 thread lens mount, has flange to film plane distance of 28.80 mm. The later, M series, bayonet mount version, has somewhat shorter flange focal distance of 27.80 mm. DSLR cameras use mirror to bend light path and then project it through the pentaprism into the viewfinder. Because this kind of arrangement requires more space, flange focal distance is inherently larger than found in rangefinder cameras, often being 40 to 60 mm. To use a DSLR camera one would need a relay lens cone of different length, a fair bit shorter than what Leitz made. For example Canon DSLR cameras have flange focal distance of 44 mm, so one would need to have a relay lens cone approximately 36.55 mm long to enable use of the Canon DSLR for imaging in combination with Micro-Ibsor device. Unfortunately such short relay lens cones are not available. Of course, there is another solution to this problem short of having relay lens cone custom made for a particular DSLR camera. One can use a mirrorless digital camera with removable lens. Such cameras do not use mirror nor pentaprism, hence their flange focal distance is substantially shorter. One example of these cameras is Olympus E-PL1 MFT (Micro 4/3) lens system, whose flange focal distance is 20 mm which will permit use of the existing relay lens cones. We must also take into account that cones are equipped with either M39 thread or M bayonet mount so we also need an adapter to fit the cone to the camera. In this case using 1/3X cone we have difference of 7.80 mm which the adapter spans without a need for an extension tube. Such adaptors are available commercially, they are professionally made and are easily available. |
||||||||||||||||||||||||||||||
|
||||||||||||||||||||||||||||||
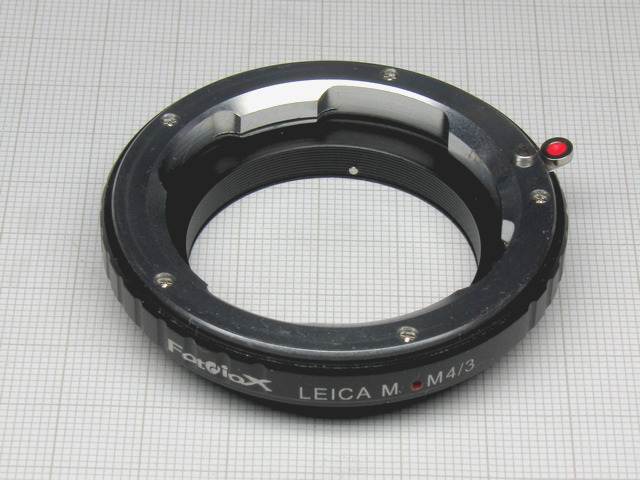
| The adaptor required to fit Leica M Bayonet lens to Olympus E-PL1 body with ability to focus the lens at infinity. | ||||||||||||||||||||||||||||||
|
||||||||||||||||||||||||||||||
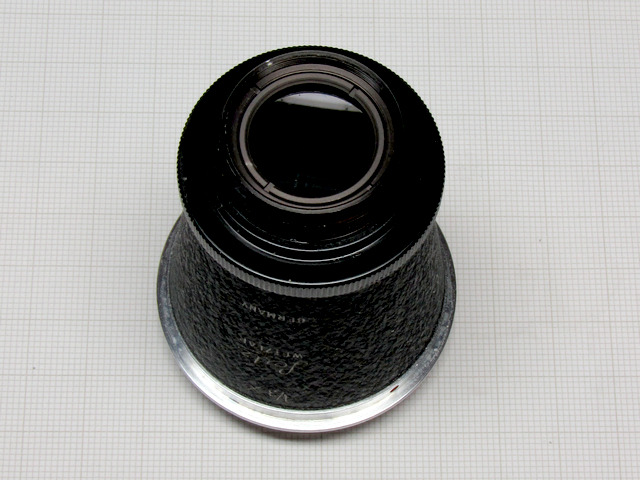
| The bottom side of the cone showing the relay lens | ||||||||||||||||||||||||||||||
|
||||||||||||||||||||||||||||||
|
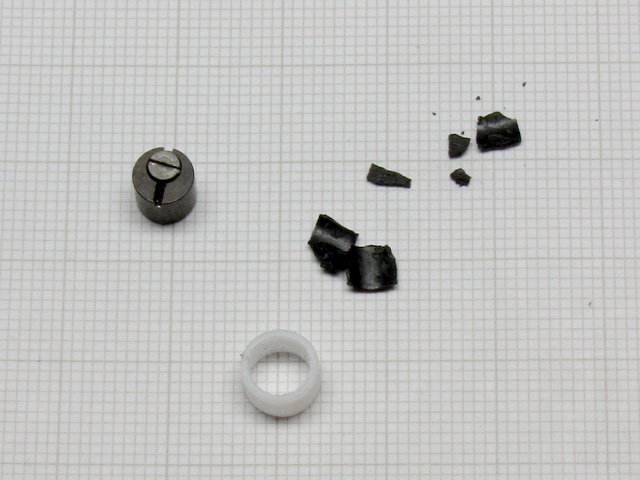
While assembling and testing device I have noticed how the image is shifted to one side. That, of course, could have been caused only by prism being shifted to one side. When I opened the prism enclosure cause of the fault became apparent immediately. Device was designed in such a way that prior to releasing shutter, prism is swung out of light path in full, to adjust exact position of the prism when it is positioned in the light path there is a small roller mounted eccentrically which when rotated shifts the prism position slightly one way or another, towards or away from the light path centre line. The roller had a thin rubber sleeve which, now aged, has become hard and eventually fell apart. Image above shows the excentric roller with its fixing screw, the remnants of the rubber sleeve carefully removed from the prism enclosure, and a new sleeve made of PTFE which I have turned using my watchmaker's lathe. |
||||||||||||||||||||||||||||||

|
||||||||||||||||||||||||||||||
| Here we can see the roller, with new sleeve, fitted back into the prism enclosure and the prism position now adjusted | ||||||||||||||||||||||||||||||
|
||||||||||||||||||||||||||||||
|
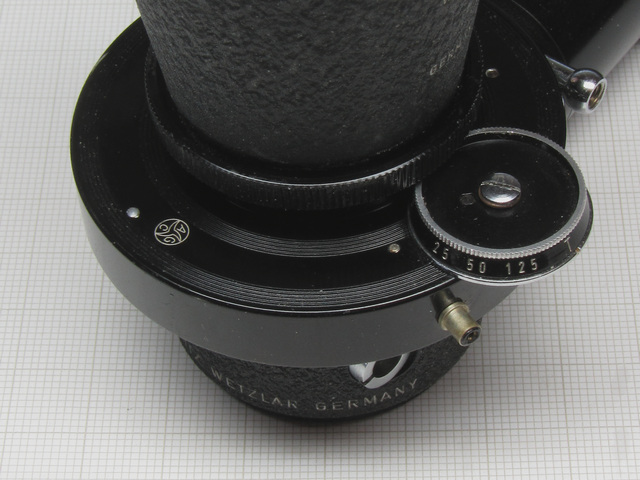
The above image shows shutter speed selector knob mounted on top of the Ibsor shutter, made by Alfred Gauthier, mounted right above the prism enclosure. Also, to the left of shutter speed selector there is a flash receptacle, fully synchronised with the shutter operation for use with flash illumination2 if and when needed. Personally I am not too impressed with the performance of this type of shutter. Why of it is very simple to explain, it is a self cocking shutter. What it means is that the action of releasing the shutter is a two part event. The first thing happening by pressing the remote wire release button is cocking the shutter, and the second is the actual shutter release. The combined action creates a lot of unwanted vibration, so to avoid vibration one must take care to press the activating button almost all the way in, to cock the shutter first, and then after all vibrations expire, push the button all the way to release the shutter. It takes a little practice to get used to it and then it goes on automatically. |
||||||||||||||||||||||||||||||
|
||||||||||||||||||||||||||||||
|
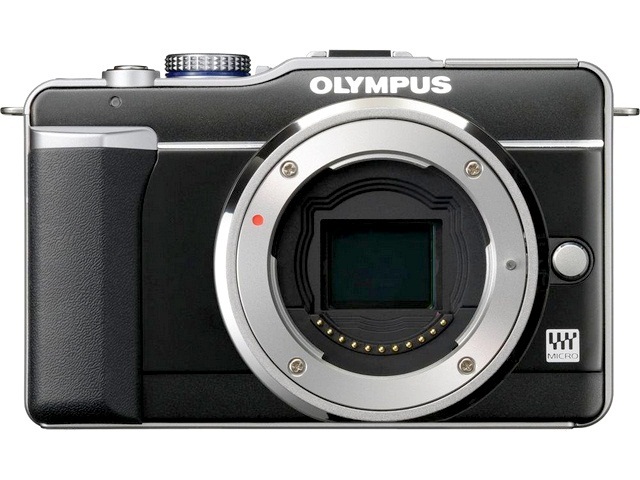
Olympus E-PL1, mirrorless 12 Mp body is the camera which I have chosen to use in combination with Micro Attachment. Although, one thing must be said about it, this model has no means of using remote shutter release, wireless or cable, something that I have discovered only after I have bought the camera. Thus, I use it with shutter set at 3" to 5" with a delay of 2", long enough for all vibrations to expire and plenty of time left to release the MIKAS leaf shutter. One of the great features of this camera is its ability to zoom in the focus area, 7X, 10X or 14X, for fine focus check or for manual focusing. It is quite inexplicable why has Olympus dropped the remote shutter release function only from this particular model out of all the PEN series. One lives and learns that nothing can ever be taken for granted. |
||||||||||||||||||||||||||||||
|
||||||||||||||||||||||||||||||

|
||||||||||||||||||||||||||||||
| top | ||||||||||||||||||||||||||||||
|
Stats Of Visitors |
||||||||||||||||||||||||||||||