| DIY Phase Contrast | ||||||||||||||||||||
| By Dushan Grujich, on June 7th. 2013 | ||||||||||||||||||||
|
| ||||||||||||||||||||
| DIY Phase Contrast Condenser | ||||||||||||||||||||
| ||||||||||||||||||||
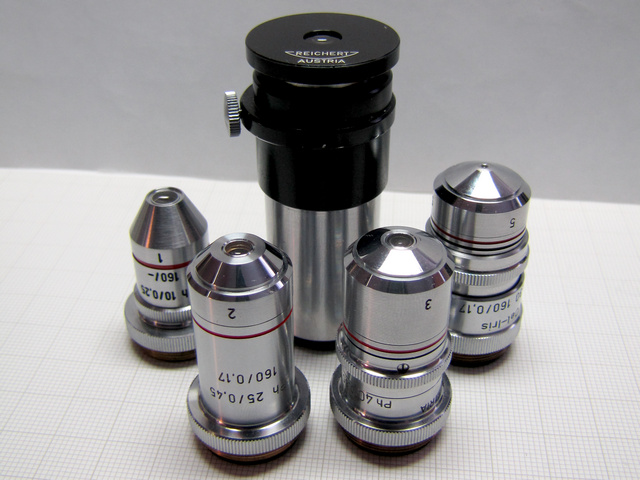
| The partial Reichert PC set - four objectives and a PC telescope, no condenser | ||||||||||||||||||||
| ||||||||||||||||||||
| Specification of the PC objectives | ||||||||||||||||||||
|
|
||||||||||||||||||||
| Reichert Dark Field Condenser | ||||||||||||||||||||
|
Obviously I needed to start somewhere. Logic dictated that I needed a condenser capable of centring and holding the annuli which I did not have and needed to make. At about the same time of acquiring the objectives I also acquired a Reichert dark field condenser, itself not suitable as a condenser for phase contrast, but, its centring mechanism is quite so. |
||||||||||||||||||||
|
| ||||||||||||||||||||
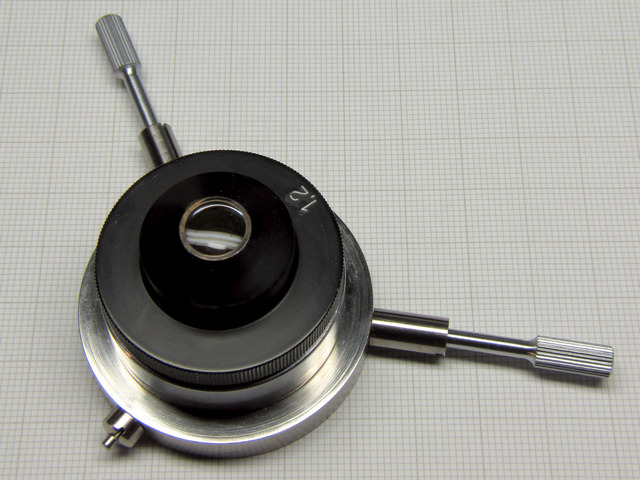
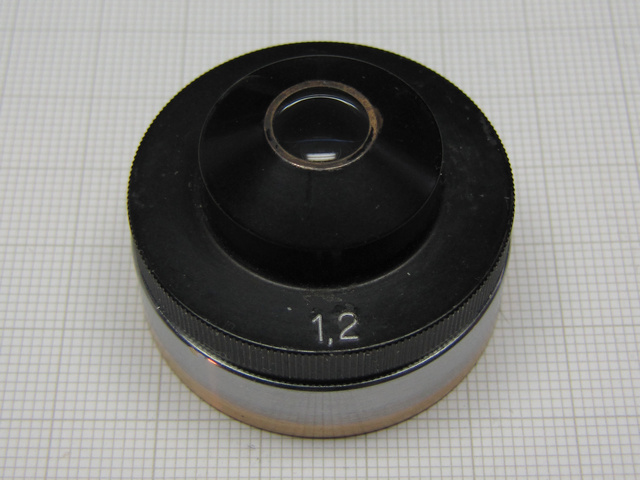
| Reichert DF Condenser base | ||||||||||||||||||||
|
Of course, idea was not to destroy the nice and useable condenser, after giving it a serious thought I've decided to go ahead and use the mounting and centring base of the DF condenser as a base for phase contrast. Now I needed to find a suitable condenser that can easily be made to fit the base. | ||||||||||||||||||||
| ||||||||||||||||||||
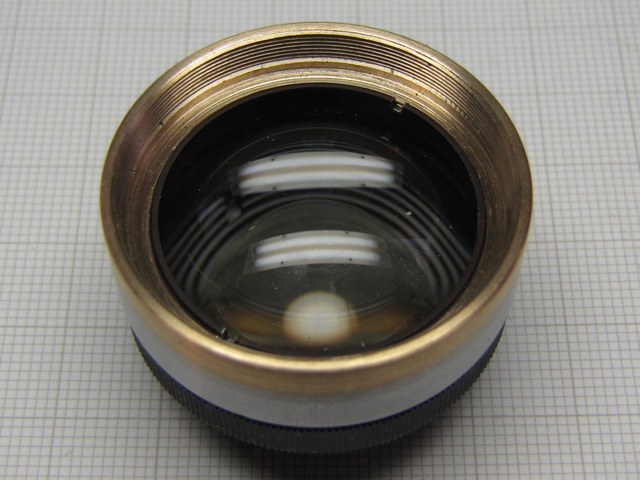
| Choice fell onto the Zeiss NA 1.2 condenser which had a non standard mounting base, needing only a slight modification | ||||||||||||||||||||
| ||||||||||||||||||||
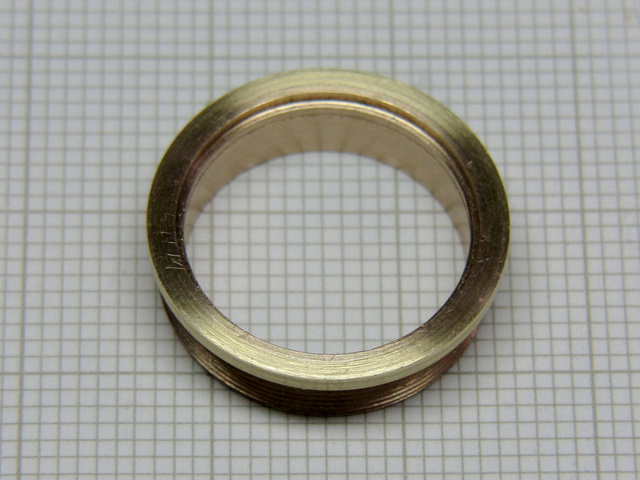
| The bottom view showing the modification that consisted in removing the mounting flange and turning a new thread that corresponds to the Reichert base. | ||||||||||||||||||||
|
The only thing that was left for me to do was to make the required annuli. In order to make them I had first to establish the exact size that annuli had to have to be useable with the objectives I had. Several methods were suggested in various articles1,2,3 published in Micscape magazine, the most usable method was suggested by Tony Saunders-Davies3 which is a method that I have adopted, although I've introduced a change of a measuring tool and the way it was applied. Using a calliper or a divider is quite suitable but there is slight difference in measurement that appears when one moves the instrument up or down along the optical axis. I placed a thin piece of glass in the exact plane, where the annulus would be placed, providing a single reference plane for attaining accurate measurements. Following the idea it was only obvious to use a graticule, instead of plain glass, which is precisely graduated in fractions of a millimetre providing repeatable measurement accuracy of about 0.1 mm, more than ample as the correction can be achieved by slight vertical repositioning of the condenser. Developing method further, in order to precisely measure required annuli diameters, I have made a holder which houses the glass graticule to allow measuring the rings of each objective by the use of the phase telescope. The same holder will in a later stage hold one of the annuli providing the means of accurate and repeatable placement requiring minimal centring readjustments. In his article, Tony Saunders-Davies3 suggested making the ID of the outer ring and the OD of the inner stop piece a tad bit larger than what was actually measured, I've followed the suggestion modifying the sizes by 0.1 mm. | ||||||||||||||||||||
|
| ||||||||||||||||||||
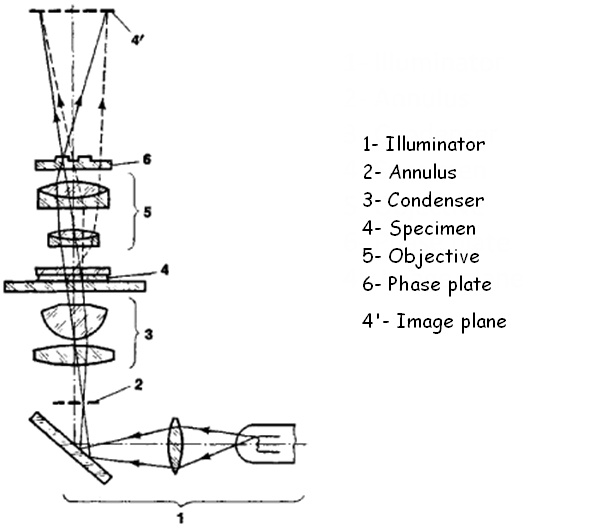
|
Diagram of a typical phase contrast system | ||||||||||||||||||||
|
| ||||||||||||||||||||
|
Also, it is important to note that the
iris diaphragm with annular opening - the annulus - is installed at the front
focus of the condenser as shown on the diagram. This is the same plane where
we place the measuring graticule and it
should also be the Köhler position for the condenser with specimen in focus
(the field diaphragm edges should be in sharp focus when fully stopped down). | ||||||||||||||||||||
|
If there are concerns about the reduction of the NA of the condenser by reduction of the maximal aperture caused by the construction and the geometry of the condenser centring mechanism located in the mounting base let me say that by the actual measurement it was verified that there is no condenser NA reduction caused by it. I have measured the NA of the condenser with the aperture reduction caused by the annulus ring #5 ID 13.0 mm (intended to be used with the #5 objective 100/1.30) inserted in the condenser, the measured condenser NA was 0.69 dry and with the immersion oil bridge NA is just above 1.0 i.e. 1.04. With no annulus inside of the condenser, the maximum measured dry NA was 0.80 and with the oil bridge the full NA of 1.2. | ||||||||||||||||||||
|
||||||||||||||||||||
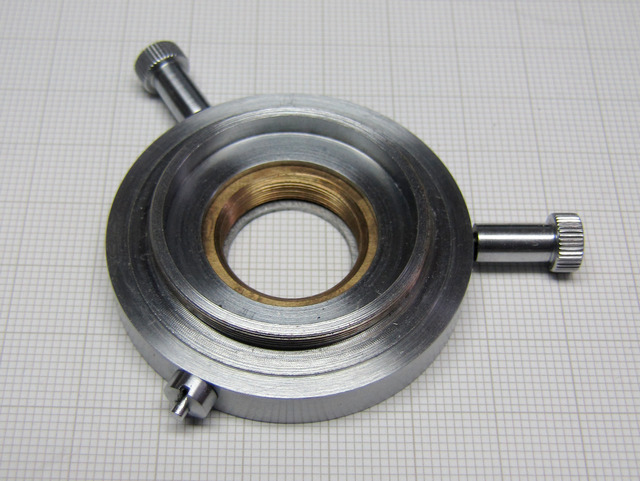
| The finished annuli holder which screws into the centring plate of the condenser base | ||||||||||||||||||||
|
||||||||||||||||||||
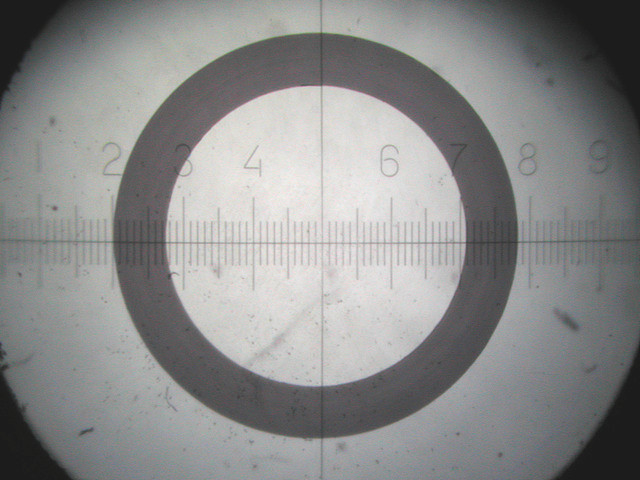
|
Here the same annuli holder with a graticule in place of annulus ready for taking measurements |
||||||||||||||||||||
| The choice of graticule was rather limited by the size of the opening in the centring plate of the condenser base, which is 18.0 mm hence the maximum working diameter is 15.0 mm limiting the graticule size to 16 mm. I was lucky as there was one graticule of the exact size available. It was found in the LOMO 7x measuring eyepiece, with the cross hair and 10.0 mm scale with smallest division of 0.1 mm. Perfect for the intended purpose, allowing accurate measurements to be taken at the same plane where the annuli are to be placed. | ||||||||||||||||||||
| ||||||||||||||||||||
| I have assembled the condenser with graticule and performed the measurements | ||||||||||||||||||||
| ||||||||||||||||||||
| View through the PC Telescope showing the image of #2 objective back plane and the graticule | ||||||||||||||||||||
|
As can be seen at the image above the measurement is straightforward, the OD and ID are read off directly. The 'scope was set for normal use with a test slide on stage focused on the specimen and condenser in normal position for object observation. Then the eyepiece was removed and replaced with the PC telescope which was focused onto the upper image plane, as shown on the image above. The process was repeated for each of the PC objectives. Results of the measurement are shown in the table below, however for making the annuli they were modified as explained elsewhere in the article. Dust particles, seen on the image above are for the most part located on the graticule itself, removing it was pointless during the measuring as dust would only accumulate again during the tests. Of course, I've cleaned it up before placing graticule back into the measuring eyepiece. | ||||||||||||||||||||
| ||||||||||||||||||||
| * measurements were taken with a larger graticule, 30.0 mm in diameter and 20.0 mm graduated scale, laid over the annuli holder and measured in the same plane just as was done with the other | ||||||||||||||||||||
|
The next step was to make annuli. I decided to make them out of brass sized so
that they can be placed inside of the holder like the graticule was for the
measurements. To avoid complicated machining they were going to be made as two
pieces that were to be joined by three short pieces of brass wire positioned
in a star like fashion, 120 degrees of arc apart, and joined by soldering.
To ensure accurate concentricity each annulus had to be assembled and soldered in a small jig designed and made for it. Without the use of the assembly jig, positioning and concentricity of the annuli would be questionable. | ||||||||||||||||||||
|
| ||||||||||||||||||||
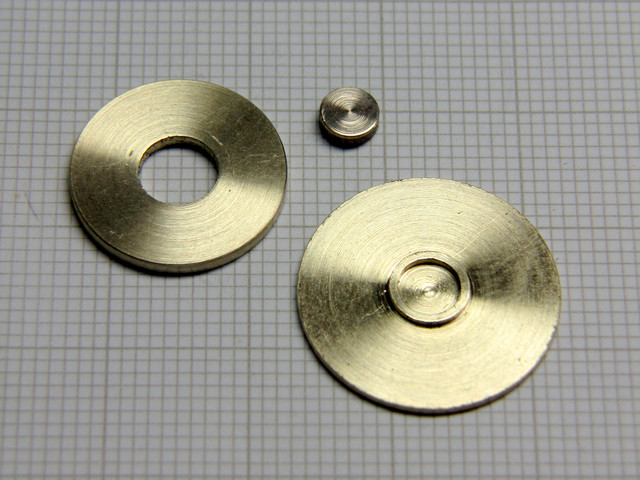
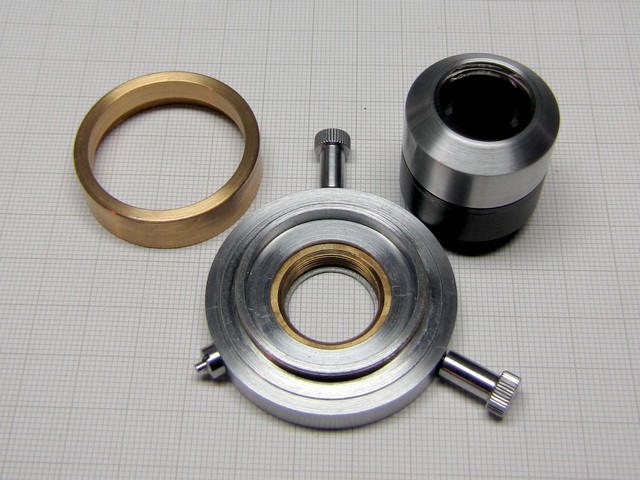
|
The image above shows machined parts of the annulus and the assembly jig | ||||||||||||||||||||
|
| ||||||||||||||||||||
|
Here the annulus parts are placed into the assembly jig ready for soldering | ||||||||||||||||||||
|
| ||||||||||||||||||||
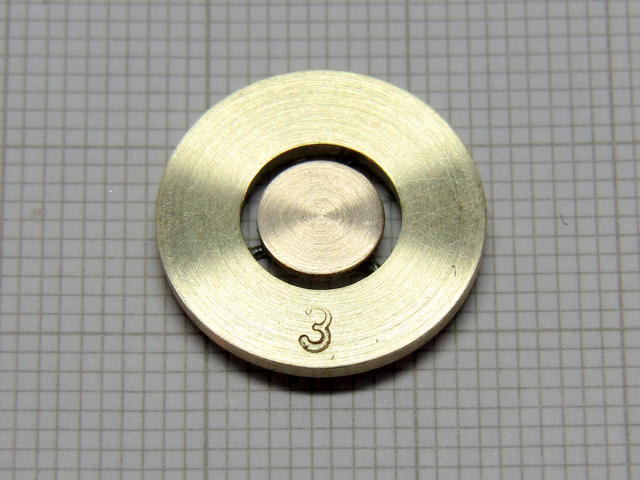
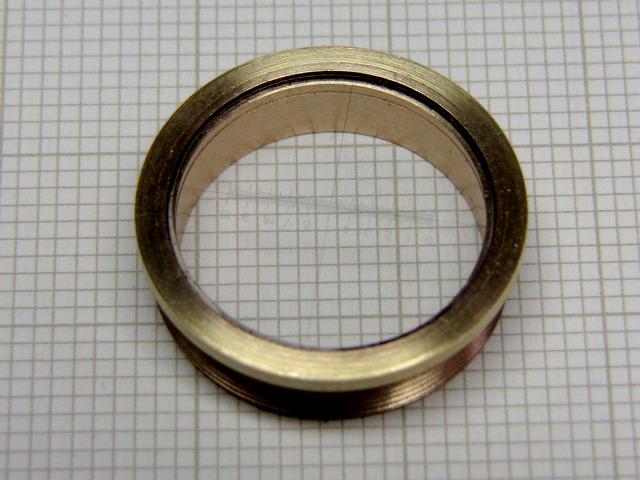
|
One of the assembled annuli, soldered together and stamped with a number of a corresponding objective | ||||||||||||||||||||
|
| ||||||||||||||||||||
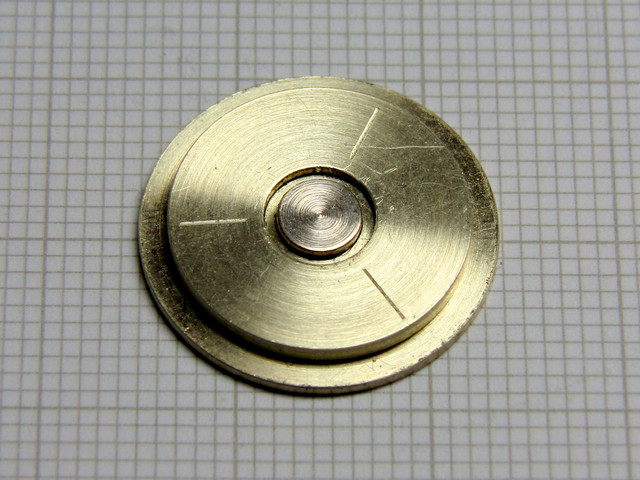
|
The underside showing how the soldering was performed | ||||||||||||||||||||
|
| ||||||||||||||||||||
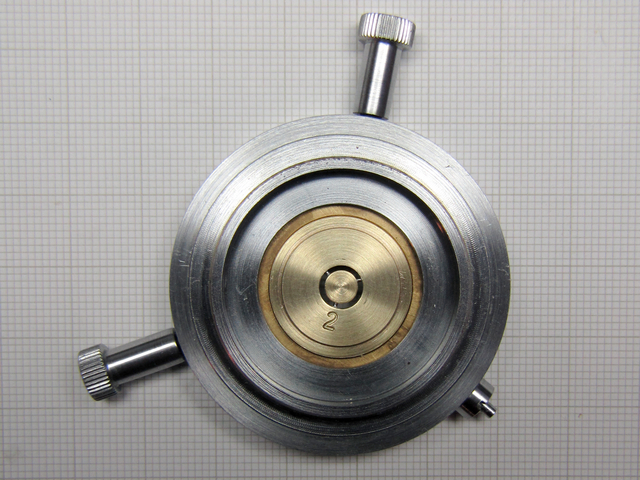
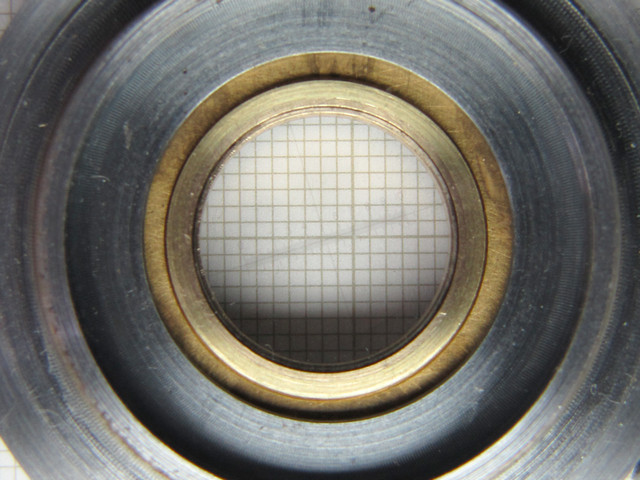
|
Annulus #2 placed in its holder | ||||||||||||||||||||
|
| ||||||||||||||||||||
|
A test shot of Navicula Lyra, Test Plate - 8 Forms by Klaus D. Kemp | ||||||||||||||||||||
| The above shot was made with LOMO Biolam 70P2 stand using the above condenser and Reichert #2 PC objective 25/0.45 with a simple 1.3 Mp CMOS sensor camera which plugs in tubus instead of an eyepiece, no correction lenses. | ||||||||||||||||||||
|
| ||||||||||||||||||||
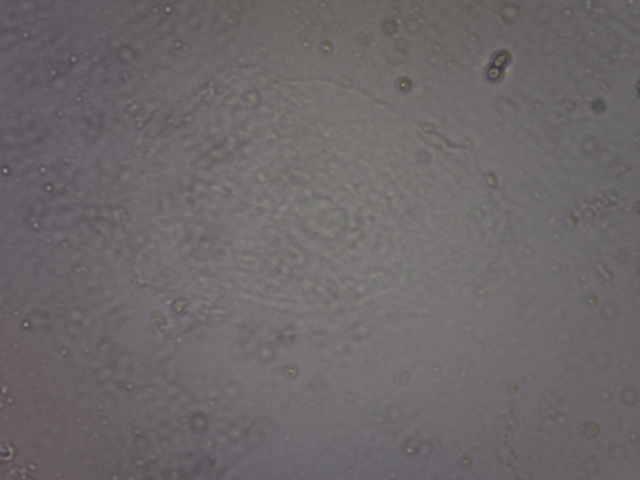
|
For comparison here is the bright field image of epithelial cell from inside cheek swab, mounted in water | ||||||||||||||||||||
|
| ||||||||||||||||||||
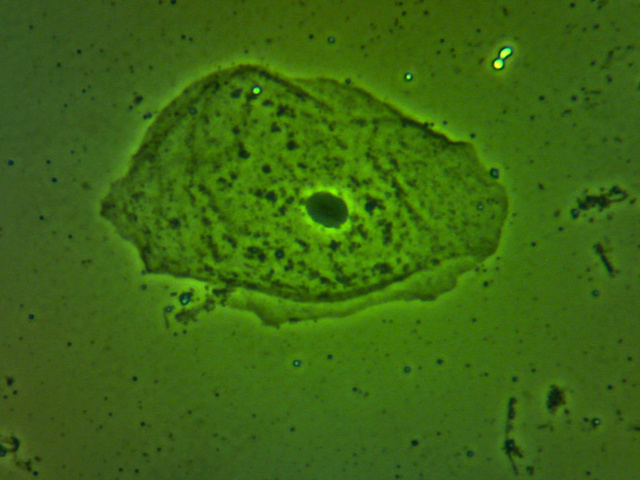
|
And here is the phase contrast image of the same epithelial cell | ||||||||||||||||||||
|
Obviously, as seen from the result of the second image, employing phase
contrast technique can to a great extent enhance observation of the subject
that is virtually invisible if observed in bright field. I can say that
my experiment has been quite successful. Both images were made with DIY
condenser, the first one without the annulus and second with annulus in place
and green filter, using the #2 objective from the set 25/0.45 with the same
eyepiece camera as was used on Navicula Lyra.
Needless to say that there still is a load of stuff that I need to learn about phase contrast microscopy as this excursion has provided me with the tool which I have yet to explore the use of. | ||||||||||||||||||||
|
| ||||||||||||||||||||
|
Reichert Dark Field Condenser parts that are easily put back together | ||||||||||||||||||||
| Oh, I must not forget to say that the dark field condenser function is left intact. All I have to do to return to dark field is to remove phase contrast parts and screw in the DF condenser and its mounting flange. The only irreversible change done was to the Zeiss condenser, which I had no use for in its previous form. | ||||||||||||||||||||
| Since the experiment worked out well, I have decided to make a new base, thus making a permanent PC condenser. The job of making the new base took a part of a weekend including a DIY nickel plating of the newly made parts. The only change in design of centring base was making the adjustment screws longer as well as adding the screw leaders, to ease anulus centring when the condenser is mounted on to the microscope. | ||||||||||||||||||||
|
|
||||||||||||||||||||
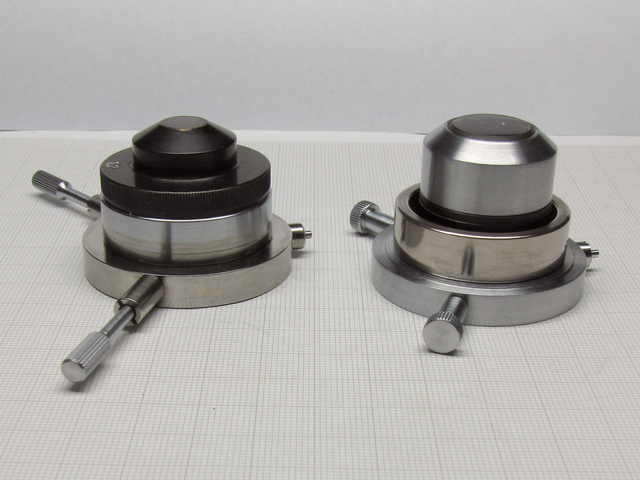
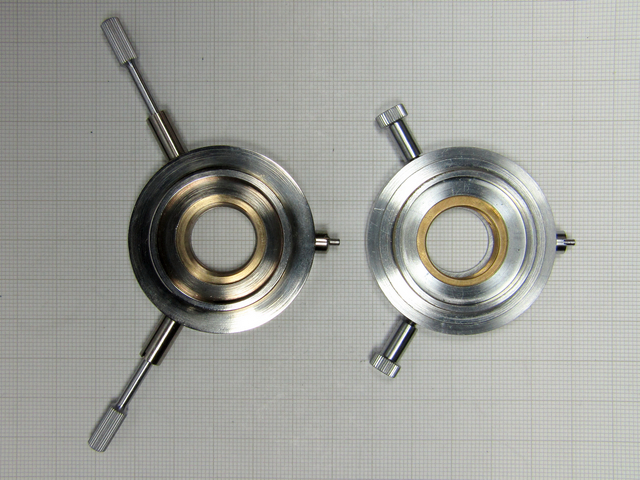
|
The image, on the left, shows newly made base mounted with modified Zeiss condenser with, on the right, Reichert DF condenser which was used in the experiment | ||||||||||||||||||||
|
| ||||||||||||||||||||
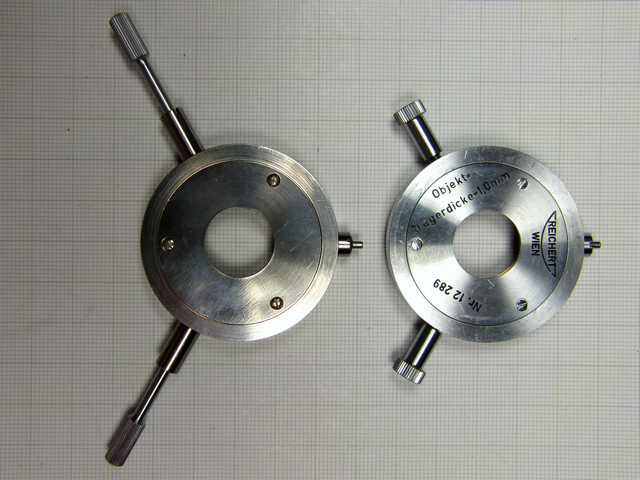
|
The two bases showing the upper side, on the left new one, on the right hand side the one used as a model for it | ||||||||||||||||||||
|
| ||||||||||||||||||||
|
The bottom side of the two bases | ||||||||||||||||||||
|
| ||||||||||||||||||||
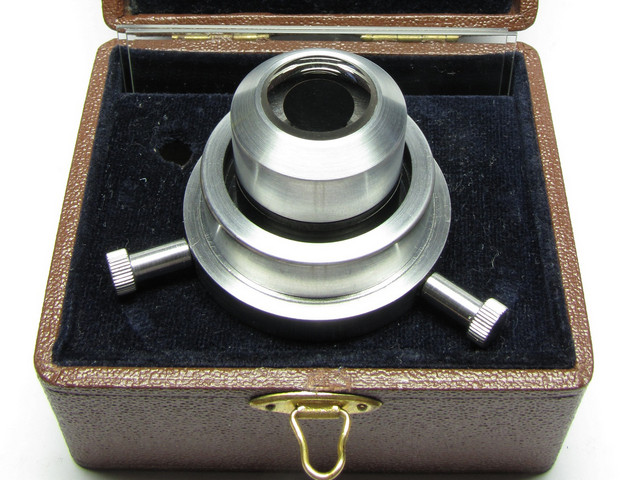
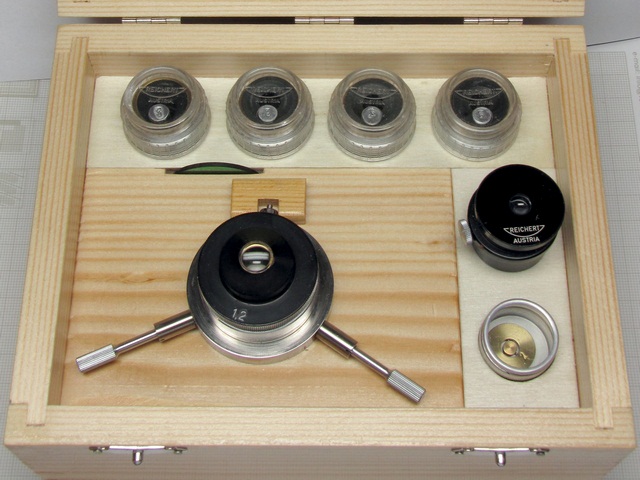
|
Finished DIY Phase Contrast Kit - Boxed | ||||||||||||||||||||
| Quite recently it was observed, by Merv Hobden, that if thickness of annuli is wrong some interesting effects may be observed, due to diffraction from both the top and bottom surfaces of the annulus. Lucky, I guess, as I have not observed any unusual effects, however it is worth noting just in case if something does show up when making new annuli for some other objective or if someone else experiences the problem when making his own DIY phase contrast. | ||||||||||||||||||||
|
| ||||||||||||||||||||
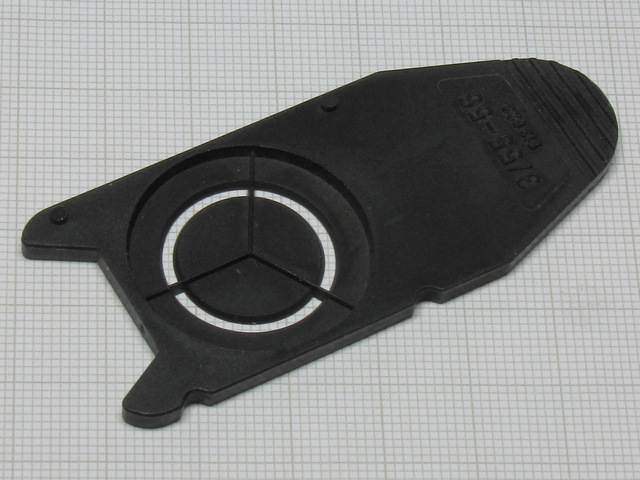
|
Leitz phase contrast annulus used in Laborlux D microscope | ||||||||||||||||||||
| I have looked around for a possible remedy and could not come up with solution on my own short of silk screen printing annuli on flat mineral watch glass, until I encountered Leitz phase contrast annulus used in Laborlux D microscope. Leitz annuli plates are made of 1.0 mm thick black non reflecting plastic with a difference in design, to my own, in one respect only. The internal walls of annulus are not vertical but are bevelled at an angle of roughly forty five degrees of arc, forming chisel shape when viewed in cross section, as can be seen at the image of the Leitz annulus plate shown above. | ||||||||||||||||||||
| It may also be beneficial if annuli were painted with matte black paint, Testors, Humbrol or some other similar product. | ||||||||||||||||||||
| References: | ||||||||||||||||||||
| 1. "Phase Microscopy - Is it worth having?" by Paul James | ||||||||||||||||||||
|
2. "Making a condenser annular ring for a phase contrast objective" by David Walker |
||||||||||||||||||||
|
3. "DIY Phase Contrast" by Tony Saunders-Davies | ||||||||||||||||||||
| 4. "Microscopy" G.E. Skvortsov, V.A. Panov 1969 | ||||||||||||||||||||
| 5. "Optika Mikroskopov" V.A. Panov, L.N. Andreev 1976 | ||||||||||||||||||||
|
| ||||||||||||||||||||
|
Published in the September 2013 edition of Micscape Magazine. | ||||||||||||||||||||