Adobe
Chotoshop CS
Short
Tutorial
By
Lomjom Co.,
System
requirements
Pentium
III – Pentium 4
Windows
2000 , Windows XP
Ram
192 Mb.
Hard
disk space 280 Mb.
Graphic
adaptor 16 Bit color
Resolution
1024*756
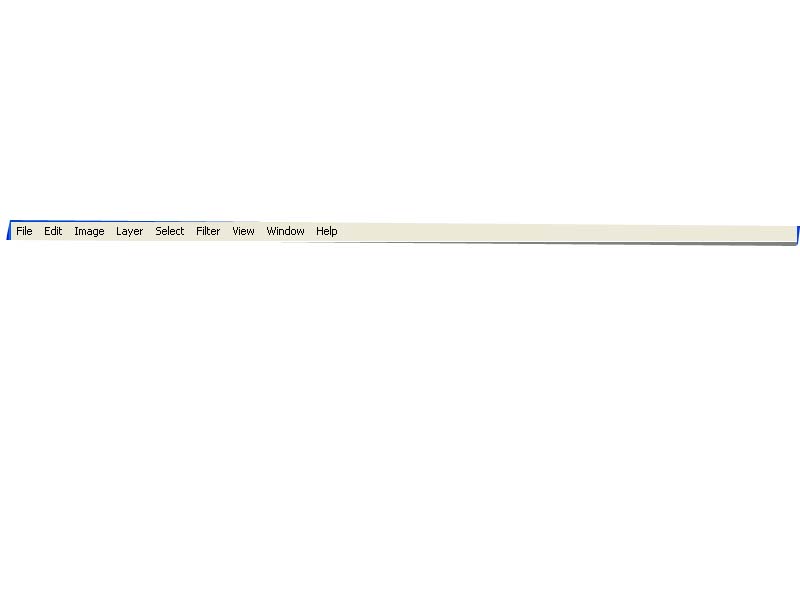
Basic
menu
Title
bar
display
programes name and file names
Menu
Bar
contain
basic command for the programe
1.File command for files managing , store or
opening files for use
2.Edit command for editing image
3. Image image modify command for resize or adjust the color
4. Layer the Layer of picture to making the effects
5. Select selecting the specific area for editing the pictures
6. Filter for using effect for the picture and object
7. View veiwpoint of the picture and viewing size
8. Window command for using extra windows and tools
9. Help helps of the programs
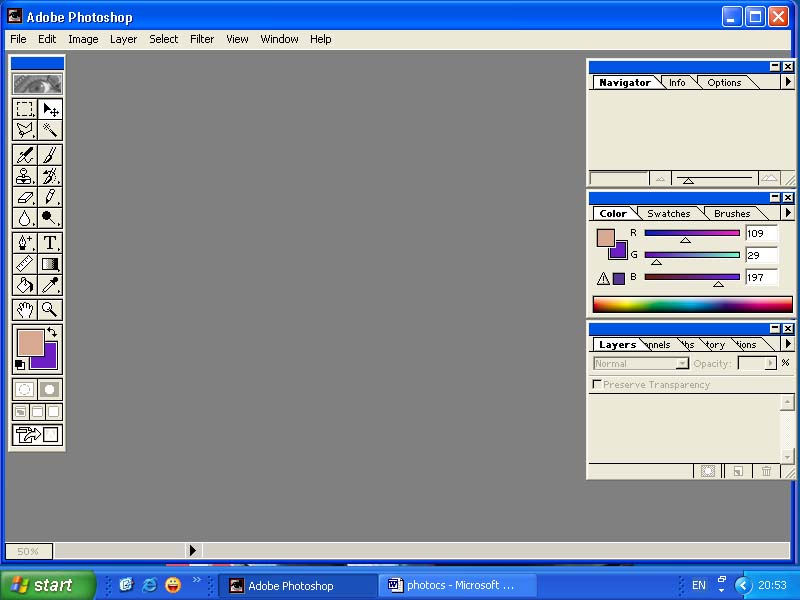
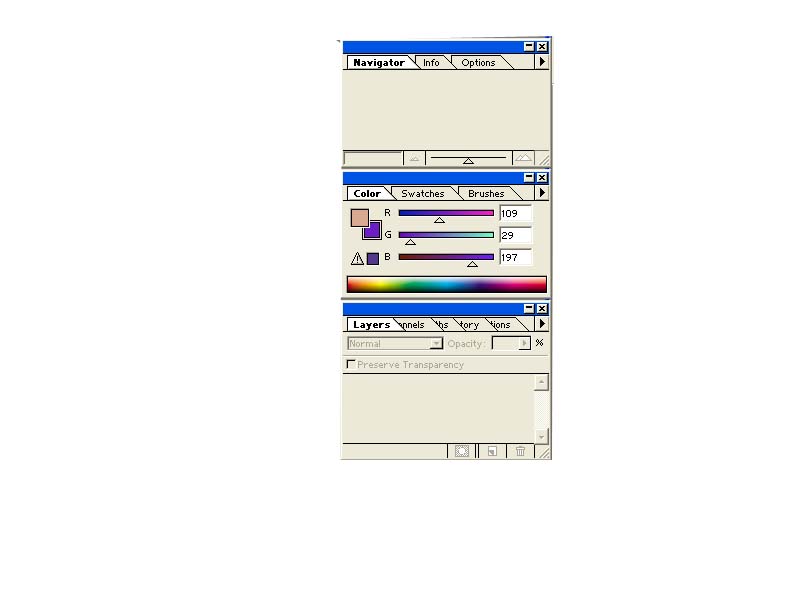
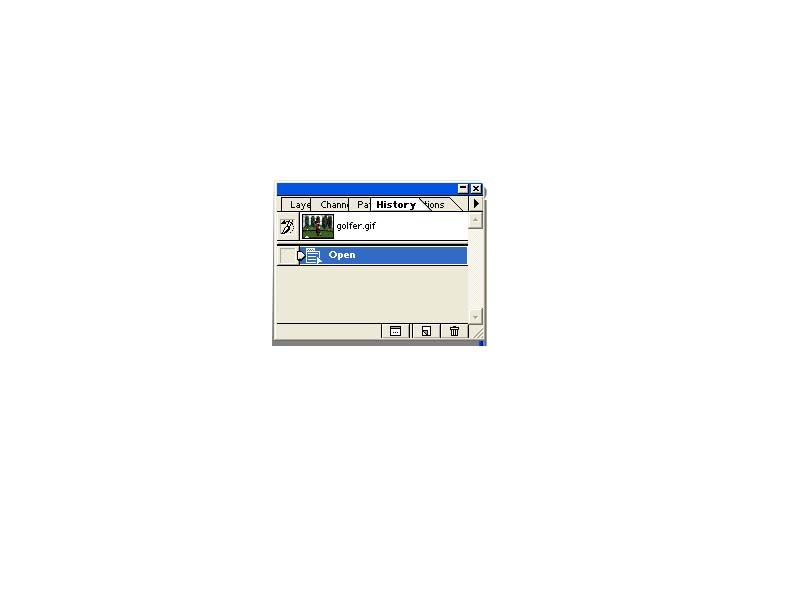
Palettes
the
small windows to the right of the screen, different palettes do different task
Palettes
help you monitor and modify images. By default, palettes appear stacked
together in groups. You can display or hide palettes as you work.
To show or hide palettes:
Do one of the following:
To show or hide all open palettes, the
options bar, and the toolbox, press Tab.
To show or hide all palettes, press
Shift+Tab.
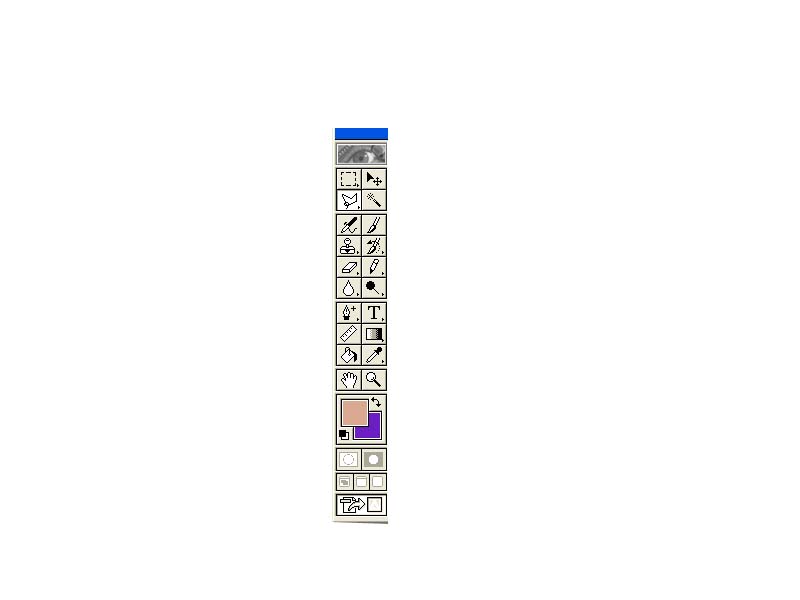
Tools
box
All
tools for using in create and modify the picture
Tools
Box List
The
marquee tools
make
rectangular, elliptical, single row, and single column selections.
The
move tool
moves
selections, layers, and guides
The
lasso tools
make
freehand, polygonal (straight-edged), and magnetic * (snap-to) selections.
The
magic wand tool
selects
similarly colored areas
The
crop tool
trims
images.
The
slice tool
creates
slices.
The
slice selection tool
selects
slices.
The
airbrush tool
paints
soft-edged strokes.
The
paintbrush tool
paints
brush strokes.
The
pencil tool
paints
hard-edged strokes.
The
healing tools
blending
the area colour with the area
The
colour replacement tool
remove
red eyes
The
patch tool
make
a selection and copy it
The
clone stamp tool
paints
with a sample of an image.
The
pattern stamp tool
paints
with part of an image as a pattern.
The
history brush tool
paints
a copy of the selected state or snapshot into the current image window.
The
art history brush tool
paints
with stylized strokes that simulate the look of different paint styles, using a
selected state or snapshot.
The
eraser tool
erases
pixels and restores parts of an image to a previously saved state.
The
background eraser tool
erases
areas to transparency by dragging.
The
magic eraser tool
erases
solid-colored areas to transparency with a single click.
The
gradient tools
create
straight-line, radial *, angle *, reflected *, and
diamond *, blends between colors.
The
paint bucket tool
fills
similarly colored areas with the foreground color.
The
blur tool
blurs
hard edges in an image.
The
sharpen tool
sharpens
soft edges in an image.
The
smudge tool
smudges
data in an image.
The
dodge tool
lightens
areas in an image.
The
burn tool
darkens
areas in an image.
The
sponge tool
changes
the color saturation of an area.
The
path selection tools
make
shape or segment selections showing anchor points, direction lines, and
direction points.
The
type tool
creates
type on an image.
The
pen tools
let
you draw smooth-edged paths.
The
custom shape tool
makes
customized shapes selected from a custom shape list.
The
annotations tool
makes
notes and voice annotations that can be attached to an image.
The
eyedropper tool
samples
colors in an image.
The
measure tool
measures
distances, locations, and angles.
The
hand tool
moves
an image within its window.
The
zoom tool
magnifies
and reduces the view of an image.
Creating
new images
The
New command lets you create a blank image.
To
create a new image:
1
Do one of the following:
To
base the image dimensions and resolution (Photoshop) on the Clipboard contents,
choose File > New. If the Clipboard does not contain image data, the image
dimensions and resolution are based on the last image you created.
(Photoshop)
To base the image size on the default dimensions and resolution or the last
entered settings, hold down Alt)when you choose File > New.
2
If desired, type a name for the image, and set the width and height.
(Photoshop)
To match the width and height of the new image to that of any open image,
choose a filename from the bottom section of the Windows menu.
3
(Photoshop) Set the resolution and mode.
4
Select an option for the contents of the background layer (Photoshop) or first
layer (ImageReady) of the image:
White
to fill the background or first layer with white, the default background color.
Background
Color to fill the background or first layer with the current background color.
Transparent
to make the first layer transparent, with no color values. The resulting
document will have a single, transparent layer as its contents.
5
Click OK.
Opening
and importing images
You
can open and import images in various file formats. The available formats
appear in the Open dialog box, the Open As dialog box (Windows), or the
Import submenu
To
open a file:
1
Choose File > Open.
2
Select the name of the file you want to open. If the file does not appear,
select the option for showing all files from the Files of Type
Previews
display faster if they are saved with the file. In Photoshop, select Always
Save for Image Previews in the Saving Files preferences to always save a
preview; select Ask When Saving to save previews on a file-per-file basis.
4
Click Open. In some cases, a dialog box appears, letting you set
format-specific options
To
open a recently used file:
Choose
File > Open Recent, and select a file from the submenu.
To
specify the number of files that are available in the Open Recent submenu,
choose Edit > Preferences > Saving Files, and enter a number in the
Recent File List Contains text box.
To
specify the file format in which to open a file (Photoshop):
Do
one of the following:
(Windows)
Choose File > Open As, and select the file you want to open. Then choose the
desired format from the Open As pop-up menu, and click Open.
If
the file does not open, then the chosen format may not match the file's true
format, or the file may be damaged.
Making
pixel selections
You
can select pixels in an image by dragging with the marquee tools or lasso
tools, or by targeting color areas with the magic wand tool. In Photoshop,
you can also use the Color Range command. Making a new selection replaces the
existing one. Additionally, you can create selections that add to a selection,
subtract from a selection, select an area intersected by other selections, or
select the union of a new selection and the current selection.
Using
the marquee tools
The
marquee tools let you select rectangles, ellipses, and 1-pixel rows and
columns. By default, a selection border is dragged from its corner.
To
use the marquee tools:
1
Select a marquee tool:
Rectangle
marquee (![]() )
to make a rectangular selection.
)
to make a rectangular selection.
Rounded
rectangle marquee (![]() )
to select a rounded rectangle such as a Web-page button (ImageReady).
)
to select a rounded rectangle such as a Web-page button (ImageReady).
Elliptical
marquee (![]() )
to make an elliptical selection.
)
to make an elliptical selection.
Single
row (![]() )
or single column (
)
or single column (![]() )
marquee to define the border as a 1-pixel-wide row or column.
)
marquee to define the border as a 1-pixel-wide row or column.
2
In the options bar, specify whether to add a new selection (![]() ),
add to a selection(
),
add to a selection(![]() ),
subtract from a selection (
),
subtract from a selection (![]() ),
or select an area intersected by other selections (
),
or select an area intersected by other selections (![]() ).
).
3
Specify a feathering setting in the options bar. Turn anti-aliasing on or off
for the rounded rectangle or elliptical marquee.
4
For the rectangle, rounded rectangle, or elliptical marquee, choose a style in
the options bar:
5
For aligning your selection to guides, a grid, slices, or document bounds, do
one of the following to snap your selection:
6
Do one of the following to make a selection:
With
the rectangle, rounded rectangle, or elliptical marquee, drag over the area you
want to select. Hold down Shift as you drag to constrain the marquee to a
square or circle. To drag a marquee from its center, hold down Alt
after you begin dragging.
With
the single row or single column marquee, click near the area you want to
select, and then drag the marquee to the exact location. If no marquee is
visible, increase the magnification of your image view.
To
reposition a rectangle, rounded rectangle, or elliptical marquee, first
drag to create the border, keeping the mouse button depressed. Then hold
down the spacebar and continue to drag. If you have finished drawing the
border, drag from inside the selection.
Normal
to determine marquee proportions by dragging.
Constrained
Aspect Ratio to set a height-to-width ratio. Enter values (decimal values are
valid) for the aspect ratio. For example, to draw a marquee twice as wide as it
is high, enter 2 for the width and 1 for the height.
Fixed
Size to specify set values for the marquee's height and width. Enter pixel
values in whole numbers. Keep in mind that the number of pixels needed to
create a 1-inch selection depends on the resolution of the image.
Transforming
and Retouching
Cropping
images
Cropping
is the process of selecting and removing a portion of an image to create focus
or strengthen its composition. You can crop an image by either hiding or
deleting. If the image only has a background layer, you can only delete.
Hiding
conceals the cropped area outside of the rectangular selection. The cropped
area is still in the image file and can be made visible by moving the layer
with the move tool. You can use this feature when creating animations with
elements that move from offscreen into the live image area.
Changing
the size of the work canvas
The
Canvas Size command lets you add or remove work space around an existing image.
You can crop an image by decreasing the canvas area. Added canvas appears in
the same color or transparency as the background.
To
use the Canvas Size command:
1
Choose Image > Canvas Size.
2
Choose the units of measurement you want. The Columns option measures width in
terms of the columns specified in the Rulers & Units preferences.
3
Enter the dimensions in the Width and Height boxes. A new file size appears.
4
For Anchor, click a square to indicate where to position the existing image on
the new canvas.
5
Click OK.
Rotating
and flipping entire images
The
Rotate Canvas commands let you rotate or flip an entire image. The commands do
not work on individual layers or parts of layers, paths, or selection borders.
To
rotate or flip an entire image:
Choose
Image > Rotate Canvas, and choose one of the following commands from the
submenu:
· 180° to rotate the image by a half-turn.
· 90° CW to rotate the image clockwise by a
quarter-turn.
· 90° CCW to rotate the image counterclockwise
by a quarter-turn.
· Arbitrary to rotate the image by the angle
you specify. If you choose this option, enter an angle between -359.99 and
359.99 in the angle text box, and then select CW or CCW to rotate clockwise or
counterclockwise. Click OK.
· Flip Horizontal to flip the image
horizontally, along the vertical axis.
· Flip Vertical to flip the image vertically,
along the horizontal axis.
Retouching
with a sample of an image
The
clone stamp and pattern stamp tools let you sample part of an image and then
paint with the sample.
Using
the clone stamp tool
The
clone stamp tool takes a sample of an image, which you can then apply over
another image or part of the same image. Each stroke of the tool paints on more
of the sample. Cross hairs mark the original sampling point.
To
use the clone stamp tool:
1
Select the clone stamp tool (![]() ).
).
2
Choose a brush size from the pop-up palette in the options bar. To learn more
about using pop-up palettes,.
If
a brush is too large to fit in the palette, it appears as a smaller brush with
a number indicating the actual diameter in pixels.
3
Specify a blending mode and opacity.
4
Select Aligned to apply the entire sampled area once, regardless of how many
times you stop and resume painting. This option is useful when you want to use
different sized brushes to paint an image. You can also use the Aligned option
to duplicate two halves of a single image and place them at different
locations.
If
Aligned is deselected, the sampled area is applied from the initial sampling
point each time you stop and resume painting. Because the clone stamp tool
samples the entire image, this option is useful for applying multiple copies of
the same part of an image to different images.
5
Select Use All Layers to sample data from all visible layers. If this is
deselected, the tool samples only from the active layer.
6
If you are using a pressure-sensitive drawing tablet, specify the effects of
stylus pressure.
7
Position the pointer on the part of any open image you want to sample, and
Alt-click (Windows) or Option-click (Mac OS). This sample point is the
location from which the image is duplicated as you paint.
Note:
If you are sampling from one image and applying to another, both images must be
in the same color mode.
8
Drag to paint with the tool.
Using
the pattern stamp tool
The
pattern stamp tool lets you paint with a pattern. You can select a pattern from
the pattern libraries or create your own patterns.
To
use the pattern stamp tool:
1
Select the pattern stamp tool (![]() ).
).
2
Choose a brush size from the pop-up palette in the options bar. To learn more
about using pop-up palettes.
If
a brush is too large to fit in the palette, it appears as a smaller brush with
a number indicating the actual diameter in pixels.
3
Specify a blending mode and opacity. 4 Choose a pattern from the pop-up palette
in the options bar.
To
load additional pattern libraries, select a library name from the pop-up
palette menu or choose Load and navigate to the folder where the library is
stored. To learn more about patterns and pattern libraries
5
Select Aligned to repeat the pattern as contiguous, uniform tiles. The pattern
is aligned from one paint area to the next.
If
Aligned is deselected, the pattern is centered on the pointer each time you
stop and resume painting.
6
If you are using a pressure-sensitive drawing tablet, specify the effects of
stylus pressure. 7 Drag to paint with the tool.
Using
the smudge tool
The
smudge tool simulates the actions of dragging a finger through wet paint. The
tool picks up color where the stroke begins and pushes it in the direction you
drag.
To
use the smudge tool:
1
Select the smudge tool (![]() ).
).
2
Choose a brush size from the pop-up palette in the options bar. To learn more
about using pop-up palettes.
If
a brush is too large to fit in the palette, it appears as a smaller brush with
a number indicating the actual diameter in pixels.
3
Specify a blending mode and pressure.
4
Select Use All Layers to smudge using color data from all visible layers. If
this is deselected, the smudge tool uses colors from only the active layer.
5
Select Finger Painting to smudge using the foreground color at the beginning of
each stroke. If this is deselected, the smudge tool uses the color under the
pointer at the beginning of each stroke.
6
If you are using a pressure-sensitive drawing tablet, specify the effects of
stylus pressure.
7
Drag in the image to smudge color.
Press
Alt as you drag with the smudge tool to use the Finger Painting option.
About
layers
Layers
allow you to make changes to an image without altering your original image
data.
Layer
sets help you organize and manage contiguous layers. You can expand a layer set
to display the layers it contains or collapse it to reduce clutter. You can
also use layer sets to apply masks to groups of layers.
Layer
sets function like layers; you can view, select, duplicate, move, or change the
stacking order of layers in a set the same way you do layers. You can easily
move layers into and out of layer sets, or create new layers within a layer
set; however, you cannot nest layers, that is, create or move one layer set
within another. Additionally, you cannot apply a layer effect to a layer set or
use a layer set as the base for a clipping group.
You
can use the Layers palette to create, hide, display, duplicate, merge, link,
lock, and delete layers. The Layers palette lists all layers and layer sets in
an image, starting with the topmost layer. A thumbnail of the layer's
contents appears next to the layer name. The thumbnail is updated as you edit.
You can make changes only to the active layer, and only one layer can
be active at a time. When you move or transform the active layer, those
changes also affect any layers linked to it. Additionally, you can fully or
partially lock layers to protect their contents.
You
can also use the Layers palette to apply layer masks and layer clipping paths
to a layer. You can also apply layer styles to a layer and create adjustment
layers or fill layers. You can use a clipping group to act as a mask for a
group of layers or to specify a blending mode for a group of layers.
Adding
layers
Newly
added layers and layer sets appear above the selected layer in the Layers
palette. You can add layers to an image in a variety of ways:
By
creating new layers or converting selections into layers.
By
converting a background to a layer or adding a background to an image.
By
placing, dragging and dropping, or pasting selections or entire images into the
image.
By
creating type using the type tool
By
using the shape or pen tools to create a new layer that contains a layer
clipping path.
To
add a new layer or layer set using default options:
Click
the New Layer button (![]() )
or New Layer Set button (
)
or New Layer Set button (![]() )
at the bottom of the Layers palette. The layer defaults to Normal mode with
100% opacity and is named according to its order of creation. The layer set
defaults to Pass Through mode.
)
at the bottom of the Layers palette. The layer defaults to Normal mode with
100% opacity and is named according to its order of creation. The layer set
defaults to Pass Through mode.
To
add a new layer or layer set and specify options:
1
Do one of the following:
Alt-click
(Windows) or Option-click (Mac OS) the New Layer button or New Layer Set
button at the bottom of the Layers palette.
Ctrl-click
(Windows) or Command-click (Mac OS) the New Layer button or New Layer Set
button at the bottom of the Layers palette to add a layer below the currently
selected layer.
2
Name the layer, and select mode, opacity, and, in some cases, fill options.
Then click OK.
You
can also use the New Layer and New Layer Set commands in the Layer menu and the
Layers palette menu to add layers.
To
convert a selection into a new layer:
1
Make a selection.
2
Do one of the following:
Choose
Layer > New > Layer Via Copy to copy the selection into a new layer.
Choose
Layer > New > Layer Via Cut to cut the selection and paste it into a new
layer.
The
selection contents appear in the same position relative to the image
boundaries.
To
convert a background into a layer:
1
Do one of the following:
Choose
Layer > Layer from Background.
Double-click
Background in the Layers palette.
2
Enter a name, opacity, and mode for the layer.
3
Click OK.
To
add a background to an image
1
Add a layer.
2
Choose Layer > New > Background from Layer to create a background layer
from the selected layer.
You
cannot change the stacking order of the background or apply a blending mode or
opacity.
Using
filters
To
use a filter, choose the appropriate submenu command from the Filter menu.
These guidelines can help you in choosing filters:
· The last filter chosen appears at the top of
the menu.
· Filters are applied to the active, visible
layer.
· Filters cannot be applied to Bitmap-mode or
indexed-color images.
· Some filters only work on RGB images.
· Some filters are processed entirely in RAM.
· Gaussian Blur, Add Noise, Median, Unsharp
Mask, High Pass, Dust & Scratches, and Gradient Map filters can be used
with 16-bit-per-channel images.
Previewing
and applying filters
Applying
filters--especially to large images--can be time-consuming. Some filters let
you preview the effect before applying it.
To
save time when trying various filters, experiment on a small, representative
part of your image.
To
preview and apply a filter:
1
To apply a filter to an area of a layer, select that area. To apply a filter to
the entire layer, leave the image unselected.
2
Choose a filter from the submenus in the Filter menu. If a filter name is
followed by ellipses (...), a dialog box appears.
3
If a dialog box appears, enter values or select options.
To
display the dialog box for the last filter you applied, press Ctrl+Alt+F
(Windows) or Command+Option+F (Mac OS).
4
If the dialog box contains a preview window, use the following navigation
methods to preview the effect:
· Click in the image window to center a
specific area of the image in the preview window.
Note:
This does not work with all preview windows.
· Drag in the preview window to center a
specific area of the image in the window.
· Use the + or - button under the preview
window to zoom in or zoom out on the preview.
A
flashing line beneath the preview size indicates that the preview is still
being rendered.
5
If available, select the Preview option to preview the filter effect on the
entire image.
6
Click OK to apply the filter.
A
progress indicator in the status bar (Windows) or progress bar (Mac OS) lets
you gauge the time remaining until the filter is applied.
Choosing
a filter effect
The
built-in filters are grouped into 14 submenus. In addition, any third-party
filters installed appear at the bottom of the Filter menu.
Artistic
filters Achieve a painterly or special effect for a fine arts or commercial
project. For example, use the Cutout filter for collages or type treatment.
These filters replicate natural or traditional media effects. (For more
information about Artistic filters
Blur
filters Soften a selection or an image. Blur filters are useful for retouching.
They smooth transitions by averaging the pixels next to the hard edges of
defined lines and shaded areas in an image
Note:
To apply a Blur filter to the edges of a layer, be sure to deselect the
Preserve Transparency option in the Layers palette.
Brush
Stroke filters Like the Artistic filters, the Brush Stroke filters give a
painterly or fine-arts look using different brush and ink stroke effects. Some
of the filters add grain, paint, noise, edge detail, or texture to an image for
a pointillist effect.
Distort
filters Geometrically distort an image, creating 3D or other reshaping effects.
Note that these filters can be very memory intensive
Noise
filters (Photoshop) Add or remove noise, or pixels with randomly
distributed color levels. This helps to blend a selection into the surrounding
pixels. Noise filters can create unusual textures or remove problem areas, such
as dust and scratches, from an image. The Add Noise filter can be used to
reduce banding in feathered selections or graduated fills or to give a more
realistic look to heavily retouched areas.
Pixelate
filters Sharply define a selection by clumping pixels of similar color values
in cells.
Render
filters Create 3D shapes, cloud patterns, refraction patterns, and simulated
light reflections in an image. You can also manipulate objects in 3D space,
create 3D objects (cubes, spheres, and cylinders), and create texture fills
from grayscale files to produce 3D-like effects for lighting
When
using the Clouds filter, generate a more stark cloud pattern by holding down
Alt
Sharpen
filters Focus blurry images by increasing the contrast of adjacent pixels. They
include the Sharpen Edges (Photoshop) and Unsharp Mask filters, which find and
sharpen areas where significant color changes occur (such as the edges).
The Unsharp Mask filter is commonly used for high-end color correction.
Sketch
filters Add texture to images, often for a 3D effect. The filters also are
useful for creating a fine-arts or hand-drawn look. Many of the Sketch filters
use the foreground and background color as they redraw the image.
For
a truer effect, change the foreground color to one of the common Conté Crayon
colors (black, sepia, sanguine) before applying the filter.
Stylize
filters Produce a painted or impressionistic effect on a selection by
displacing pixels and by finding and heightening contrast in an image. After
using filters such as Find Edges and Trace Contour (Photoshop) that highlight
edges, you can apply the Invert command to outline the edges of a color image
with colored lines or to outline the edges of a grayscale image with white
lines
Texture
filters Give images the appearance of depth or substance, or add an organic
look.
Other
filters Let you create your own filters, use filters to modify masks, offset a
selection within an image, and make quick color adjustments
Digimarc
filters Embed a digital watermark into an image to store copyright information
About
printing
Whether
you are providing an image to an outside service bureau or just sending a quick
proof to a desktop printer, knowing a few basics about printing will make the
print job go more smoothly and help ensure that the finished image appears
as intended.
Types
of printing When you print a file, the Adobe Photoshop application sends your
image to a printing device, either to be printed directly onto paper or to be
converted to a positive or negative image on film. In the latter case, the film
can be used to create a master plate for printing by a mechanical press.
Types
of images The simplest types of images, such as line art, use only one color in
one level of gray. A more complex image, such as a photograph, has color tones
that vary within the image. This type of image is known as a continuous-tone
image.
Halftoning
To create the illusion of continuous tones when printed, images are broken down
into a series of dots. This process is called halftoning. Varying the
sizes of the dots in a halftone screen creates the optical illusion of
variations of gray or continuous color in the image.
Color
separation Artwork that will be commercially reproduced and that contains more
than a single color must be printed on separate master plates, one for each
color. This process is called color separation. In Photoshop, you can
adjust how the various plates are generated and create traps.
Quality
of detail The detail in a printed image results from a combination of
resolution and screen frequency. The higher an output device's resolution, the
finer (higher) a screen ruling you can use.
Printing
images
To
print any type of image, you first select general printing options and then
specify settings for a particular image type. You can preview how the image and
selected options will appear on the printed page and adjust the position and
scale of the image.
Photoshop
provides three printing-related dialog boxes: Print Options, Page Setup, and Print.
Some printing options may appear in multiple dialog boxes depending on
your printer, print drivers, and operating system. For example, you may be
able to access output options in both the Print Options and Page Setup dialog
boxes.
Note:
You cannot print images directly from ImageReady. If you have an image open in
ImageReady and need to print it, use the Jump To command to open the image in
Photoshop. Keep in mind that ImageReady images open at screen resolution (72
ppi); this resolution may not be high enough to produce a high-quality print.
To
print an image with its current print options:
Do
one of the following:
· Choose File > Print, and click Print or
OK.
· Hold down Alt and choose File > Print
One.
Note:
By default, Adobe Photoshop prints a composite of all visible layers and
channels. To print an individual layer or channel, make it the only visible
layer or channel before choosing the Print command.
To
select print options:
1
Choose File > Page Setup, and select an installed printer from the pop-up
list at the top of the dialog box. (You can also select an installed printer in
the Print dialog box.)
2
Select a paper size and orientation in the Page Attributes section of the Page
Setup dialog box.
3
Choose File > Print Options to do the following:
· Adjust the position and scale of the image
in relation to the selected paper size and orientation.
· Set output options.
· Select halftone screen attributes.
· Set other printing options.
· Set color management options.
4
Click OK to save the print options for the image, or click Print to print the
image. Hold down Alt and click Print One to print the image without displaying
the Print dialog box.
To
preview the current image position and options:
Position the pointer over the file information box (at the bottom of the application window in Windows or the document window in Mac OS) and hold down the mouse button.