Welcome to my wild and wacky world of overhead air filtration apparatuses (or is it apparati?)
Below is a blow by blow method of how I built an air filtration device for my shop.
By Brook Duerr (Tool Junkie Extradorinare)
Step one. Obtaining a furnace type blower. The first time I built one of these blowers I got a free blower. Well, things are worth what you pay for them, and soon the blower's bearings froze up almost causing a fire. After that I wised up and ordered a blower from Grainger. Click here to see one of the blowers I got from Grainger. I chose this type of blower because it was cheap and it had two ports so it would be balanced in my filtration box. This size blower works best with one 24 inch by 12 inch filter. For a filter box with two 12 inch by 24" filters I used this fan. A word of warning, Grainger can be a pain in the arse to do business with because they want to deal with business only. Sooooo, open up your own business by calling yourself some official sounding name, and then they will work with you.
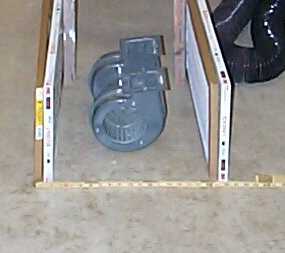
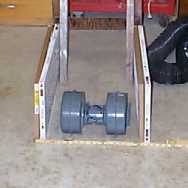
Step Two: Positioning the fan. You can place the fan in your filter box either horizontally in the box as shown here, or across the box as shown here. For some stupid reason I chose to have the fan in the end of the box, so I chose the across position. For the other position you would have the fan blowing either up out the top of the box, or out the bottom. With my positioning method, the air blows out the end of the box.
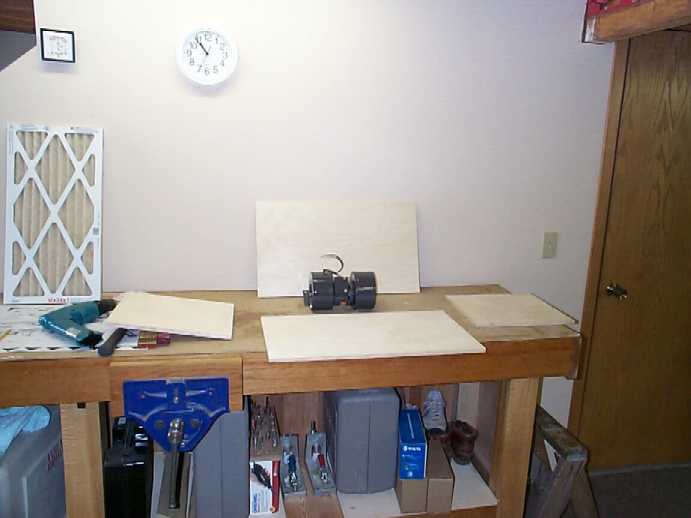
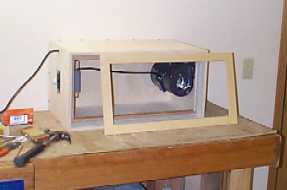
Step Three: Next I cut some plywood to make the top and bottom, and the two short ends. I actually size the pieces so that the sides of the box can be filled with the filter sizes that I want to use. Thus the filters become the sides of the box. For a look at the plywood look here. Here I show how the pieces go together and how the fan will fit (sorta) on one end. If I did things right (as I always do, of course) then the filters will fit just perfect into the sides of the box.
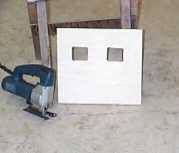
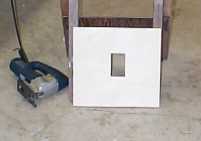
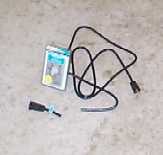
Step Four: Next I cut some holes for the fan and one for the switch to go in the opposite end. Try to do a better job and not make the holes look like a rat chewed them like I did. Sheesh! I got a bazillion tailed tools, and I still do a hack job sometimes. For a nice grounded cord I simply get an extension cord from the hardware store and I cut the end off. I also add a timer switch that I can get for about $15. WELL worth the money. I can set the timer and walk away and I know it will go off at a predetermined time. This allows the shop to clear of dust while I am not there.
Step Five: Next I add some strips of wood on the inside of the box so as to hold the filters in from the outside edge of the box. I know this picture is lousy, but hey, ya get what ya pay for. I actually use two filters. On the inside I use a 3M Filtrete ™ filter and on the outside I use a standard cheapo filter. Both filters are thus stacked inside the box one on top of the other. On the wood strips I add some foam tape that I got from the hardware store. This is the tape that is used to insulate around window cracks and such. The 1/4 inch stuff works great at helping form a tight seal between the wood and the filter.
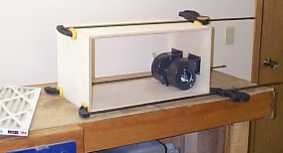
Step Six: I put the whole thing together as I showed in the previous picture (with the clamps). The top and ends are glued and nailed together. I also cut a frame of 1/4" thick plywood to use to hold the filters in place. For this I just cut a rectangle out of a rectangle in order to make the frame from one piece of wood.
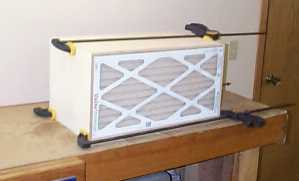
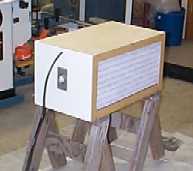
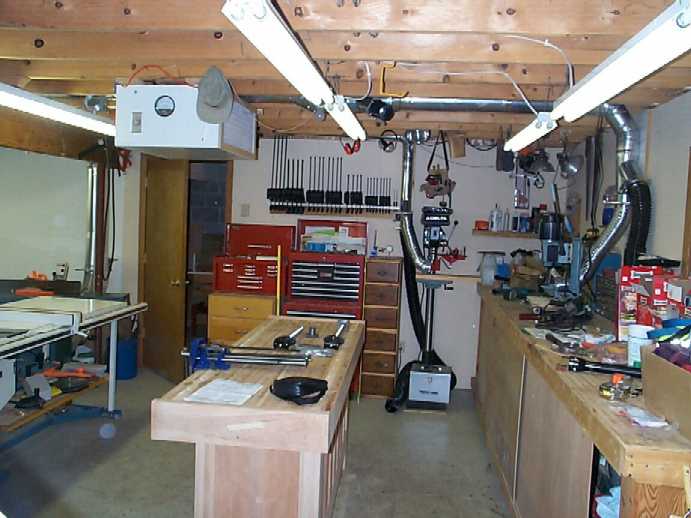
Step Seven: Finally I give it a couple of coats of paint and wire it all up. When it is all done it looks pretty slick. Hanging it on the ceiling can be kind of difficult for one person to do. I will leave this up to you to figure out on your own. I did not like using chains, so I added some strips of wood that were longer than the length of the filter box. I then screwed these to the floor joists that compose the top of my shop. Here is a view of one of my filters (my double one) up in place.