

Mission 12--Fallen Angel--Secret Agent--(2:45)--Gadget Wars Weapons
While waiting for the action to start, hold your A-button down. As soon as it does start, release it to equip your watch-stunner and head up the nearby staircase (don't pick up the pistol off the floor). While going up, give the friendly guard a good zap so that he drops his weapon. Pick it up as you run by (if done smoothly, you won't even have to slow down  ). Pause and arm yourself w/the KA-57 he dropped. At the top of the stairs, shoot the enemy thru the door's barred window ahead and enter the room. Shoot at the other 2 enemies in the room as you run to the table by the window diagonally opposite the door. As you pick up the Palm-scanner off the table, look thru the window and kill an enemy ahead by the security door. Turn around and exit the room the same way you entered and go back down the stairs. Run to the double doors downstairs and go thru. Bear to the right and go thru the double (brown) doors to the outside (after going thru the door, you may stop for a moment to kill the bad guy to the right before proceeding on--but it's not necessary). Instead of going down the dirt path, stay on the walkway above and round the corner. Drop down to the roof killing the enemy on the roof (either directly in front of where you dropped down or in the corner to the right). Now kill the enemy
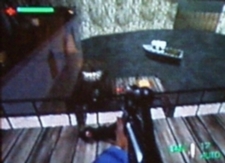 who is either on the boat or on the dock near the boat (if he is on the dock, you can kill him by shooting the barrel near him--it's obviously an easier shot). Then run around the corner to a spot next to the square hole in the floor. Shoot Buillion from here (if you kill him from this spot he'll almost always fall in such a way that you can get his palm-print). Give him a good blast (if you have to fire a 2nd burst at him, he usually falls into the water). You can get his palm-print from here (it can be a little touchy to get, but it does work ). Now re-equip a gun and retrace your steps all the way back to the room where you picked up the palm-scanner. Go thru the room and out the opposite door from which you entered. Turn left and if you see a baddie ahead...kill him. Pause and equip the palm-scanner and use it on the pad on the wall next to the security door (try and do it as you're running twd. it). Go thru the door and equip a gun. Move just a bit fwd of the door (so any remaining enemies outside it won't shoot you), but don't go too far into the room, glass panels will drop and gas will kill you if you do. Now shoot the cameras high up on the walls on either end of the room.
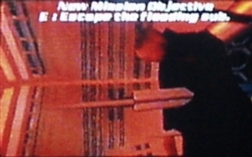
(NOTE: You can escape the sealed gas chamber by grappling a target thru a hole in the ceiling & climbing up the line, but this takes longer).Now go thru the room and run up the stairs. At the top, go to the left and kill the 3 enemies ahead of you at the end of the hallway (one of them may be in the jail cell area). Don't pick up all of their weapons, leave at least one on the floor. Enter the jail cell area and go to the far cell where "M" is being held captive. Shoot the lock off the door and enter the cell. After cycling thru the cut-scene, Just run past Gabor to the stairway just outside the cell area door, picking up a weapon that you previously left on the floor. Ignore the guards in the hall outside the cell area, just run to the stairs as fast as you can and run up them. While running up, pause and equip the gun you picked up. At the top of the stairs, shoot at the 2 bad guys as you run to the door off to the right. Go thru that door and the next one also. A cut-scene will be triggered. Cycle thru the cut-scene and the instant the action resumes...pull your trigger to kill Elektra (you will already be aiming at her)--If you hesitate even a second, you may get a MISSION FAILED.
 While waiting for the level to end, turn back twds the door and shoot any guard(s) who might come running in.
_MISSION COMPLETE_
Mission 13--A Sinking Feeling--00agent--(2:55)--Navy Skins
Start by running along the wall to your left and turn left at the edge of the water. Run along the sidewalk almost to the end and jump in the water twds the back of the sub.  Climb onto the sub at the tail and run twds the front of the sub along the left side (to avoid being seen by the men on shore). Run up to the ladder on the sail and climb up. Jump down and drop thru the hatch. Go to the 2nd hatch, get onto the ladder, climb down a short distance then hit your jump button...you will land right in front of a guard--shoot immediately to kill him, then take and equip his weapon (you will land so close to him that he'll put his hands up ).
NOTE: Use your x-ray vision to check for Christmas' whereabouts and avoid those rooms that she's not in. Christmas will be in one of 4 rooms in the sub: Either in one of 2 rooms off the first corridor (which you landed in); or in one of 2 rooms around the corner on either end of the first crosshall you come to. Wherever you find Christmas, after killing her guard...make sure you walk up to her and she starts talking...if you don't, she'll just stand there like a dummy (for a nuclear physicist, she can be pretty stupid).
If she was in one of the first two rooms, go left at the 1st cross hall and proceed fwd thru the first hatch you come to and turn right at the 2nd crosshall, then go left thru the already open middle door in the crosshall (from here on, the route will be the same no matter where you found her).
If she wasn't in one of the first two rooms, go fwd into the 1st crosshall and look to the right with your x-ray vision. If she's in that room, go in and rescue her, then proceed on fwd in the sub, going thru a hatch to the 2nd crosshall. Turn right at the already open middle door (as I said previously, the route from here on will be the same no matter where you found Christmas).
If she wasn't in any of those 3 rooms, turn left at the first crosshall, proceed fwd thru the 1st hatch you come to...just on the other side of it will be another door on your right. Christmas will be in the room that door opens up into. Rescue her, go back out and turn right. At the 2nd crosshall just beyond the room. Turn left and enter the middle door in the crosshall (again, the route from here on will be the same).After turning into the middle door in the 2nd crosshall, turn left at the end of the corridor, pass thru a hatch, and go thru the hatch just beyond it on the right. Continue straight on ahead...passing thru 2 more hatches and turn right at the end. Move fwd a short distance and drop down into the hatch in the floor (on your left). Wait for Christmas and as soon as she climbs down the ladder, climb up the ladder and go back the way you came from (once Christmas is in the torpedo room, you don't have to worry about her anymore). Go back the way you came from and open the 2nd door on the left that you come to. This is the control room. Kill all the men inside, go to the other door in the room. Open it and kill the guard(s) in that room and shoot the machine you see there (the steering controls).
_MISSION COMPLETE_
Mission 14--Meltdown
--Agent--(complete level...no time req.)--Contemporary Skins
--Secret Agent--(complete level)--Classic Skins
--00agent--(complete level)--Golden Gun Scenario
NOTE on difficulty levels: The only differences between the 3 difficulty levels in Meltdown are...a) The amount of time your air lasts (45 secs. for agent & 22 secs, for Secret Agent and 00agent)...b) The damage you incur from being shot or drowning...c) Not having auto-aim on 00agent. All enemies and items are present & in the same locations & the reactor meltdown takes the same amount of time (9:45) in all 3 difficulty levels. The one walkthru will work for all 3 awards (it was written for the 00agent diff. so it'll only be easier on the other two difficulties
A couple of general tips: -Even if you just can't get used to controller style 3 for normal play...Use it for the swimming portion of this level. It is far faster and much, much easier to control & steer Bond w/ style 3. Just try it and you'll see what I mean. After you emerge from the water, you can pause and switch back to your regular controller style if desired. -When swimming, keep going in a generally downward direction until you get to the narrow, horizontal opening w/the floating body nearby,..then go in a generally upward direction (there are 5 green lights along the way of the correct path on the downward portion of the swim).
When the level begins, walk fwd and drop down into the water. Turn and swim thru the opening into the next room (don't bother turning the valve-wheel on the wall...all it does is turn off a jet of steam). Turn around to face the way you came from, take a last breath and swim downward (the 1st green light should be on the wall to your right). Swim down thru the opening, level off and go fwd thru the opening ahead. Immediately after passing the threshold, turn downward (the 2nd green light should be to your right). Swim down the shaft to the bottom (spin 180 degrees while swimming down). Level off and swim to the end of the passage and turn downward again. Swim down this short shaft (the 3rd green light will be on the wall of the shaft), again--spin 180 degrees while swimming down. Level off and swim fwd a short distance until you come to the 1st opening below you (the 4th green light should be next to the hole-to your right). Swim down this long shaft spinning 90 degrees to the left as you swim, passing by a fallen ladder, and proceeding on to the very bottom (the 5th and final green light is near the bottom of this shaft--if you need air, there is a room next to the green light where you can get one...there is also a mach. gun on the floor of the room). Level off at the very bottom (a floating body should be here) and swim fwd thru the narrow horizontal opening and turn right. Swim a short distance fwd and turn upward...just a bit before you come to the end of the passage. Swim up thru the opening and proceed all the way to the top of the shaft (spin as you swim up so that the grating [normally a floor] is to your right). level off at the top and swim fwd thru the opening ahead. Immediately after passing the threshold, turn upward and swim up thru the opening. Swim all the way up this long shaft to the surface. Spin on the way up so that the long grill (normally a floor) is to your right. NOTE: Equip your gun as swim up the shaft.
Pop up out of the water, run fwd a bit (the water is choppy near the hole you came out of and will throw off your aim). Kill the enemy there and wait a moment for another to slide down a rope and kill him also. Pick up their weapons, reload and turn around. Run to the other side of the opening you came out of (there is body armor very close to the far side of the hole...don't miss it ). Continue fwd until almost the end of the passage and look up thru the hatch there for a grapple target (pretty high up there). Grapple it, turn to face the way you came from and climb up. There will be an enemy to kill when you get to the top (he'll be ahead and on the left side of the passage behind a jet of steam). Kill him and then jump off the rope and go fwd. Look up the hole w/ the white hatch hanging down. Grapple the target you see there. Turn to face the way you came from and climb up. Jump off the rope and go fwd. Jump up on the pipes on the left side of the room and hit the red button (by hitting your B-button). This will kill Renard and stop the meltdown. 
 Turn to face the rope you jumped off and kill an enemy you'll see sliding down a rope (if you're not fast, another will slide down also). Now climb back onto the same rope you jumped off and climb up a short distance and jump to where the enemy's body fell. Look up thru a hatch you'll see above you and grapple the target you see at the top. Turn to face the far end of the room and then get on the rope and climb up. At the top, there will be another guard ahead (behind another jet of steam). Kill him, jump off the rope and go fwd. Another enemy will slide down a rope. Kill him also (this is the last enemy
  ). Look up the hatch he came thru and grapple the target at the top. Turn to face the way you came from and climb up. Jump off at the top and walk fwd a short distance. Look up the hatch there and grapple the target you'll see. Climb up the rope. When you get near the top, the level will end.
 _MISSION & GAME COMPLETE_
Courier, Courier (alt. glitch method), and King's Ransom (agent) walkthrus by Vivagorditas and Mr. E--
All other walkthrus by Mr. E
Mr. E's times using these walkthrus:
Courier (SA)- 1:32
Courier (SA)(glitch)- 0:12
King's Ransom (Agent)- 1:37
King's Ransom (SA)- 2:57
Thames Chase (00agent)- 3:44
Underground Uprising (Agent)- 1:55
Cold Reception (SA)- 2:26
Cold Reception (00agent)- 2:31
Nightwatch (00agent)- 1:55
Midnight Departure (Agent)- 2:09
Masquerade (Agent)- 2:43
Masquerade (00agent)- 3:58
COW 1 (Agent)- 2:44
COW 1 (SA)- 3:03
COW 2 (Agent)- 2:37
Turncoat (SA)- 2:41
Fallen Angel (SA)- 1:52
A Sinking Feeling (00agent)- 2:25
Meltdown (00agent)- 2:22
Meltdown (Agent)- 1:38 (different method-[special fast time way])
Meltdown (SA)- 1:41 (different method-[special fast time way])
Special Thanks and Sources
Special Thanks:
For Detailed 007 Award info: www.angelfire.com/games3/twine64/007awards.html and codes.ign.com
For Tips: www.gamewinners.com/n64/WorldIsNotEnough.htm
For TWINE64 background info: to Skellington & Doctor Zhivago of EUROCOM/U.K..
For HTML help & posting of the FAQ on Bond-Station: to Goldenboy.
EXTRA SPECIAL THANKS to pernicious_p for the invaluable info he provided. This FAQ would never have turned out as well as it did without him.
VERY SPECIAL THANKS to Ian Flemming for thinking up James Bond and giving us all a hero to look up to.

Contact Information
E-mails with questions and/or comments are welcome, please mark subject...TWINE64 FAQ---send to Mr. E (Douglas B. Hoyer) or Vivagorditas at...
[email protected]
[email protected]