These exercises are arranged very roughly from easiest to most difficult. They aren’t meant to be inclusive of all the subtleties you have to consider in making optimal Pyramids decisions!
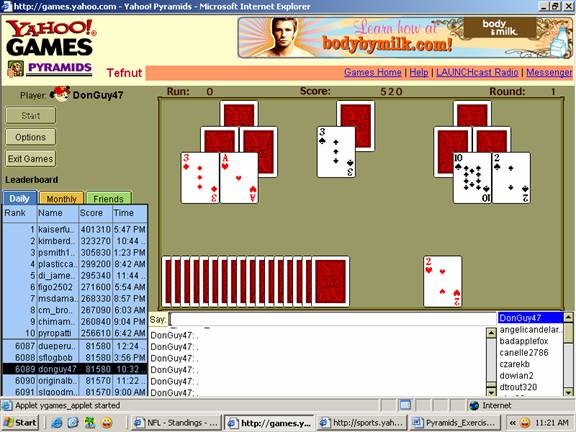
Exercise 1:
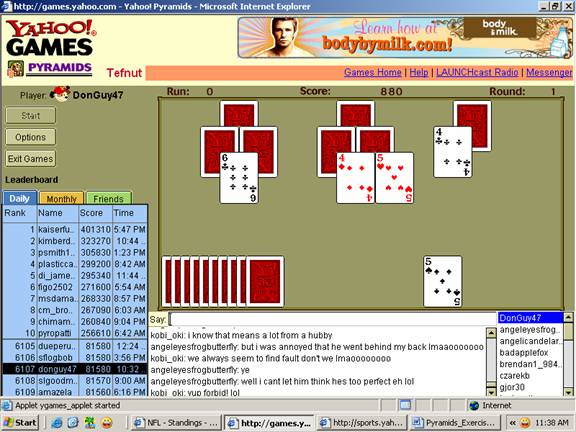
Solution 1: This is a classic situation. Taking 4-5-6 allows only one uncovered card (a 5) to remove the remaining 4. Doing 6-5-4 is better because uncovering a 5 or a 3 will allow you to remove the remaining 4.
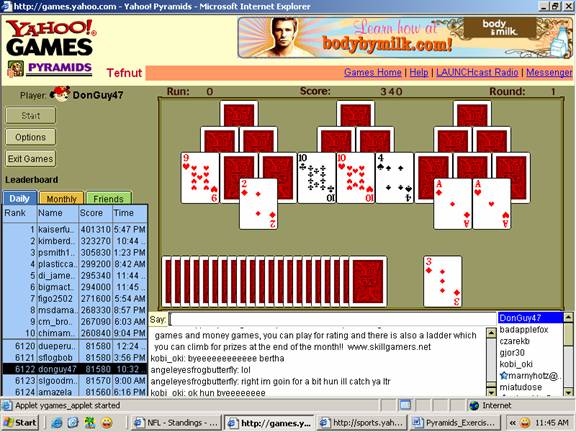
Exercise 2.
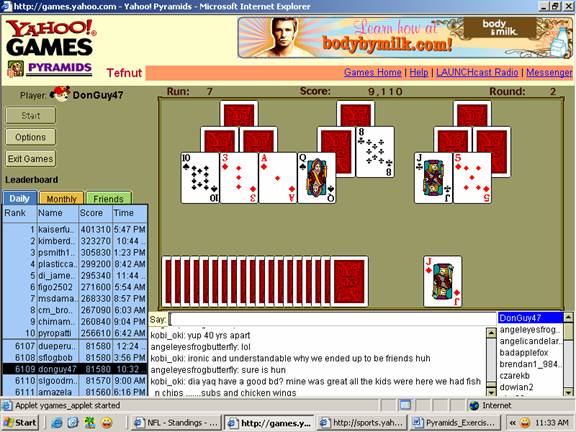
Solution 2: Doing Q-J-T will allow you to take the 8 if the Q uncovers a 9. But T-J-Q allows you to take the A if the Q uncovers a K; and the A is closer to you than the 8. So do T-J-Q here.
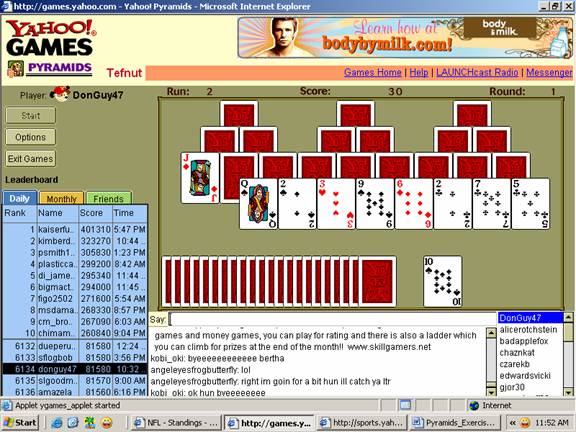
Exercise 3.
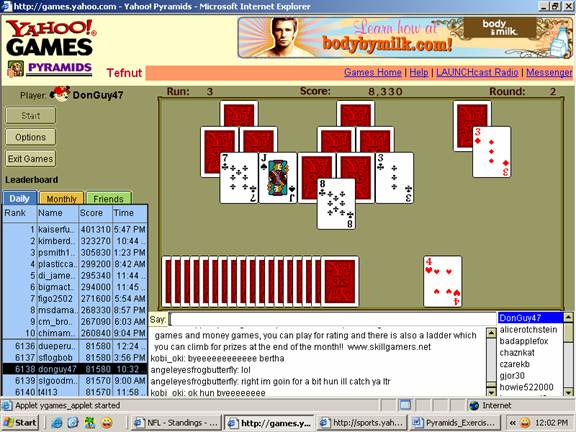
Solution 3: Taking the card closer to you is more important than uncovering a card. Take the 3 on the left.
Exercise 4.
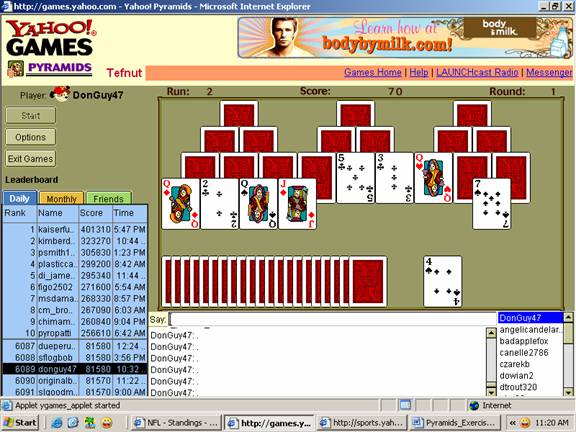
Solution 4: Don’t waste upcards: take the 5. If you take the 3-2, only two cards (4 and 6) remove the 5, and you’d rather use a 6 to get rid of the 7. If you take the 5, there are four cards (ace through 4) that remove the 3-2; and there won’t be any conflict over what to do with a 6.
The one argument in favor of taking the 3-2 is that the 2 is closer to you than the 5. If it were later in the hand, or if the 5 were further back, this argument would carry more weight.
Exercise 5. Rank the following options: A-2-3, 3-2-3, 3-2-A.
Solution 5: 3-2-3 is the worst option, because it uncovers only one card, which would have to be a 2 to allow you to remove the A; and the A that remains is in the row closest to you. 3-2-A is better: it uncovers two cards, and leaves a 3 further away from you. A-2-3 is the best option: it has both features of the 3-2-A option, but now uncovering a 2 or a 4 will allow you to remove the remaining 3.
Exercise 6.
Solution 6: Most of the time, I’d take the 4. Doing 2-A doesn’t help you remove the other A – you still need a K or a 2; and if you have a K or a 2, you can remove the whole A-A-2 combination. So using the 3 to do 2-A is a waste of an up card.
But here, the 2-A combination is closer to you than the 4, and it uncovers three cards instead of zero. So this is a situation in which other considerations trump the Golden Rule of not wasting upcards. Take the 2-A.
Exercise 7:
Solution 7: J-Q is two cards instead of one, and uncovers one card versus zero for taking the 9. Nevertheless, you should take the 9, because it will be (almost) twice as easy (T through K) to remove the J-Q later than it will be to remove the 9 (only 8 or T).
Exercise 8.
Solution 8: Here it is (almost) equally easy to remove the K-Q-K later (A or Q) as to remove the 2 later (A or 3). So the tie-breaker – that removing K-Q-K uncovers a card – comes into play, and you should take the K-Q-K.
Exercise 9.

Solution 9: Don’t waste up cards: if you take 3-4, you’ll still need a 3 or 5 to remove the other 4; so taking 3-4 doesn’t do any good. Make use of the 2 by taking the A instead.
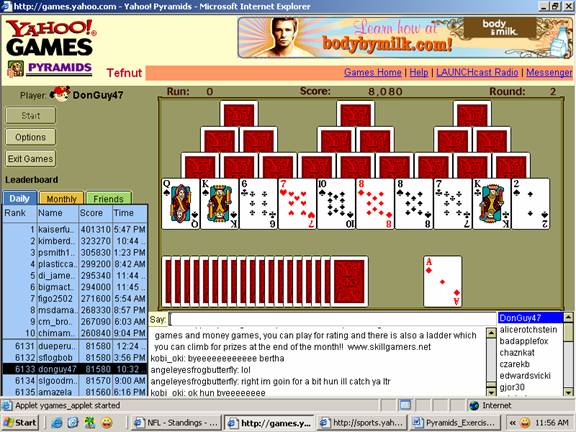
Exercise 10.
Solution 10: This is a tough decision. The advantages of doing K-A-K are the uncovering of four cards, and finishing the front row. The advantage of doing 2-A-K is that if an A or Q is uncovered, you can remove the last K. There are four Q’s and two A’s left in the deck, for a total of six uncovered cards that help you, instead of two cards if you do K-A-K. It’s early in the hand, and I haven’t seen any Q’s yet, so I’m going to gamble on 2-A-K, trying to remove all four cards right now, and hoping that if the gamble fails, it at least won’t strand that other K for very long. [Addendum: Suweet, the K I took uncovered a Q.]