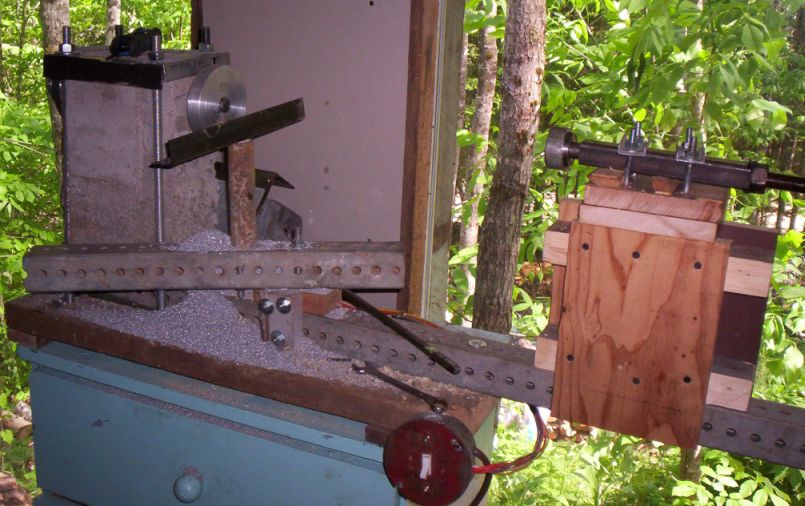
Concrete Headstock Homemade Lathe
I was unable to find any meaningful references on the Internet to the use of concrete in lathe construction.
All I could find were casual references to ' a friend of a friend tried to build one, but gave up part way' or
to the use of concrete to stiffen cheap machine tools.
I bought a copy of Dave Gingery's book on using aluminum castings to build a machine lathe. He claimed accuracy to within .001"
I didn't like the idea of making all the patterns. So I cast around for an alternative.
I was pouring a set of concrete risers for my front door steps when it hit me.
Concrete. Heavy. Strong. Vibration resistant. Granite would be better, and for a while I toyed with the idea of getting a granite tombstone from the local monument maker and boring it out for the bearings. Dramatic. Expensive. Difficult. The RIP Lathe was laid aside for future work.
I decided on a 3/4 shaft diameter for the prototype headstock. I bought a set of bronze bearings 1.5" x 0.75".
When slipped over the shaft, they proved loose. I slit them with my hacksaw, and wrapped each one in a pipe clamp. It was easy to screw them down to just the right amount of fit. I built a rough rectangular form, with a set of slots for the shaft to fit in. The tunnel between the bearings was arranged by wrapping the shaft in pieces of corrugated cardboard. I made the front bearings protrude about 1/4 inch. The rear bearing was cast flush. I also cast a 2 inch washer behind the front bearing to help take the load. I poured the headstock on Friday night.
For maximum strength, the concrete needs to be poured very dry, and once it starts to set, kept wet. If its a dry mix, it requires ramming to assure any voids or air bubbles are driven out. I don't think I rammed it quite hard enough, but it should do.
Saturday, I stripped the form off, very carefully. Concrete is as soft as cheese at this age. I then dressed the casting with a scraper, cleaning up any flash, and adjusting its general look. I also slipped the shaft out, and used a steel hook to catch and draw out the wet cardboard from the tunnel. I used a dental probe, which broke. Bending a new hook also broke. I then whipped out the propane torch, heated the steel tool to a red heat, bent to fit, and quenched in the nearest water. Worked fine. I then greased the shaft and ran it back home. It ran freely.
Sunday, the casting felt a little dry. I put it in a bucket of water and left it there for a few days.
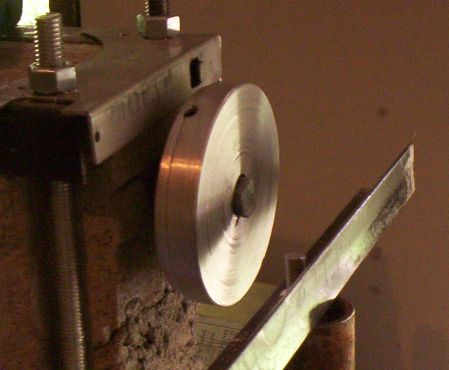
I pulled the shaft, and ground a flat on the last two inches, to correspond with the setscrew of the triple pulley. I reinstalled, and then oiled copiously with 10W30. A 60ml "veterinary use only" syringe from the local Co-Op works wonders as an oilcan.
It takes 28 days before engineers consider the chemical reactions in setting concrete done. At least 28 days - I know of at least one occurrence where a concrete dam is still setting, a decade after the pour. But then again, my headstock does not contain thousands of yards of concrete.
Dimensional change should not exceed 1% during set. This seems like a lot, but its around the same amount as you'd expect with an aluminium casting.
So far it works good. The headstock is solid and strong. I'm finding I need a decent tailstock, and that the stepdown pulleys do not step down far enough.
This adaptor plate is the first thing I have ever turned on a lathe. Its turned down from a aluminium disk I cast using a length of 1/4" keystock 12" long with a poor imitation of a round nose tool ground into one end.