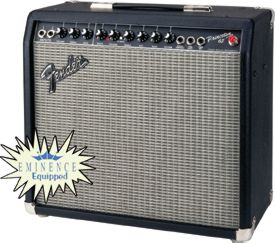
This
all started when my brother got this amp for Christmas. It's really called
the Princeton 65, the 65 standing for 65 watts of fury. So this bad boy
amp was no weenie, what WAS weenie about the amp is it having one 12" speaker.
The highs were great but the lows needed some definite assistance. I guess
you could replace the speaker, but then again you could build an extension
cabinet and have two 12's starring you in the face. The objective is clear,
now to build it. The following can be applied to any amp, not just the
Fender Princeton.
First I decided that the speaker grill (baffle) on the
extension cabinet should be the same size as the one on the amp.
So I measured the amps baffle and cut a new baffle, out of 3/4" plywood,
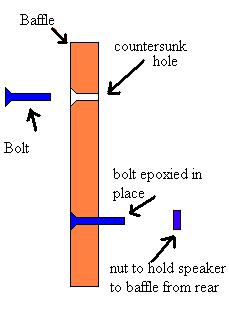
to the same dimensions. Then cut the hole for the speaker. After dropping
the speaker into the hole and making sure that it fits nicely you are gonna
want to mark where the mounting holes are. What we will be doing later
is getting some 1.5" bolts, diameter to fit the mounting holes, drilling
through the wood the same diameter as the bolts, counter sinking the holes
and epoxying the bolts into the holes. This will allow the speaker to be
rear mounted.
Next
up is to start building the cabinet. Most cabinets are made out of 3/4"
plywood or particle board. Measure the depth of the amp the extension cabinet
will be for. Then set your table saw to that distance. If you don't have
a table saw you can use a circular saw. You should try to cut all the sides
at once on the table saw so that they are all exactly the same depth. Say
you have a long piece of 10" wide plywood. Now you can take it over to
the radial arm saw and cut the sides to length, and they all will have
the same depth. To get the dimensions of the top and bottom piece of your
cabinet you should measure the bottom of your amp. Cut two pieces the same
size as the bottom of your amp from your longer piece of wood. Now the
sides of the cabinet will have to be as tall as the baffle you just cut.
That way when you put together the sides, top and bottom, the baffle will
fit nicely in the center. Pre-drill and countersink some holes 3/8" from
the edges of the top and bottom pieces. Glue and screw the pieces together
so that the sides are sitting on the bottom piece and the top is sitting
on top of the sides. When you screw these together make sure that all the
sides are lined up, flush and square, otherwise you'll end up with a crusty
looking cabinet.
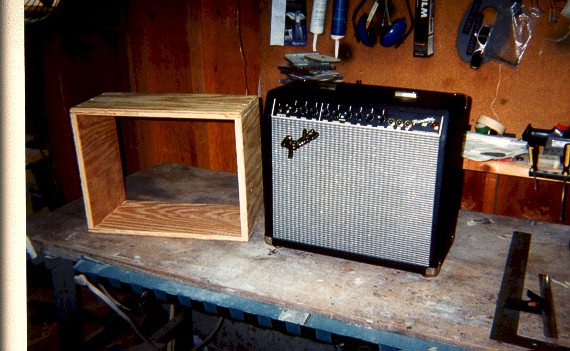
Here is the start of the cabinet sitting next to the Princeton
65.
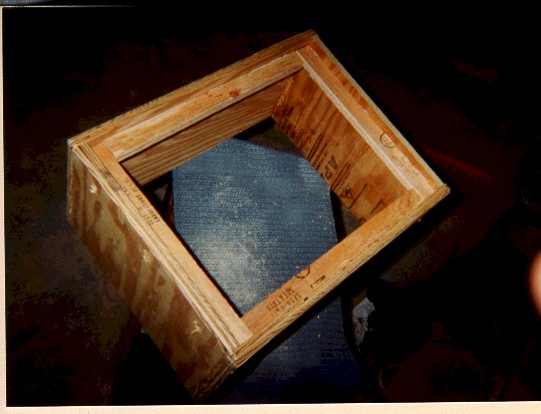
Now it is time to cut some 3/4" by 3/4" strips of wood.
You are gonna want to mount these strips of wood 3/4" in from the
back of the cabinet. That way when you make the back panel out of 3/4"
wood it'll sit flush with the sides. The back panel will be the same dimensions
as the baffle. Here you can see those 3/4" strips installed and caulked.
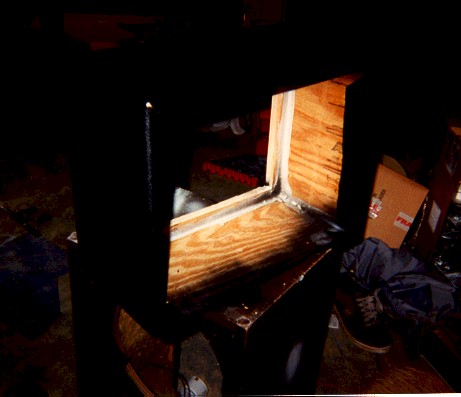
Here's
one
horrible picture. It is the beginning of the covering process. It started
with the corners and the areas around the baffles being painted black.
Next was to wrap the tolex around the cabinet. Use spray adhesive to hold
the tolex to the wood. Here is a cheesy drawing depicting how
I used 2 pieces of tolex to cover the entire shell of the cabinet. Note
that the small piece is on the bottom and the seems will not be seen. After
you wrap it all the way around the outside you can cut 90 degree angles
out of the tolex at the corners of the cabinet. Then it is possible to
fold the flaps left over into the box. There is no need to worry about
the corner seems being messy because the metal corners that will be added
later will cover any imperfections.
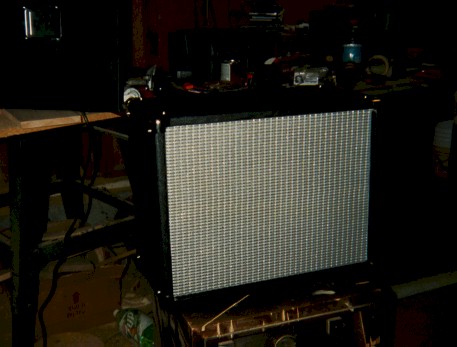
Here the baffle is already wrapped in matching grill cloth
and set into place. It is recessed in the same amount that the amps' baffle
is recessed. Once you have the baffle where you want it you can use angle
brackets on the inside of the cabinet to hold the baffle in place. You
should use at least six, two on the top, two on the bottom, and one on
each side. Then caulk all around it. In the back ground you can kind of
see the back panel sitting on the radial arm saw. A hole has been cut for
the terminal, then it was covered with tolex and then the terminal was
screwed and caulked into place. The next step is to mount the corners and
the handle. After wiring up the speaker to the 1/4" jacks on the terminal
you can screw the back panel on with screws and washers. Its a good idea
to get some fancy screws and washers for this part so they look nice.
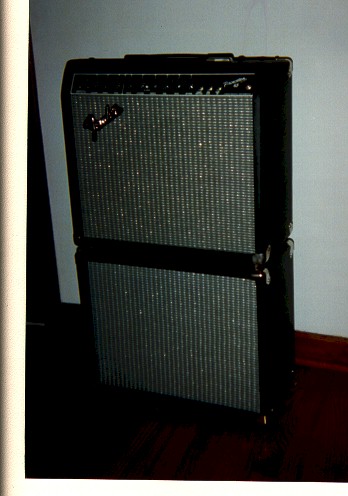
Well, here is the final product. It looks mean and sounds
great. It sounds 100 times better now with the extension cabinet. The speaker
I put in it is a Carvin PS12B. That
speaker is made for bass guitar but sounds totally awesome when tag teamed
with the Fender special design speaker.
 This
all started when my brother got this amp for Christmas. It's really called
the Princeton 65, the 65 standing for 65 watts of fury. So this bad boy
amp was no weenie, what WAS weenie about the amp is it having one 12" speaker.
The highs were great but the lows needed some definite assistance. I guess
you could replace the speaker, but then again you could build an extension
cabinet and have two 12's starring you in the face. The objective is clear,
now to build it. The following can be applied to any amp, not just the
Fender Princeton.
This
all started when my brother got this amp for Christmas. It's really called
the Princeton 65, the 65 standing for 65 watts of fury. So this bad boy
amp was no weenie, what WAS weenie about the amp is it having one 12" speaker.
The highs were great but the lows needed some definite assistance. I guess
you could replace the speaker, but then again you could build an extension
cabinet and have two 12's starring you in the face. The objective is clear,
now to build it. The following can be applied to any amp, not just the
Fender Princeton.
 Next
up is to start building the cabinet. Most cabinets are made out of 3/4"
plywood or particle board. Measure the depth of the amp the extension cabinet
will be for. Then set your table saw to that distance. If you don't have
a table saw you can use a circular saw. You should try to cut all the sides
at once on the table saw so that they are all exactly the same depth. Say
you have a long piece of 10" wide plywood. Now you can take it over to
the radial arm saw and cut the sides to length, and they all will have
the same depth. To get the dimensions of the top and bottom piece of your
cabinet you should measure the bottom of your amp. Cut two pieces the same
size as the bottom of your amp from your longer piece of wood. Now the
sides of the cabinet will have to be as tall as the baffle you just cut.
That way when you put together the sides, top and bottom, the baffle will
fit nicely in the center. Pre-drill and countersink some holes 3/8" from
the edges of the top and bottom pieces. Glue and screw the pieces together
so that the sides are sitting on the bottom piece and the top is sitting
on top of the sides. When you screw these together make sure that all the
sides are lined up, flush and square, otherwise you'll end up with a crusty
looking cabinet.
Next
up is to start building the cabinet. Most cabinets are made out of 3/4"
plywood or particle board. Measure the depth of the amp the extension cabinet
will be for. Then set your table saw to that distance. If you don't have
a table saw you can use a circular saw. You should try to cut all the sides
at once on the table saw so that they are all exactly the same depth. Say
you have a long piece of 10" wide plywood. Now you can take it over to
the radial arm saw and cut the sides to length, and they all will have
the same depth. To get the dimensions of the top and bottom piece of your
cabinet you should measure the bottom of your amp. Cut two pieces the same
size as the bottom of your amp from your longer piece of wood. Now the
sides of the cabinet will have to be as tall as the baffle you just cut.
That way when you put together the sides, top and bottom, the baffle will
fit nicely in the center. Pre-drill and countersink some holes 3/8" from
the edges of the top and bottom pieces. Glue and screw the pieces together
so that the sides are sitting on the bottom piece and the top is sitting
on top of the sides. When you screw these together make sure that all the
sides are lined up, flush and square, otherwise you'll end up with a crusty
looking cabinet.
 Here's
one
horrible picture. It is the beginning of the covering process. It started
with the corners and the areas around the baffles being painted black.
Next was to wrap the tolex around the cabinet. Use spray adhesive to hold
the tolex to the wood. Here is a cheesy drawing depicting
Here's
one
horrible picture. It is the beginning of the covering process. It started
with the corners and the areas around the baffles being painted black.
Next was to wrap the tolex around the cabinet. Use spray adhesive to hold
the tolex to the wood. Here is a cheesy drawing depicting 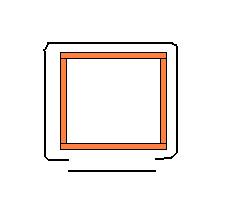 how
I used 2 pieces of tolex to cover the entire shell of the cabinet. Note
that the small piece is on the bottom and the seems will not be seen. After
you wrap it all the way around the outside you can cut 90 degree angles
out of the tolex at the corners of the cabinet. Then it is possible to
fold the flaps left over into the box. There is no need to worry about
the corner seems being messy because the metal corners that will be added
later will cover any imperfections.
how
I used 2 pieces of tolex to cover the entire shell of the cabinet. Note
that the small piece is on the bottom and the seems will not be seen. After
you wrap it all the way around the outside you can cut 90 degree angles
out of the tolex at the corners of the cabinet. Then it is possible to
fold the flaps left over into the box. There is no need to worry about
the corner seems being messy because the metal corners that will be added
later will cover any imperfections.