 Homer
Shaped Guitar
Homer
Shaped Guitar
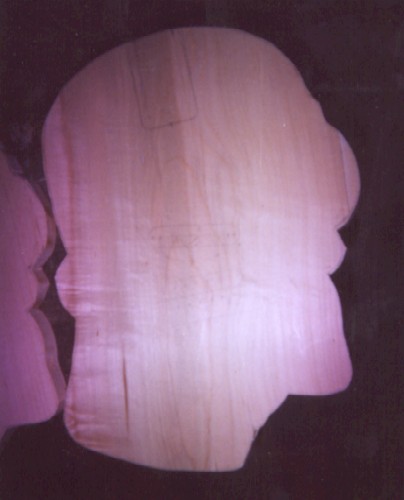
Here is one of the two pieces of the Homer guitar. This
one happens to be the top. It is marked for the neck, bridge and pickup.
Although you can't see it here well click on it to view it larger. You
have to be careful here because you want the center line of the neck, pickup
and bridge to be aligned with each other. The shape looks a little ruff
because it was cut out a bit larger than the shape drawn. This is so after
we laminate them together we can go back to the band saw and have some
wood to cut off. Then it will be sanded down to the line that we originally
drew. When marking where the bridge will go remember that the distance
from the nut to the 12th fret and the distance from the 12th fret to the
bridge saddles have to be the same, otherwise the intonation will be off.
As for the pickup, it can be mounted anywhere. Here it is mounted so that
it'll be totally in his eye. With a white pickup cover it won't look bad.
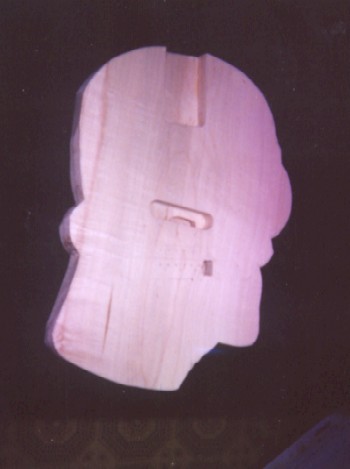
 Here
we see the 2 pieces of 3/4" thick maple that are cut out like Homer. The
piece on the left is cut out for the neck, pickup, and toggle switch. Toggle
switch? Instead of having a volume knob there will be a on/off toggle switch.
Also, the bridge to be used is a strat style tremolo bridge(minus the block).
The bridge will be screwed to the guitar using the 6 holes for holding
the bridge to the strat and the 3 holes used to hold the bridge to the
block(they are under the saddles). Since the bridge will be fixed there
is no need for a tremolo bar so the toggle switch will be mounted in the
tremolo bar hole. The right piece is the bottom. It's so the wire can be
run from the pickup to the switch then to the output jack. The mounting
hole for the jack will be drilled after the pieces are put together.
Here
we see the 2 pieces of 3/4" thick maple that are cut out like Homer. The
piece on the left is cut out for the neck, pickup, and toggle switch. Toggle
switch? Instead of having a volume knob there will be a on/off toggle switch.
Also, the bridge to be used is a strat style tremolo bridge(minus the block).
The bridge will be screwed to the guitar using the 6 holes for holding
the bridge to the strat and the 3 holes used to hold the bridge to the
block(they are under the saddles). Since the bridge will be fixed there
is no need for a tremolo bar so the toggle switch will be mounted in the
tremolo bar hole. The right piece is the bottom. It's so the wire can be
run from the pickup to the switch then to the output jack. The mounting
hole for the jack will be drilled after the pieces are put together.

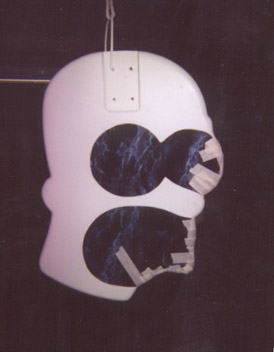
Here's that bad boy glued up. Now its ready for final
shaping. First up will be the band saw to get all the curves nice. Then
we'll sand it on the belt sander to get out the saw marks. Then we can
route around the entire body with a 3/8" round over bit. On the right picture
you can see that the back has been mortised. The strings are going to be
strung through the body. First we drilled from the top of the body all
the way through with about a 1/8" drill bit. The holes were drilled where
the bridge allows the strings to come through(we marked that earlier).
These holes were drilled on a drill press so that they were perpendicular
to the body. To cut out that slot in the back a 1/2" Forsner drill bit
was used. These bits cut holes with flat bottoms. Six holes were drilled
1/2" deep. Use a chisel to take out the rest of the material that the drill
missed. A metal plate will be machined to fit in that mortise. There will
be 6 holes in it lined up with the 6 in the body. They will be big enough
to fit the stings through but not the bead on the string.
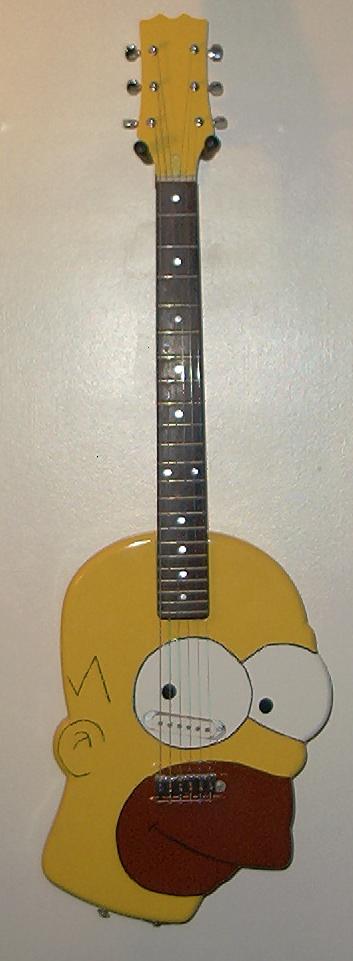
To the left is a picture of homer after he was primed
white. I put Black and blue contact paper over everything that will not
be yellow. Then I just gave the whole thing a few coats of yellow paint.
then I took off the paper over the mouth and masked off the yellow around
the mouth and painted that brown. The eyes are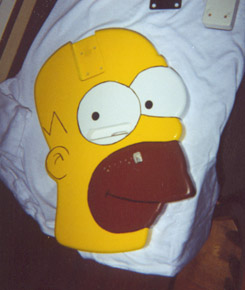 already white from the primer. After all the colors have been sprayed its
time to whip out the paint brush and paint the black lines. Last but not
least is the clear coat. On the right you can see the finished body. Notice
the pickup cavity is totally in his eye. That way when I put in a white
single coil it'll be unintrusive. I also painted the bridge (not the saddles)
brown and yellow to match his face.
already white from the primer. After all the colors have been sprayed its
time to whip out the paint brush and paint the black lines. Last but not
least is the clear coat. On the right you can see the finished body. Notice
the pickup cavity is totally in his eye. That way when I put in a white
single coil it'll be unintrusive. I also painted the bridge (not the saddles)
brown and yellow to match his face.
![]()