 |
|
|
|
|
|
|
|
|
|
|
|
|
|
|
|
|
|
|
|
|
|
|
|
|
|
|
|
|
|
|
|
|
|
|
|
|
|
|
|
|
|
|
|
|
|
|
|
|
|
|
|
|
|
|
|
Click on any of the pictures for a larger version. |
|
|
|
 |
|
|
|
 |
|
|
|
|
|
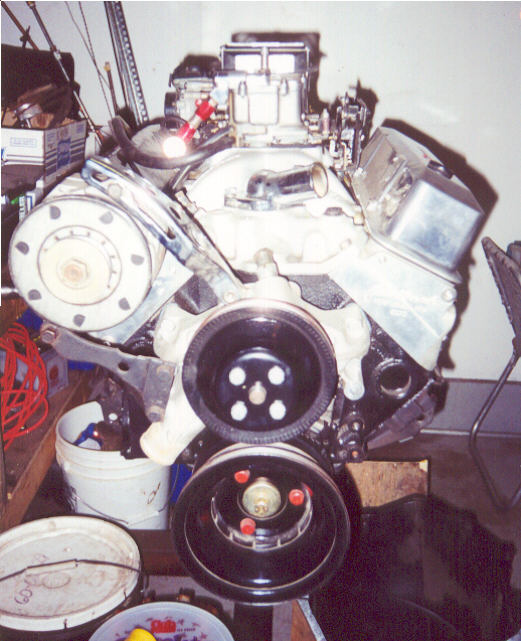
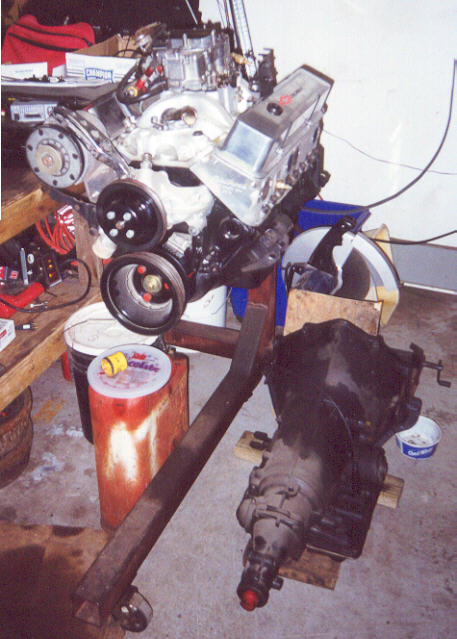
This is the engine that's in my Blazer. I totally rebuilt it with Edelbrock aluminum heads, Keith Black 10:1 pistons, Crane roller cam, Edelbrock intake, Holley carb. I did all the assembly, but the machine work was done by Wheeler Racing in Blaine, MN. It was dynoed at 385 HP and 435 TQ with a slighly smaller TPIS cam in it. I imagine the HP is slightly higher, and the TQ slightly lower with the Crane cam. You can also see the tranny that's behind it. It's a TH700r4 that was built by Premier Performance in CA, which I believe is now Jet Performance. They said it will handle 450 TQ so it should be okay. |
|
|
|
|
|
|
|
 |
|
 |
|
|
|
|
|
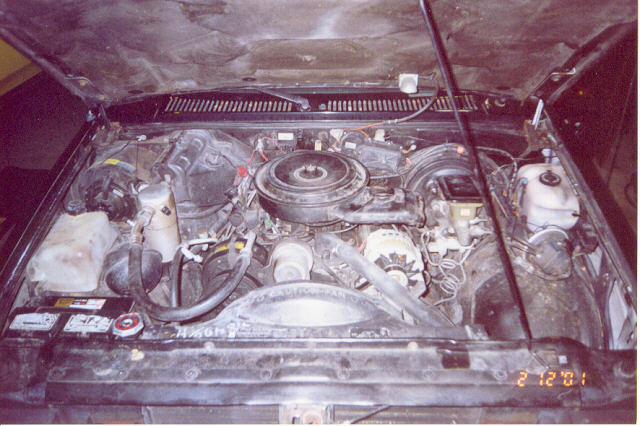
Here's the engine compartment with the stock 4.3L v-6. It looks kinda cramped and really dirty, but I will hopefully get that taken care of soon. Believe it or not, it will actually look less crowded once I get the v-8 in here. Luckily MN doesn't do emissions testing anymore, so lots of this stuff will not be necessary anymore. I also did a v-8 swap on my '85 Blazer 4x4, so this 2wd is my 2nd S-10 V-8 swap. |
|
|
|
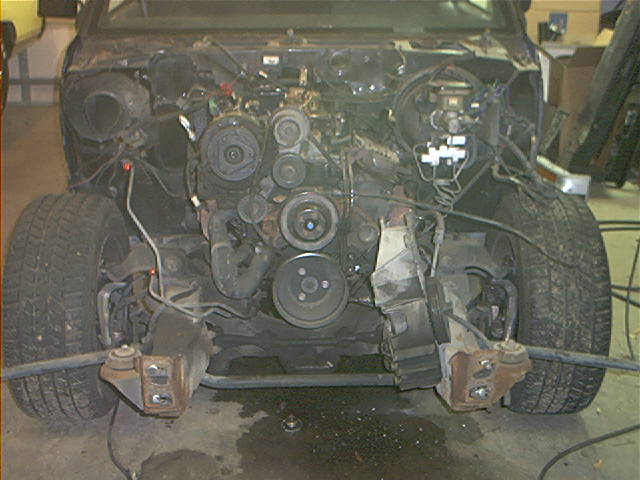
I decided to remove the entire front clip to make things easier to get at. I also want a newer '91 style grille, which means I had to change the core support anyways. |
|
|
|
|
|
|
|
|
|
 |
|
|
|
 |
|
|
|
|
|
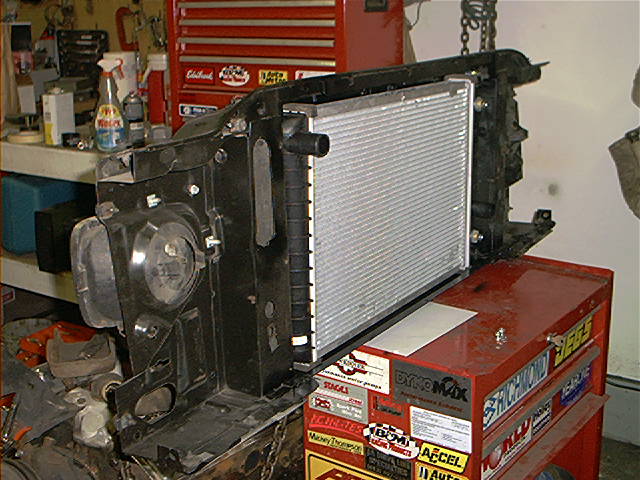
Here's the newer style core support. I got it at the local salvage yard out of a '92 Blazer. I've modified it to fit the Corvette radiator, which now sits where the A/C condenser used to be. Moving it forward that couple inches makes a big difference when it comes time to put in the cooling fans. |
|
|
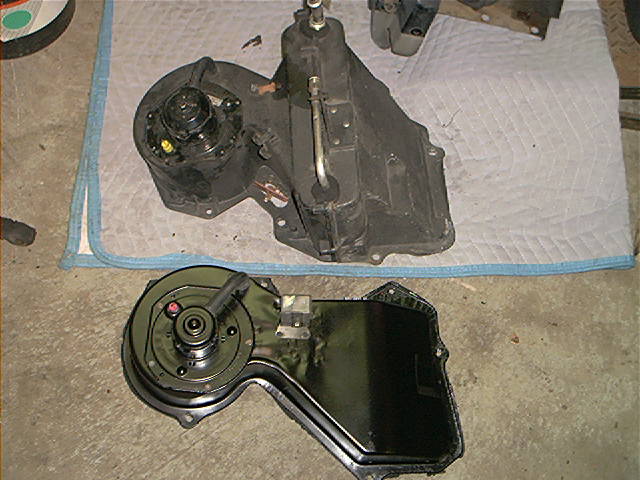
Since I live in MN, I feel that A/C is really unnecessary. So to save weight, and make more room, I'm pulling all the A/C components out. Here you can see my heater box (top), and the heater box I got out of a non-A/C S-10 at the local salvage yard. It's virtually a direct bolt in. |
|
|
|
|
|
|
|
|
|
|
 |
|
|
|
 |
|
|
|
|
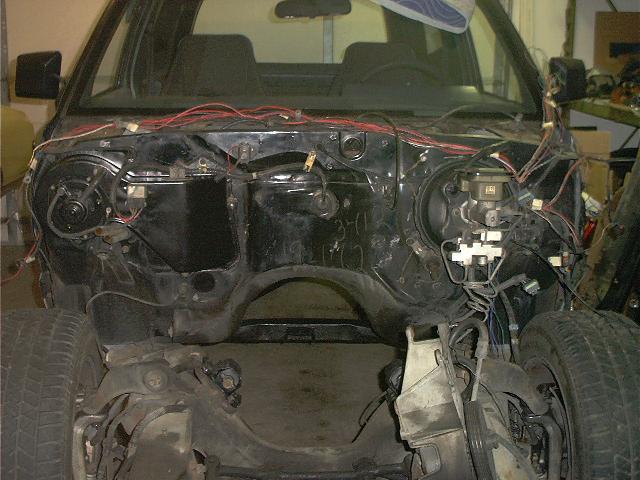
Here you can see I've got the engine and tranny pulled out. I also installed my new heater box, and I've gone through the wiring to determine what goes and what stays. |
|
|
|
|
|
|
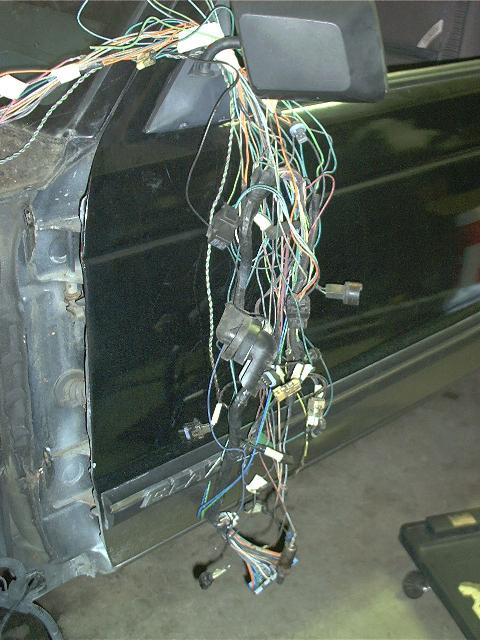
Here's all the wiring for the A/C, and the fuel injection and all it's sensors, which will no longer be needed. Now you can see why I say it will look cleaner and less crowded when I'm finished, even though the v-8 is bigger. |
|
|
|
|
|
|
|
|
|
 |
|
|
 |
|
|
|
|
|
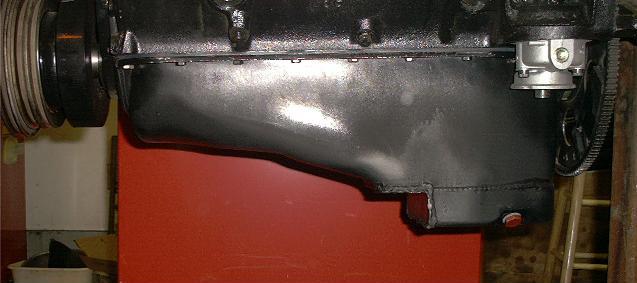
It turns out the oil pan wouldn't fit. I had a Moroso 7qt. oil pan on the 383, and it hit the front crossmember. I could have just gotten a stock Camaro oil pan and it would have fit fine, but to save some money, I just decided to modify my existing pan to fit. You can see where I took out the front lower corner so it would clear the crossmember. |
|
|
|
|
|
|
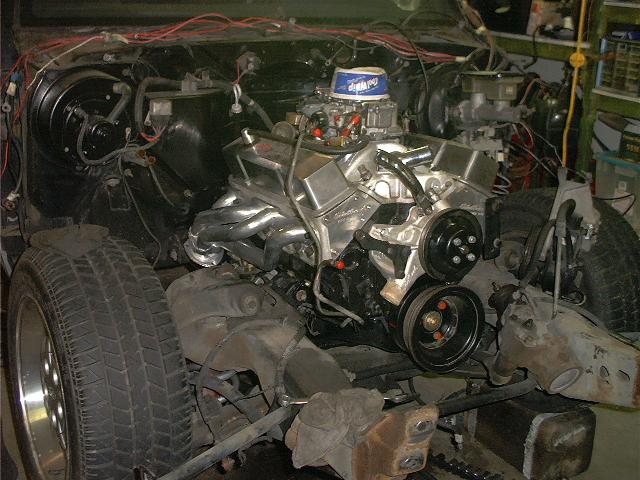
I trial fit the engine and transmission several times. Here it is installed for good. I set the engine back approximately 1.25" from a "stock" position. Although not necessary, it will give me more room up front for cooling fans, as well as better weight distribution. |
|
|
|
|
|
|
|
|
|
 |
|
|
|
 |
|
|
|
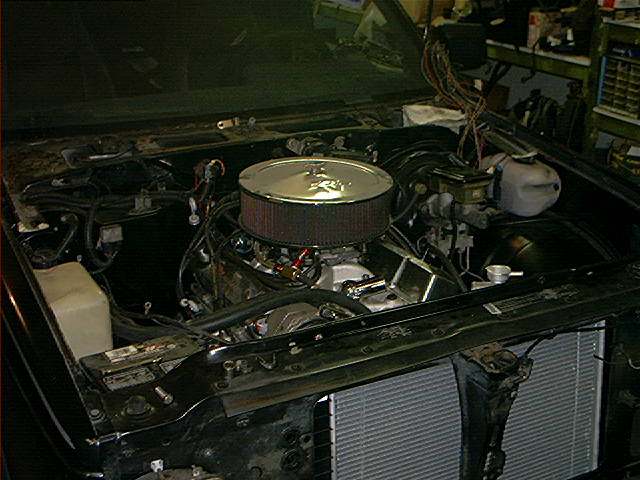
Here's the engine compartment with the swap almost done. Just a few small things left, but this is pretty much what it will look like. |
|
|
|
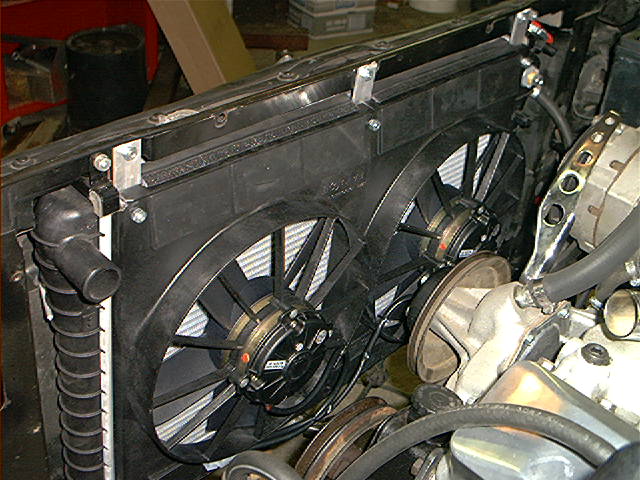
Here's a shot of the cooling fans. These are Spal dual 11" electric fans rated at 2780 cfm. They've worked great for me so far. The Blazer has sat idling in 95 degree weather for an hour with no problems. |
|
|
|
|
|
Back to Doug's Page |
|
|
Home |
|
|
Back to '89 Blazer Page |
|
|
|