 |
|
|
|
|
|
|
|
|
|
|
|
|
|
|
|
|
|
|
|
|
|
|
|
|
|
|
|
|
|
|
|
|
|
|
|
|
|
|
|
|
|
|
|
|
|
|
|
|
|
|
|
|
|
|
|
|
|
|
|
|
|
|
|
|
|
|
|
|
|
|
|
|
|
|
|
|
|
|
|
|
|
|
|
|
|
|
|
|
|
|
|
|
|
|
|
|
|
|
|
|
|
|
|
|
|
|
|
|
|
|
|
|
|
|
|
|
|
|
|
|
|
|
|
|
|
|
|
|
|
|
|
|
|
|
|
|
|
|
|
|
|
|
|
|
|
|
|
|
|
|
|
|
|
|
|
|
|
|
|
|
|
|
|
|
|
|
|
|
|
|
|
|
|
|
|
|
|
|
|
|
|
|
|
|
|
|
|
|
|
|
|
|
|
|
|
|
|
|
|
|
|
|
|
|
|
|
|
|
|
|
|
|
|
|
|
|
|
|
|
|
|
|
|
|
|
|
|
|
|
|
|
|
|
|
|
|
|
 |
|
|
|
 |
|
|
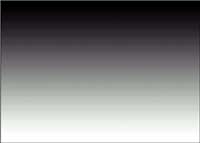
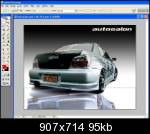
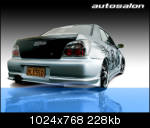
If you want the same size of the image i used, use 1024x 768 Pixels
(White or Transparent background) |
|
|
|
|
 |
|
|
 |
|
|
|
 |
|
|
|
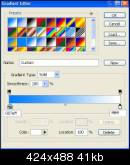
Start with a gradient. Tip: To constrain the gradient to 90 degrees hold down the shift key. |
|
|
|
 |
|
|
 |
|
|
|
|
|
|
|
|
|
|
|
|
 |
|
|
|
|
|
|
|
|
|
|
|
|
|
|
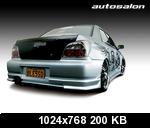
Image Result or Simular |
|
|
|
|
|
|
 |
|
|
|
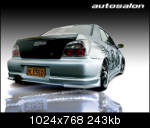
Add your text or image. tip i used my wrx picture |
|
|
|
|
|
|
|
|
|
|
|
|
|
|
|
|
|
|
|
 |
|
|
|
|
|
|
|
|
|
|
|
|
|
|
|
|
|
|
|
|
|
|
|
|
|
|
|
|
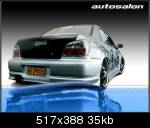
Click Here To Download the Transparent wrx |
|
|
|
|
|
|
|
|
|
|
|
|
|
|
|
|
|
|
|
|
|
|
|
|
|
|
Image Result or Simular |
|
|
|
|
|
|
|
|
|
|
(Right Click, Open in new window, Right Click Save Picture As) |
|
|
|
|
|
|
|
|
|
|
|
|
|
|
|
|
 |
|
|
|
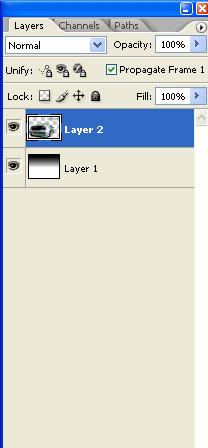
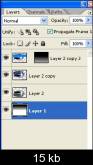
Make a copy of the text or image by dragging to the new layer icon |
|
|
|
|
|
|
|
|
|
|
|
|
|
|
|
|
|
|
|
 |
|
|
|
|
|
|
|
|
|
|
|
|
|
|
|
|
|
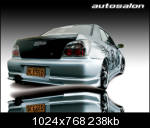
Image Result or Simular |
|
|
|
|
|
|
|
 |
|
|
|
tip. don't forget to duplicate the image before proceeding
On the copy go into free transform by clicking
> Edit >> Free Tansform
then make it vetical
> Edit >> Transform >>> Flip Vertical
Drag the reflected copy below the original |
|
|
|
|
|
|
|
|
|
|
|
|
|
|
|
|
|
|
|
|
|
|
|
 |
|
|
|
|
|
|
|
|
|
|
|
|
|
|
|
|
|
|
|
Image Result or Simular |
|
|
|
|
|
|
 |
|
|
|
|
|
|
|
|
|
|
|
|
|
|
|
|
|
|
Add a layer mask to the reflected copy and fill with a black to white gradient
> Layer >> Layer Mask >>> Reveal all |
|
|
|
|
|
|
|
|
|
|
|
|
|
|
|
|
|
|
|
|
|
|
|
|
|
|
|
|
Image Result or Simular |
|
|
|
|
|
|
 |
|
|
|
Should look like this |
|
|
|
|
|
|
|
|
|
|
|
|
|
|
|
|
|
 |
|
|
|
|
|
|
|
|
|
|
|
|
|
|
|
Image Result or Simular |
|
|
|
|
|
|
 |
|
|
|
Filter>Blur>Motion Blur. Angle -90 |
|
|
|
|
|
|
|
|
|
|
|
|
|
|
|
|
|
|
|
 |
|
|
|
|
|
|
|
|
|
|
|
|
|
|
|
|
|
Image Result or Simular |
|
|
|
|
|
|
 |
|
|
|
|
|
|
|
|
|
|
|
|
|
|
|
|
|
|
Make a selection around the bottom part of the background layer.
Image>Adjust>Levels or Ctrl/Cmd+L
Adjust the sliders to lighten the surface |
|
|
|
|
|
|
 |
|
|
|
|
|
|
|
|
|
|
|
|
|
|
|
|
|
|
|
Image Result or Simular |
|
|
|
|
|
|
 |
|
|
|
Select the background. Open Hue Saturation box. Colorize to add some color to the background.
> Image >> Adjustment > Hue/Saturation |
|
|
|
|
|
|
|
|
|
|
|
|
|
|
|
|
|
|
|
|
|
|
|
 |
|
|
|
|
|
|
|
|
|
|
|
|
|
|
|
|
|
|
|
Image Result or Simular |
|
|
|
|
|
|
 |
|
|
|
|
|
|
|
|
|
|
|
|
|
|
|
|
|
|
Make a selection around the bottom part of the image by using the rectangular selection tool |
|
|
|
|
|
|
 |
|
|
|
|
|
|
|
|
|
|
|
|
|
|
|
|
|
|
|
Image Result or Simular |
|
|
|
|
|
|
 |
|
|
|
|
|
|
|
|
|
|
|
|
|
|
|
|
|
|
Filter>Distort>Ocean Ripple. Adjust settings to suit |
|
|
|
|
|
|
 |
|
|
|
|
|
|
|
(Don't deselect) |
|
|
|
|
|
|
|
|
|
|
|
|
|
|
|
|
|
|
|
|
|
Image Result or Simular |
|
|
|
|
|
|
|
|
|
|
|
|
|
|
|
|
|
|
|
 |
|
|
|
|
|
|
|
|
|
|
|
|
|
|
|
Image Result after Ocean Ripple effect |
|
|
|
|
|
|
 |
|
|
|
|
|
|
|
|
|
|
|
|
|
|
|
|
|
|
|
 |
|
|
|
Now Click On the Gradient Tool again and select a nice blue water color |
|
|
|
|
|
|
|
|
|
|
|
|
|
|
|
|
|
|
|
|
|
Image Result or simular |
|
|
|
|
|
|
|
|
|
|
|
|
|
|
|
|
|
|
|
 |
|
|
|
Now Fill with gradient in the selected box. and then press "CTRL + D" it will deselect. |
|
|
|
|
|
|
|
|
|
|
|
|
|
|
|
|
|
|
|
|
|
Image Result or simular |
|
|
|
|
|
|
|
|
|
|
|
|
|
|
|
|
|
|
|
 |
|
|
|
Select the top part of the blue and click
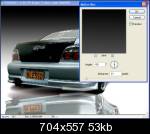
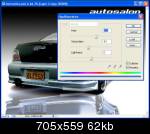
Filter >> Distort >>> Glass
play around with the settings to suit the image |
|
|
|
|
|
|
|
|
|
|
|
|
|
|
|
|
|
|
|
|
|
Deselect
"Ctrl + D" |
|
|
|
Image Result or simular |
|
|
|
|
|
|
|
|
 |
|
|
|
|
|
|
|
|
|
|
|
|
|
|
|
|
|
|
|
|
|
|
|
 |
|
|
|
|
|
|
|
Now Finally the final "STEP"
Select the background layer |
|
|
|
|
|
|
|
|
|
|
|
|
|
|
|
|
|
|
|
|
|
Image Result or simular |
|
|
|
|
|
|
|
|
|
|
|
|
|
|
|
|
|
|
|
 |
|
|
|
Select other half and click gradient
choose a nice orange and yellow background
(Last one on the layer pallete)
(doesn't matter what it's called) |
|
|
|
|
|
|
|
|
|
|
|
|
|
|
|
|
|
|
|
|
|
Image Result or simular |
|
|
|
|
|
|
|
|
|
|
|
|
|
|
|
|
|
|
|
 |
|
|
|
Fill inside the selected box. |
|
|
|
|
|
|
|
|
|
|
|
|
|
|
|
|
|
|
|
|
|
Image Result or simular |
|
|
|
|
|
|
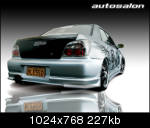
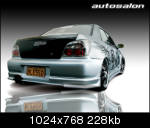
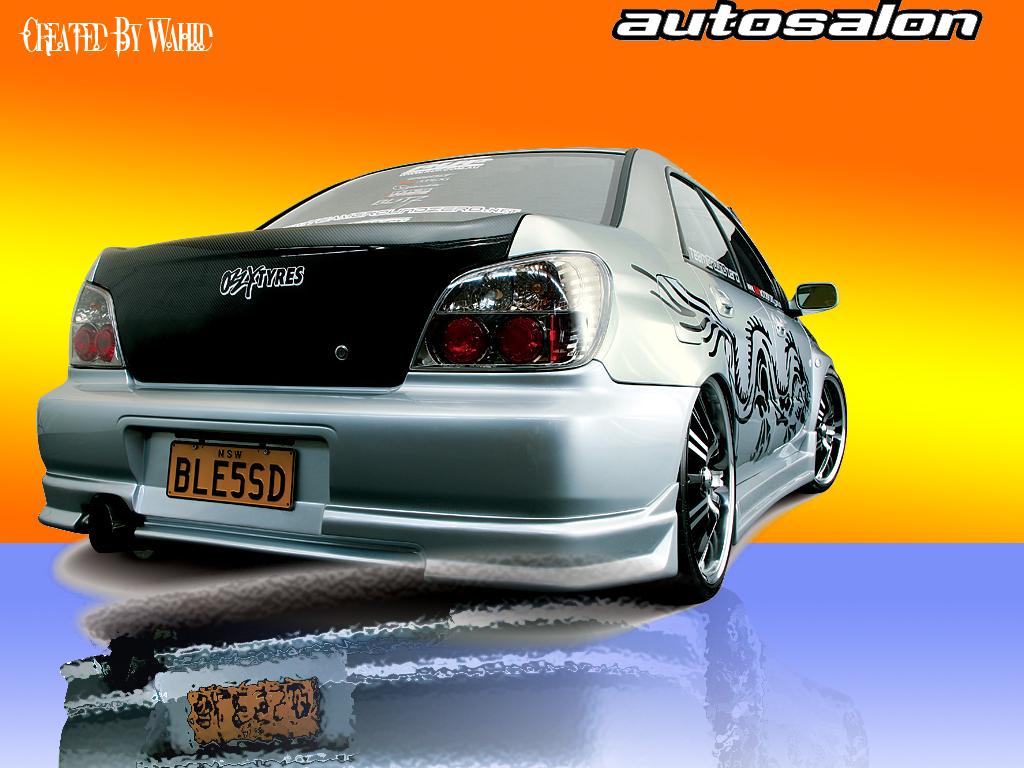
IMAGE FINAL PREVIEW |
|
|
|
 |
|
|
|
This tutorial was created by Wahid |
|
|
|
WOW THANKS FOR GOING THROUGH ALL 13 STEPS
if you have found any problems in this tutorial please email me at
[email protected] |
|


