I am happy to anounce that the missions 1-6 are complete!
It has a copyright by Prima Publishing. All rights reserved. None of the imformation can be sold in any way.
General Strategies and Tips
-Hotkey the comsat station to 9 and/or 0. This way you can get a sensor sweep quickly without having to click on your comsat station. You can get a sweep on cammand by pressing the station key and the S. Getting a sensor sweep can be critical if your troops are under attack from cloaked units, because the sweep will reveal enemy locations.
-For defence, build bunkers (filled with Marines) and missile turrets together and place siege tanks beside them. This combination provides an extremly tenacious defence that's very difficult for the enemy to penetrate.
-When both comsat stations and yamato guns become available, use them together to take advantage of the yamato's superior range. For example, when you want to take out a missile turret, sweep the missile turret area with a sensor sweep and then target it with a yamato strike. The Battle Cruiser will move in to take its shot but it will still be outside the missile turrets range.
-This is a little underhanded, but it can be very efective: Build a factory or barracks behind the enemy's position and start cranking out units for a backside attack. If you can't afford to build there, or can't get an scv to that position, fly an existing structure into position and then begin building.
-Use the Science Vessel's irradiate ability on biological units. This can be very effective, even against Templars or Defilers.
-Use bunkers to prevent enemy movment. Place them at any choke point the enemy must squeeze through to advance. Before it's destroyed, a carefully place bunker can do huge amounts of damage to the advancing enemy.
-Use bunkers in a "leapfrog" tactic(as Frank Gilson puts it), building them one after another, even deeper into enemy territory, with each previous bunker protecting the bunker under construction. This method is particularly useful against the Zerg.
Against the Zerg:
-Build lots of Firebats. The zerg are an organic race with mostly ground-based attacks. Firebats are always a cost effective unit to use against Zerg ground minions.
-Use Battlecruisers more for defence than offense, especially in multiplayer games. This is because the Zerg Scourges can take out a Battlecruiser for half the cost. In a resourcebattle, you'd lose.
-If a unit becomes infected with a parasite, the enemy can see everything it sees, so use the infected unit to fight the enemy. Never keep it around your base.
-Take out enemy guardians at all costs. A group of guaardians can reduce you base to rubble very quickly. Keep Wraiths or Battlecruisers around for this purpose.
-Whatever you do, don't leave an outpost Command Center for the Zerg to infest. If this happens you'll quickly have Infested Terrans blowing up around you and it isn't pretty.
-When attacking a Zerg base, always take out the underlying tech-tree buildings first. You may be temted to go for the hatcheries, but you can cripple your opponent more by taking out the structures necessary for building advanced units.
Against the Protoss:
-Again Firebats are important, but only against Zealots, so don't go crazy building them. Make just enough to keep Zelot groups at bay.
-Build Goasts for defence. They're a little too expensive to produce in bulk for offence. However, when an enemy Carrier or Reaver comes by, you can use the lockdown ability to neutralize them.
-Use Science Vessels. Their EMP ability is especially effective against the protoss(it removes there shields). The EMP is as effeective for attack as it is for defense.
-If the Protoss are employing Arbiters, use a Yamato Gun to take them out quickly and reveal cloaked units.
-Whatch out for Observers. They cloak and locate your own cloaked units. Use a Comsat Sensor Sweep to check for Observers in areas where you plan to use cloaked units.
-Keep Missile Turrets around your entire base as an early warning system. If this technique prevents just one shuttle from dropping a pair of Reavers, it's worth it.
The Terran Missions:
M1:WASTELAND
Mission Overview:
The Confederate Security Forces have quarantined the entire planet of Mar Sara and will have implementeda complete lockdown within 48 hours. You must relocate your colonists (SCV's and Marines) to the Wastelands. In route you'll meet up with Jim Raynor, the local marshal, who'll help you take out any enemies you encounter.
Mission Objectives:
-Find Jim Raynor
-Build a Barracks
-Train 10 Marines
-Jim Raynor must survive
Special Units:
-Jim Raynor(in vulture)
New Units:
-Marines
Enemy Units:
-Zerglings
Battle Stategy:
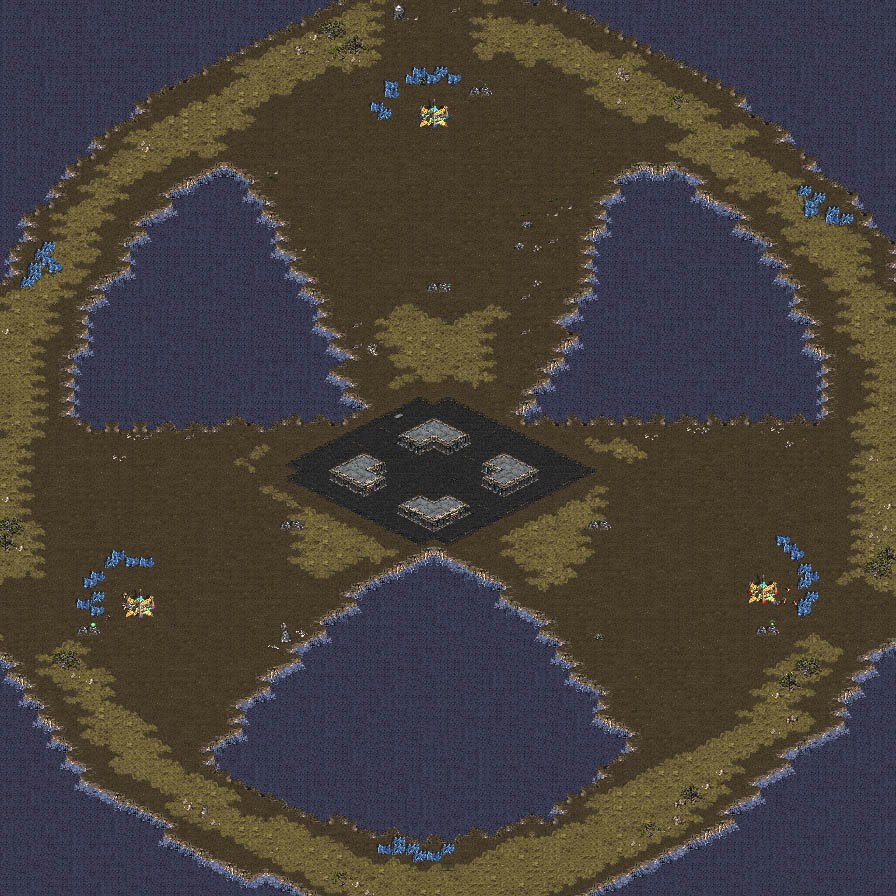
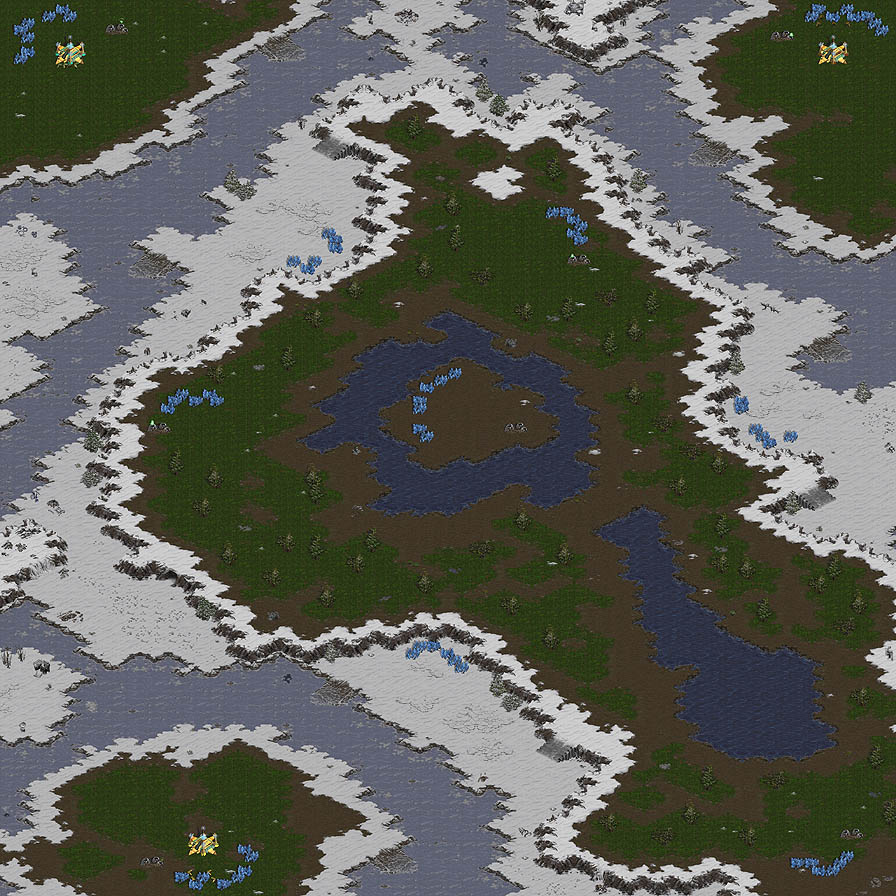
Your Marines and SCV's start in the upper-left corner. The Command Center and Supply Depot lie some distance away in the lower-central map area. Divid your troops into two groups, Marines and SCV's, and move the Marines toward the Command Center. After passing the bridge you'll run into Jim Raynor and one or two isolated Zergling groups. Terminate the Zerglings with extreme prejudice. Then move down to provide support for the base. Once the base is secure, Move you're SCV's down and start mining minerals in earnest. After retrieving sufficent minerals, build a Barracks and manufacture the 10 Marines you need to complete this mission. Jim Raynor and a couple of Marines can continue moving around the map mopping up Zerglings, but is not necessary for victory. Remember, if yoou lose any Marines, you must replace them to hit the production ttarget(10). Also, there is a slight chance you'll lose Jim Raynor in fighting the remaining Zerglings, so you may want just to sit tight and guard the Command Center area.
Rsource Management:
When your SCV's reach the Command Center, place them all on mineral-gathering duty until you've banked 150 minerals. then get one SCV to build a Barracks while the others continue gathering minerals. During this time, use your Marines to guard the Command Center area: A few zerglings may be waiting at various pionts around the periphery. Once the Barracks is in place, set it up to build one Marine after another until you reach 10, when the mission will end. To see how many Marines you currently have and how many more you need, check out the Marine counter in the upper-left corner of the screen.
M2:BACKWATER STATION
Mission Overview:
Backwater Station is under attack from unknown alien organisms. The Confederate headquarters on Tarsonis requests that you don't get involved, but Raynor is convinced the Confederate troops won't take action fast enough to save Backwater. It's risky, but if you team up with Raynor There's a chance you can get get to Backwater Station before it's to late.
Mission Objectives:
-Wipe out all Zerg structures
-Raynor must survive
New Units:
-Firebats
Enemy Units:
-Zerglings
-Hydralisks
Battle Strategy:
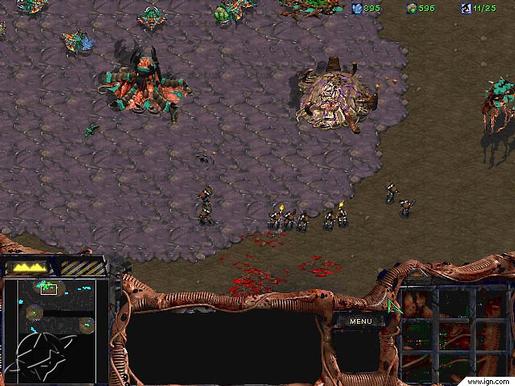
Your forces are grouped in the lower-left corner of the map, which gives you some measureof protection against the Zerg in the early going. After you've set up your SCV;s to collect resources, set your Barracks to produce Marines Until you have a squad of 12 ready to kick some zergling butt. Take advantage of Jim Raynor's awsome power when you hunt Zerglings, and if he gets damaged, simply order an SCV to repair Jim's Vulture. After you have 12 Marines, group them into one attack force and move northeast up the canyon to take out the few Zerglings waiting there. After their blood soaks the ground, move north up the ramp to slice up some Zerg. As soon as you climb the ramp you'll see the telltale sign of the Zerg's presence, called "Creep", as well as a Zerg structrure guarded by half-dozen Zerglings. Your 12 Marines will shred the Zerglings in the blink of an eye, leaving your firepower free to annihilate the Zerg structure. Now move your group of Marines north until they capture the Backwater Station Command Center. When you get a unit close enough to the Center, All the other structures and units fall under your control, including two SCV's and five Firebats. Immediatly order the two Barracks in Backwater to produce three or four Firebats each. Then park your Marines on the east(right) side of the station. Note:Think "blitzkrieg" when you attack with your Marines and Firebats in this mission. Don't hesitate to move into packs of Zerglings or Hydralisks. Your Marines are tougher than you may think, and before you know it you'll have crushed the Zerg. Once you've created the Firebats, form another group made up entirely of these units Now you should have two groups, 8 to 12 Marines(depending on how many you have left) and at least 10 Firebats. Move your Marines southeast and have them take out any Hydralisks and Zerglings they encounter while the Firebat group follows up to destroy structures. This one-two punch is an effective tactic in these early missions, so keep moving throughout Zerg territory this way. The scenario ends when you destroy the infested Command Center. The infested Command Center lies in the upper-right corner of the map.
Resource Management:
Begin sending an SCV to build a Refinery on the Vespene Geyser to the north while your Command Center produces 2 more SCV's. Have the remaining SCV start harvesting minerals posthaste. Continue creating SCV's until you have 6 or 7 of them, and leave all but 1 harvesting minerals. As minerals pour in, produce Marines until you have 12. That's it; that's all you have to do resource-wise to win this scenario. Your SCV's will continue collecting minerals while your lone Vespene Gas SCV slowly gives you all the gas you need to create Firebats down the road. This is a nice way to manage your resources in this mission, because basically you can set it up and forget it.
M3:DESPERATE ALLIANCE
Mission Overview:
Times are tough for the Terrans. The confederation is failing to provide a cohesive resistance to the Zerg menace, and even more stations have fallen to Zerg forces. The Confederation has arrested many of the militia that otherwise would provide defense, and the only groups still available to fight are the right-wing factions. One such group is the Sons of Korhal, lead by Arcturus MMengsk. He has contacted you to request assistance in stemming the Zerg onslaught. However, should you join forces with Mengsk, you'll be branded a criminal.
Mission Objective:
-Survive for 30 minutes
Special units:
-None
New Unit:
-Vulture
Enemy Units:
-Zerglings
-Hydralisks
-Mutalisks
-Overlords
Battle Strategy:
Your objective in this scenario is to survive for 30 minutes, and there are a couple of ways to go about it. You can either build your defences and sit tite, or you can take the offensive stance and attemt to deal a blow to the Zerg before they come looking for trouble. The latter approach is more fun, and will give you some valuable experience managing an attack force. First, you'll need to repair the burning Bunker on the lower road with an SCV. After that's done, throw the full complement of 4 Marinesinto each of your 2 Bunkers; this provides your base with a very powerful defence as you build up your attack force. Your attack force should consist of 2(3 is recomanded) groups of 12 Marines each, and 1 group of 12 Firebats. Upgrade Marine weapon range and armor strength before you set out. If all goes well, your full attack force should be ready to move out in 15 minutes.(You'll need extra Barracks to train your armies this fast. Tip:Bunkers are incredibly powerful structures:They take the damage instead of your units, allowing you to defend an area against a large attack with only a few Marines. If you can, you should keep a repair SCV around to repair the damage the Bunker has taken. A bunker that has 4 Marines in it and a repair SCV can hold out for a long time against seemingly insurmountable odds. Group your units into groups of 12, then move out(Marines first and Firebats second) up the lower road. Begin a sweeping motion that systematically wipes out the heart of the Zerg Hive. Generally, Marines are your best weapons against Hydralisks and Mutalisks because they have better range and their weapons penetrate Zerg armor better than Firebat weaponry. Continue training Marines at your base, you can use these extra men as reinforcements if you need to. Remember, your objective is only to survive, not to obliterate the Zerg. If you launch this massive attack on Zerg positions, they'll have little chance to launch a counterattack. Now you can just let the clock tick toward victory if you want, but you should stock your Bunkers with Marines. Just to be safe, keep a few extra emergency units(probably Marines) hanging around your base in case Mutalisks fly over. The key to this strategy is speed, if you are to slow, the Zerg will have to build a huge army. Note:Counterpoint:If you don't feel aggressive, you can win this mission by building some extra Bunkers alone the road and filling them with Firebats. Throw in a few extra Missile Turrets and a couple dozen Marines to guard the base, and you'll win without much trouble. Be sure to have at least 3 full bunkers at each base entrance, as well numerous Marines to handle flying enemies.
Resource Management:
Your first concern is to get the greatest amount of minerals in the shortest amount of time. Immediately set up your Command Center to produce 4 new SCV's while the others collect minerals. After you've set 6 or 7 SCV's collecting minerals, send 1 to repair the right hand Bunker, then order it to construct a Refinery on the Vespene Geyser. You don't need more than 1 SCV to gather the Vespene Gas, there should be enough to train the Firebats and reaserch the upgrades you need. At this point build a couple more SCV's to do some construction. Have 1 build Supply Depots and the other build more Barracks. You'll need at least 3 new Supply Depots(4 if you choose to have 4 attack groups), so keep 1 SCV making Supply Depots continually. You'll also need at least one SCV to repair damage from Zerg attacks. Before you know it, you'll have the Marine and Firebat groups ready for attack, and can simply leave your SCV's gathering resources while your Barracks produces more Marines.
M4:THE JACOBS INSTALLATION
Mission Overview:
Your tenure as a Colonial Magistrate has been suspended pending an official investigation of your affiliation with the Sons of Korhal. The Zerg have overrun the Mar Sara amost completely, and the confederates are abandoning the planet. Mengsk wants you to raid Mar Sara's Confederate Outpost and bring back whatever designs or weapon schematics you can get you hands on in the Jacobs Installation.
Mission Objectives:
-Retrieve data disks from the
Confederate netwoork
-Bring the disks back to the pickup point
-Jim Raynor must survive
Special Unit:
-Jim Raynor
New Enemy Units:
-Floor mounted guns(hidden)
-Wall mounted guns(hidden)
Battle Strategy:
Because this is an "installation" mission, the map is like a maze, and offers a number of superfluous pathways. At several locations in this mission, you'll encounter hidden floor and wall mounted guns and Missile Turrets. Stay calm as you move through the installation and don't panic if the floor opens fire on you, simply target the spot and have your Marines destroy the turret. As you move north-west you reach a room with a raised area serviced by three stairways. Several Marines and 1 Goliath defend this area, so don't head in there until you've grouped your attack force tightly. When you fight the Marines above you, remember that they have a height advantage. You only have a 70% chance of hitting them when you're lower, while they have 100% chance of hitting you. Therefore, always attack when your numbers are at least 3 times theirs. Be sure to activate any Beacons you come across as you wind throughthe installation. The 1st 2 Beacons you'll run across disable floor-mounted guns and release a number of friendly(and not-so-friendly) prisoners. The 3rd teleports your men so they can proceed along the optimal path and collect the disks. Once you grab the disks and return them to the starting beacon, the mission will end in a victory for you.
Resource Management:
You can't build new units in this scenario, so don't waste any units. If you end up losing a pile of men accidentally or due to a sloppy play, you may have to restart this scenario.
M5:REVOLUTION
Mission Overview:
With the disks secure, Raynor advises you that headquarters is analyzing the data and should have them decoded soon. Mengsk is confident your efforts have weakened the Confederate hold on the fringe worlds, but there's more work yet to be done. Sources have imformed Kerrigan that the colony on Antiga Prime is ready to revolt aganst the Confederacy, however, a substantial group of Confederate troops(Alpha Squadron) is stationed around the colony. Kerrigan will help reclaim the colony, but you must use all your skills to eliminate the Confederate base established there.
Mission Objectives:
-Take Kerrigan to the Confederate Command Center
-Raynor and Kerrigan must survive
-Destroy the Confederate base
Special Units:
-Jim Raynor(in Vulture)
-Kerrigan(Ghost)
New Units:
-Wraith
-Dropship
-Vulture
Battle Strategy:
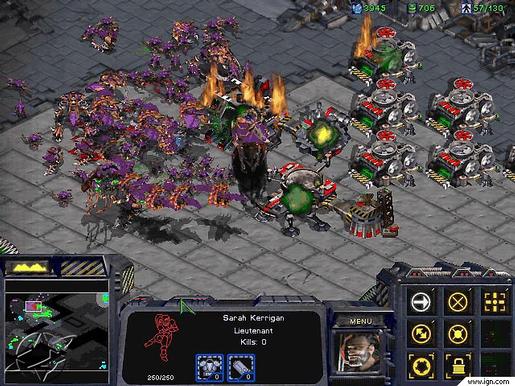
This mission begins with your troops in the upper-left corner of the map. Group them and proceed south until you run into Kerrigan. After Kerrigan and Raynor engage in a brief verbal fencing match, proceed south until you reach the 3 Missile Turrets on the roadway. Destroy them. Continue along the road(now leading northeast) and take out the waiting Vulture.Next turn north and head to a clearing just left of some Confederate Bunkers. Your Marines must take out a Confederate Wraith guarding this area, but otherwise you'll be safe there for a while. Separate Kerrigan from your group, then move your troops in to take out the Bunker directly to your right, and then the Missile Turret beside it. Missile Turrets are detectors and can see cloaked Ghosts, so you must take it out before you can sneak Kerrigan past. Once the Turret is gone, move your troops back, then cloak Kerrigan and move her up to the Beacon. With the Turret destroyed, enemy units can't spot her when she's cloaked, so getting to the beacons will be easy. After the Antigan base is liberated, the Antigan Bunkers will destroy most Confederate forces near the base. You can move Raynor and the Marines in to mop up the last few Confederate Marines after the Confederate Bunkers succumb. After you liberate the Antigan base, your objective becomes destroying the Confederate base(that scrols along the bottom of the map). You must get the Antigan base up and moving forward the military force to crush the Alpha Squadron. Fortunately, the Antiga Prime base is substantial and you don't need to build a lot of infrastructure to win. 1st, repair any buildings(or Jim Raynor's Vulture) that have taken damage, then set your Command Center to produce as many SCV's as you can afford. After setting up your resource gathering, start producing Marines and Wraiths, as well as Missile Turrets, along the base's southern border. The Confederate base lies along the lower quarter of the map, so the best staging area for your attackslies to the south. Build up a strike force of 12 Wraiths(with cloaking ability and Apollo Reactors), and 12 or so Marines with upgraded weapons and armor(if possible). Then get ready to mix it up. Cloak your Wraiths and head to the lower-right portion of the map, where a Confederate Refinery and plenty of SCV's rush resources back to the Command Center. As you cloaked Wraiths fire on SCV's and the Refinery, many Confederate Wraiths fly in to stop the carnage; because your ships are cloaked, you can lay waste to them quickly. Note:The Power of the Cloaked Wraith:A large group of cloaked Wraiths can havoc on enemy air and ground units. As long as you're careful to back up your Wraiths with ground units that can take out detector units suck as Missile Turrets or Spore Colonies, the Wraiths can turn the tide of a battle. After clearing the lower-right corner of the Confederate menace, load the Dropship with Marines and transport them to the secured area. Move as many as you can, then collect them into 1 or 2 groups. Now you'll move from East to West across the bottom of the map with your Wraiths and Marines. There may be spider mines in this area, send lone Marines in 1st to detonate the mines. Use your cloaked Wraiths to take out air and ground unitswhile your Marines move foward to knock out Missile Turrets that would give your Wraiths' position away. Using this method, you'll quickly sweep the Confederate base off the map, leaving only a few straggling units for your Wraiths to hunt down.
Resource Management:
After capturing the Antigan base, your goal is to quickly amass a small army of SCV's to collect the large amounts of minerals and Vespene Gas you'll need to construct the necessary Wraiths. After liberating the base, set the Command Center to build 5 SCV's while 2 active collect minerals and repair damage to Jim Raynor and any buildings that took hits during the fighting. Once the resource gathering is in full swing, build several new Supply Depots to accommodate the strike force. You also must build a Comsat Station so you can develop cloaking, and an Engineering Bay to build Missile Turrets to protect the base from Confederate Wraith attacks. You may want to move your Starport down to the southern portion of the base. If you are enterprising, you can build a Command Center in the south to help speed up the Vespene Gas collection.
M6:NORAD II
Mission Overview:
The Confederation is in shock over the Antigan revolt. The remains the Alpha Squadron, and it's commander, General Duke, have crash-landed in their flag ship, Norad II. It's your job to move in and save the colony and General Duke. It's a bitter pill for Raynor and Kerrigan to swallow, but Mengsk feels saving duke will make him a powerful ally. War is hell.
Mission Objectives:
-Protect Battlecruiser Norad II
-Take Raynor to Norad II
Special Unit:
-Jim Raynor(Vulture)
New Units:
-Goliath
New Enemy Units:
-Mutalist
-Spore Colony
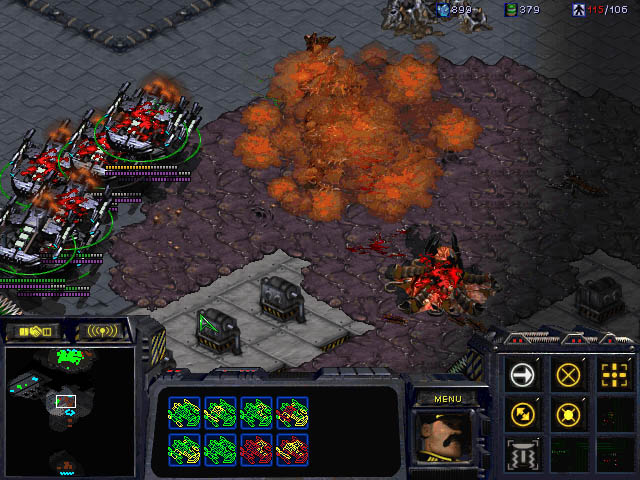
Battle Strategy:
Your base is in disarray following a Zerg attack, and several of your buildings will need repair. Your first priority is to mobilizeRaynor and the Marines and Firebats around him to secure the base. While you're moving your Marines into the existing bunkers, use your SCV's to fix up any buildings that are terminally damaged(in the red zone). If a building that is in the red zone is not repaired, it will eventually explode and be lost. Tip:Terminal Buildings:If a Terran building has taken enough damage to put it in the red zone, it will continue deteriorating until it's been destroyed. Once a building reaches this state, you must repair it at least to the yellow level to avoid losing the structure. Note:Nored 2 Strategy:When the Norad 2 comes online, you'll notice that you have a pair of SCV's and some other units(Goliaths, Marines, and Firebats). This position will undergo fairly heavy Zerg attacks during the early part of this mission, so repair any Bunker damage you may have taken. Then, put your units(including the SCV's) into the bunkers. As the enemy swarms attack, your bunkers will take a beating, but , whenever they need to be repaired you can simply unload one of your SCV's out of the bunker to fix it, and then reload it back into the bunker. During quiet periods(when the Norad 2 isn't under attack), use your SCV's to repair the ship. However, always keep a lookout forenemy attacks, your SCV's are to valuable to lose. Whatever you do, don't attempt to build any units near the Norad 2, and don't attempt to launch any attacks from this position. If you do, you'll bring the wrath of the Zerg down upon you, and the mission will be over. After thwarting the initial Zerg attack, there's only a short period of time for you to get your defences back up before the next onslaught. Continue repairing damaged structures while you put Marines(and/or Firebats) into the existing bunkers. If you can spare the resources, build another bunker near the refinery to protect your north flank. Once you have a defense perimeter of Marine-filled bunkers, you'll have a shield Zerg ground units can't penetrate. you next priority is to build up a freet of Wraiths and a large contingent(20) of Vultures, Goliaths, and Marinesto mount an assault on the spore colonies guarding the airways between the base and the Norad 2. Caution:With the resources at your fingertips in this senario, you may be tempted to try to take out all of the Zerg by force. That could be suicide. The Zerg you can't see, the ones just north and just east of the Norad 2, are numerous, and defeating them would take a very long time. In this case, it's better to be sneaky than ruthless. Once your troopsare ready to go, move the Dropships to the edge of the ridge east of your base. There's one area where the spore colonies can't hit your ships, but you may still want to throw a Wraith or two in front to take hits instead of your Dropships. Once your troops are on top of the ledge, move systematicly from one spore colony to the next, clearing an area for a Dropship to come through. At this point, expect the Zerg to throw plenty of Mutalisis and some ground units at you. You should have your Wraiths ready for backup. As this battle goes on, send one Dropship back for reinforcements(any mix of units you prefer) and the other to pick up Jim Raynor. When you're fairly sure you can sneak a Dropship to the Norad 2, fly it in and drop Raynor on the beacon. That's it, you win.
Reasource Management:
The most precious resources to manage at the beginning of this mission are the buildings that have fallen into the red zone. They'll collapse in minutes(or seconds) if you don't get an SCV over to do some repair work. After securing the area and ensuring you won't lose buildings to deterioration, build 6 to 10 SCV's to start gathering resources. Devote one SCV exclusively to repairing damaged buildings and constructing bunkers. After the tense initial period, you can gather resources in a business-as-usual manner, making sure you build a starport with a control tower,and an engineering bay so you can make Wraiths and missile turrets as the game progresses. Whatever your plan, you should use your resources first to repair structures and provide a defence curtain around your base and then to make Wraiths and Goliaths."


It has a copyright by Prima Publishing. All rights reserved. None of the imformation can be sold in any way.