home | what's new? | bad things | tips | calendar | askCat | resources | contact | guestbook
|
How to Make An Envelope Back Pillow |
 |
Materials
1/2 yd fabric
16x16 pre-made pillow form
The first thing to do is make a pattern. Cut a 16" by 16" square. Don't add hem allowance and the cover will fit the pillow beautifully. Cut one of whatever fabric you have chosen for the front. I used a velvety fabric for the front and satin for the back. Fold the pattern down 3" and cut two of the fabric for the back.
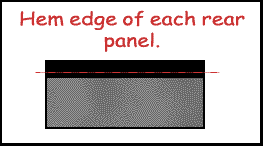 |
Turn over 1/4" to the inside of each of the back pieces and press. Repeat this process and hem those edges down. |
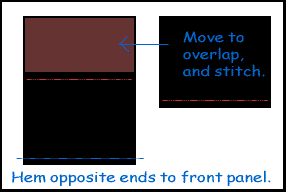 |
Next pin the opposite end of each of these pieces to opposite sides of the front piece, wrong sides out. Stitch both. Trim close to the hem. |
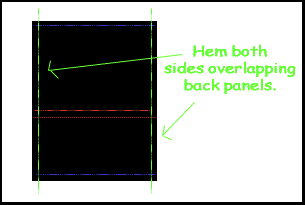 |
Pin the remaining two sides shut. You want one side to overlap the other like an envelope. Stitch both sides, yes over the overlap as well. Trim close to hem. Turn right side out and insert pillow form. It's that simple. |
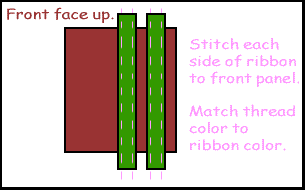 |
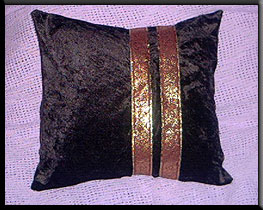
If you would like to add ribbon like in the picture above, follow these instructions. Cut as many pieces as you would like to have on your pillow, sizing them a 1/2" bigger than the length of the pillow. Before sewing anything to the front panel, stitch the ribbon in place, up one side, down the other. Then, when you sew the other panels on, the ends will be sandwiched in. |

Click to subscribe to the Cat Smith DIYing Newsletter!!
back to sewing
home | what's
new? | bad things
| tips | calendar
| askCat
| resources
| contact | guestbook
Cat Smith DIYing and its contents are ©2002
Contact the Web Mistress regarding any questions, comments or problems:
DIYgothicCatGrrl