|
|
||
11/27/06 |
|
|
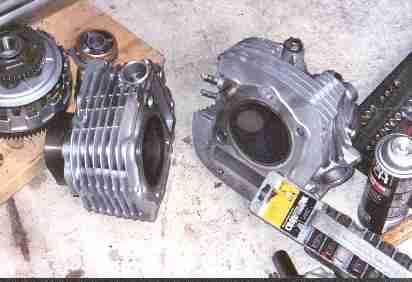
Welcome to the Virago Engine page. So I kept the crank assembly, most of the timing set parts, and matching cylinders and heads from the bike's motor. I also find out why it cranked so hard. I think you could measure the thickness of the carbon buildup in the piston tops and combustion chamber on the heads. I figure the guy ran around with the choke on all the time. So I clean this off and ponder- new rings? Then I think hey I'm doing this, it will never run anyway. So I attack the cylinders with scotchbrite (yes) and give them a good cross-hatch pattern.
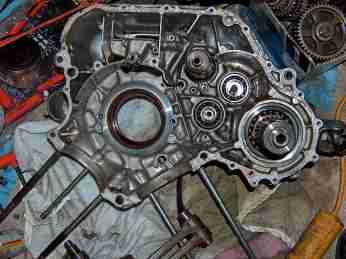
I order new bearings and wait for them to come in. In the interim, I clean and scrub everything. ( I don't think you can ever clean EVERYTHING out, as I found out later ) When the bearings arrive, I remember reading some where about heating a bearing seat to ease installation. So what I do is put the bearings in the freezer, the crankcase in the oven and set it to 150 degrees. Take the hot case out put it on its side, take the Main bearing out of the freezer, place it on the hole it gets pressed into and took a mini ball peen hammer to tap it to align it in the hole and I just barely touch it and it drops to the bottom of the seat, job over! I tap the rest of the bearings into place and I'm ready for assembly.
Now I look at all these parts laying on the basement floor and think "You
stupid fool, who in the world do you think you are that this will ever run
again??" I scour the manual to make sure I don't leave any o-rings out. All I can imagine is leaving one out and having no oil pressure and having to do a complete tear down. I follow the instructions on the yama-bond tube of sealer for the split case. Two years and 9000 miles later, this is the only joint not leaking. Sometimes I think the bike thinks it's a harley because it now leaks oil and parts have fallen off. And if you grossly mis-tune the front carb, it even kind'a sounds like one! The timing set was real interesting to get set. They say to align this gear with that gear, and that dot with this dot using a straightedge but one dot is behind another gear and you have to eyeball it. Then you have to align this with that and it never really made sense so I figure the ultimate goal is to line up the dot on the cam sprocket with the timing mark on the head just as the scribe mark on the flywheel aligns with the timing mark on the left cover. So that's what I did and it works well. ( I have since then gained some experience with this and now it does make sense and is actually easy, now that I understand it! )
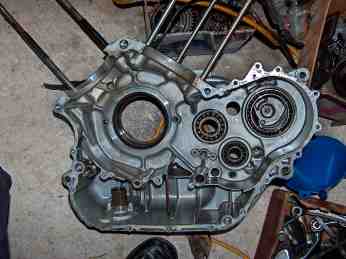
I painted the assembly with a light grey engine paint then I buffed all the
covers and had them clear powder coated. It was ok for now.
Ain't she perrdy?
|