and a HEI Ford distributor (one wire!) http://speedwaymotors.com./distributor
and a 1 wire Ford alternator
http://speedwaymotors.com/alternator
woo hoo!
|
Click on pics for larger image | ||||||||||||||||||||||||||||||||||||||||||||||
| Ford Page | |||||||||||||||||||||||||||||||||||||||||||||||
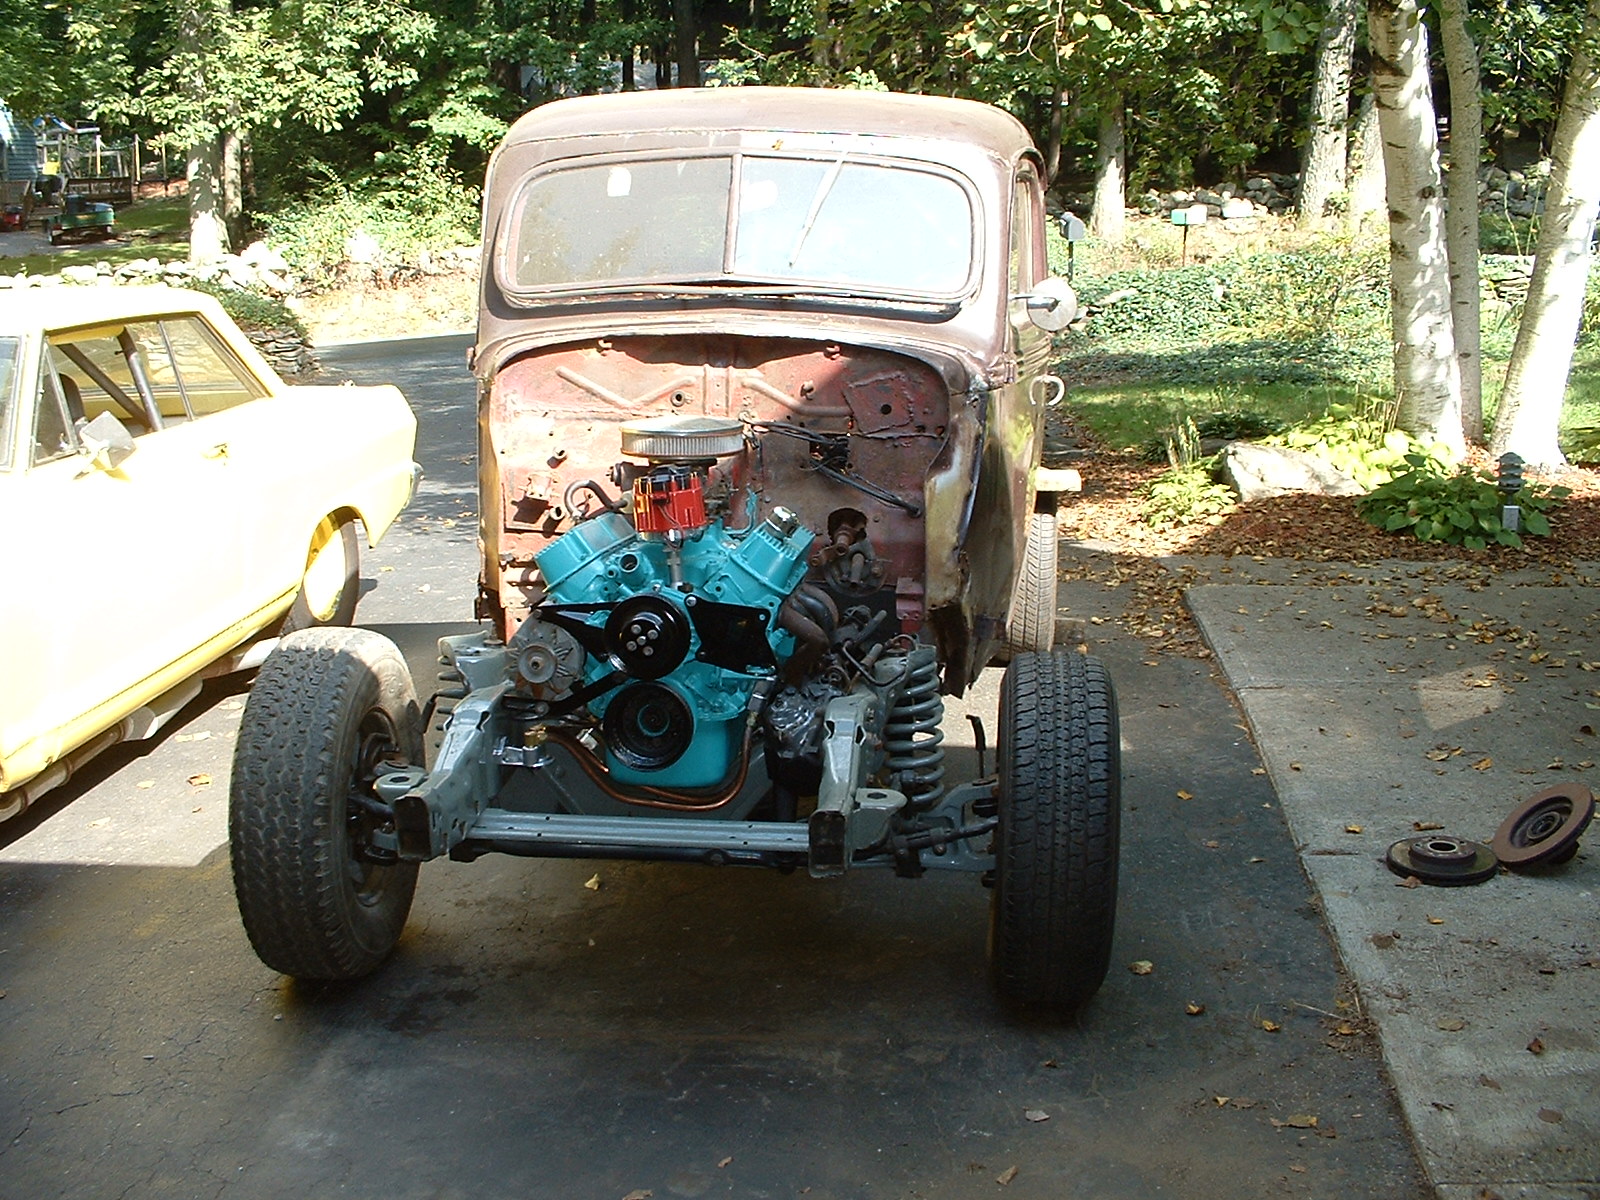
| Fitting the cab on the frame with the motor | |||||||||||||||||||||||||||||||||||||||||||||||
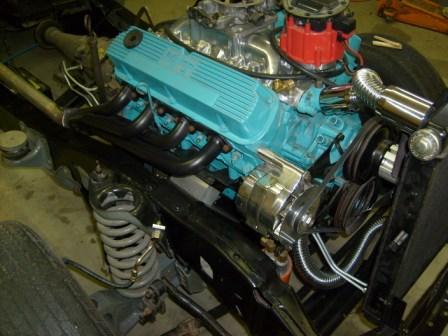
| I traded a 1953 Chevy Bel-Air for this 38' truck that was for sale up in NH. The frame was rusted through in many spots so I stripped the body off, rebuilt the motor and began looking for a suitable replacement frame. I could have built one from scratch but I figured it would be a lot easier to have the steering and suspension already done, so after researching I discovered that the 2wd Explorer has the same width and wheelbase as the 38. I kept the Explorer gas tank so I pretty much had an instant rolling chassis. When I threw the cab on the frame it need a little modification to fit onto the Explorer body mounts but after scrounging in the Junk yard I found two pieces of "U" channel steel (heavy & real thick!) that I mounted to the bottom of the cab via welding and bolting. (see pic). I then began working on the cab, I removed the doors and cut out all the rust and cut out the body panels in font of the doors. Then I tackled the firewall. While I was doing the body work I mounted the motor in the frame, it fit with only a few modifications, I had to move the transmission crossmember a few inches back and jack up the motor 2 inches. I purchased a Ford C5 (it has a lockup torque converter) auto transmission from the local salvage yard. . With the motor and tranny mounted nice I purchased a master cylinder that mounts under the cab from Southern rods http://southernrods.com/catagories/brakes/universal-kit/products/product-1892.html And mounted in the proper spot (after putting the cab on and off a few times!) Next the left header did not quite right fit so I modified it to fit the frame, after that I made an exhaust from scratch. I purchased a Holley throttle body fuel injection (ebay) and a HEI Ford distributor (one wire!) http://speedwaymotors.com./distributor and a 1 wire Ford alternator http://speedwaymotors.com/alternator |
|||||||||||||||||||||||||||||||||||||||||||||||
|
|||||||||||||||||||||||||||||||||||||||||||||||
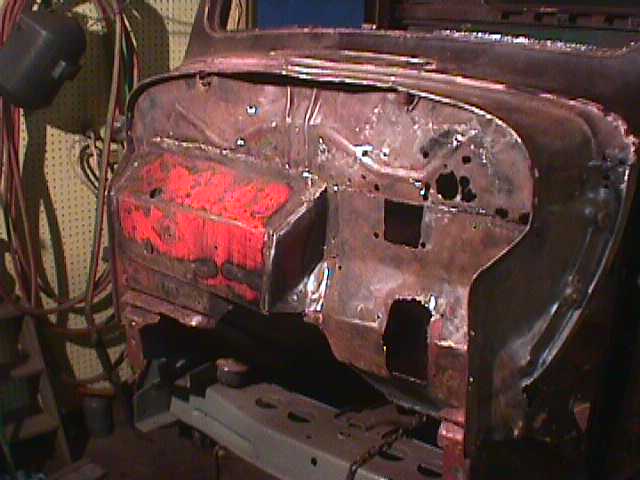
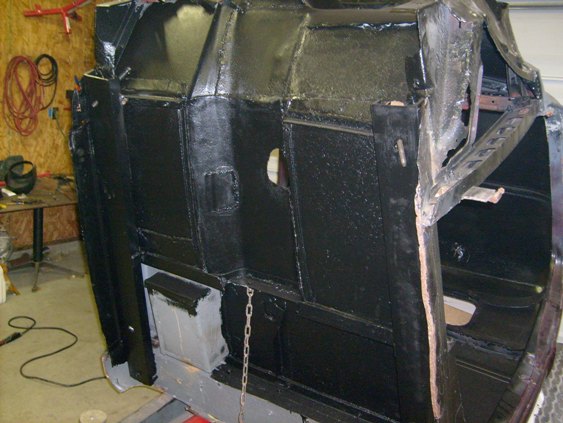
| Before pic of firewall | |||||||||||||||||||||||||||||||||||||||||||||||
|
|||||||||||||||||||||||||||||||||||||||||||||||
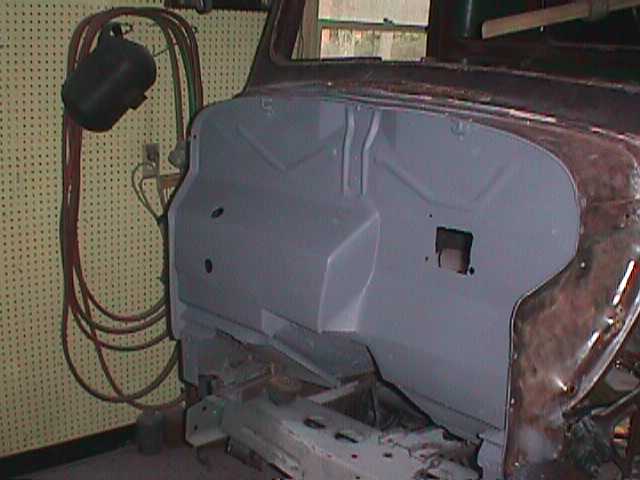
| After pic of the firewall | |||||||||||||||||||||||||||||||||||||||||||||||
|
|||||||||||||||||||||||||||||||||||||||||||||||
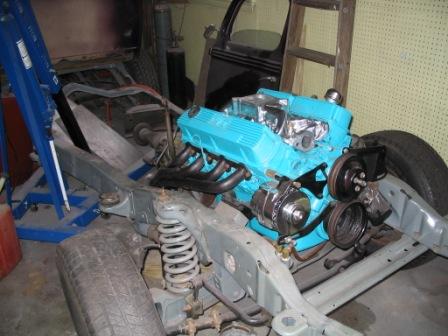
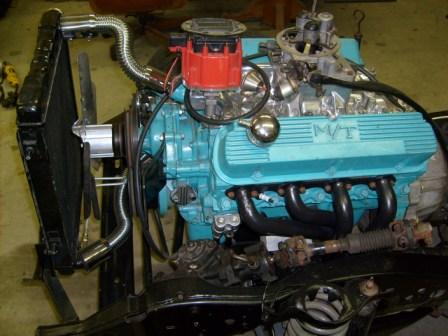
| Rebuilt motor mounted in the new frame | |||||||||||||||||||||||||||||||||||||||||||||||
|
|||||||||||||||||||||||||||||||||||||||||||||||
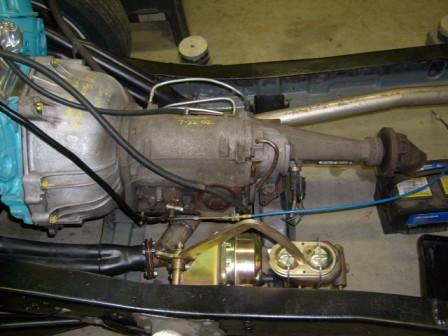
| Pic of the master cylinder & tranny | |||||||||||||||||||||||||||||||||||||||||||||||
|
|||||||||||||||||||||||||||||||||||||||||||||||
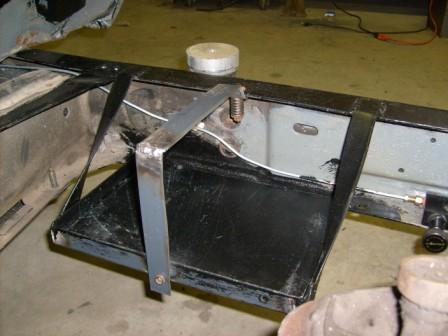
| Here's the battery box I built, sits under the cab, notice the spring loaded swivel hold down, slick eh? | |||||||||||||||||||||||||||||||||||||||||||||||
|
|||||||||||||||||||||||||||||||||||||||||||||||
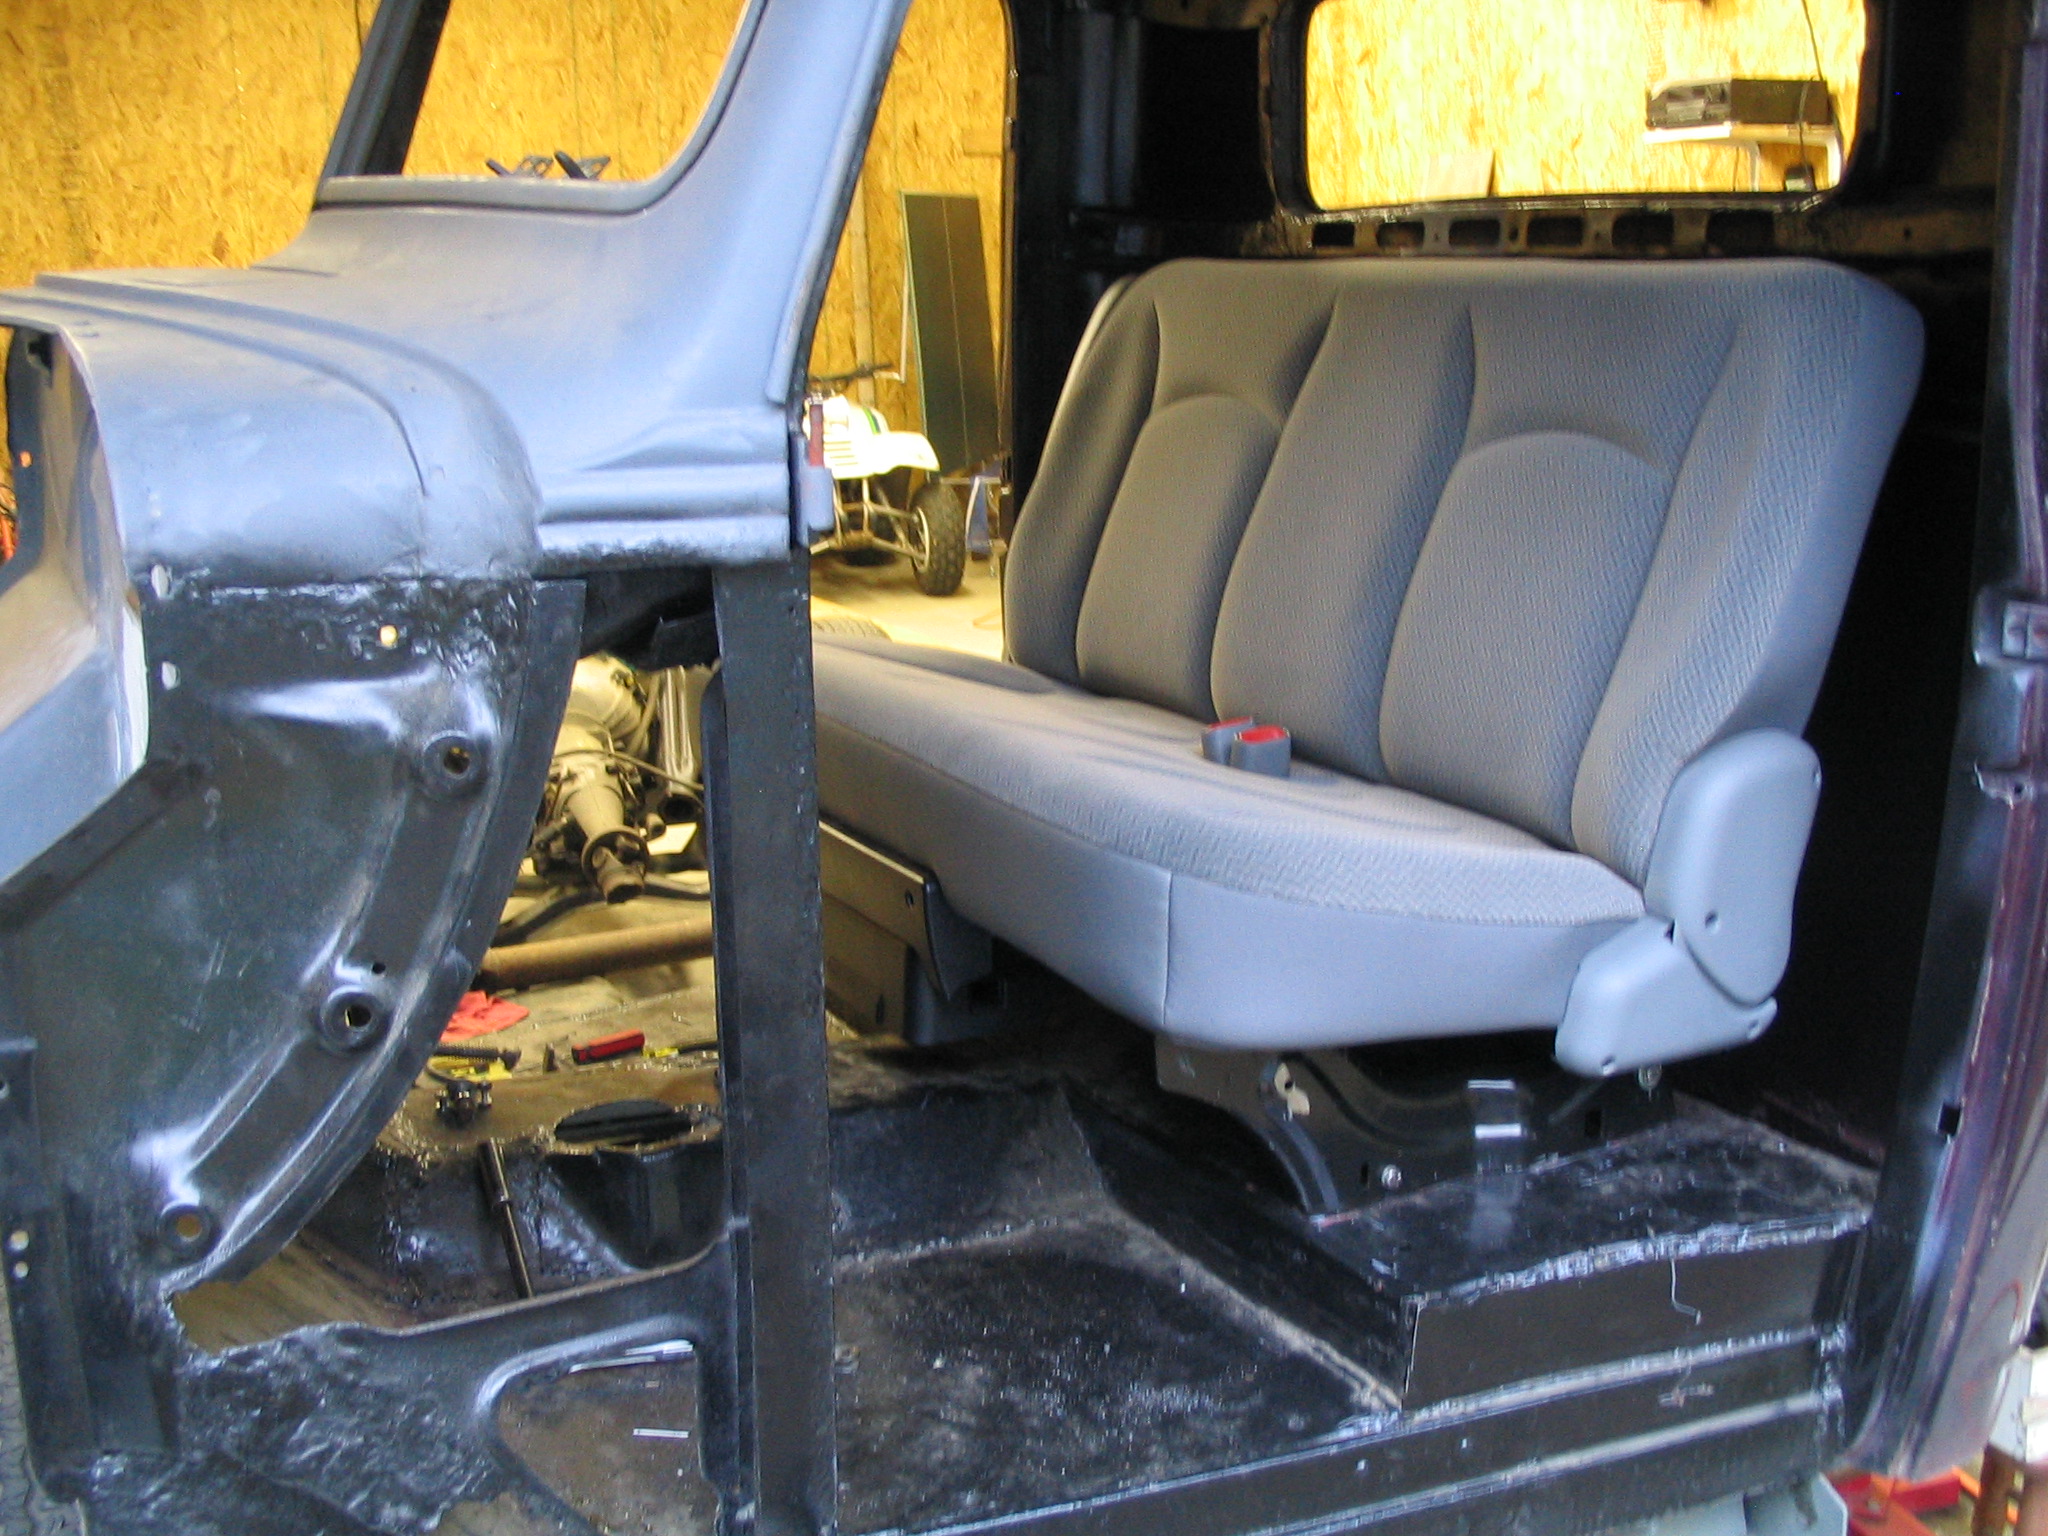
| Installing the new seat, it even has a cup holder. woo hoo! |
|||||||||||||||||||||||||||||||||||||||||||||||
|
|||||||||||||||||||||||||||||||||||||||||||||||
| Motor progress | |||||||||||||||||||||||||||||||||||||||||||||||
|
|||||||||||||||||||||||||||||||||||||||||||||||
| Progress | |||||||||||||||||||||||||||||||||||||||||||||||
| I just got the cab permanently mounted to the frame (bolted) I mounted the shifter and brake pedal. All the brakes lines are done and mounted. I will need to plumb in the fuel lines, I have throttle body fuel injection so I want to use the in tank pump that came with the truck, the pressure and flow are very close so it should work.. I purchased the steering column, dash insert and throttle pedal which is the next install as well as the wood dashboard I'm building. After that I will need a new wiring harness and I should have everything to get it running. The goal is to be able to take it for a ride with just the cab. I will still need to build a driveshaft too. Always something....stay tuned for more pics and progress! | |||||||||||||||||||||||||||||||||||||||||||||||
| Here's the bottom of the cab. Both sides have a piece of "U" channel steel I mounted so the cab would ride on the explorer body mounts. | |||||||||||||||||||||||||||||||||||||||||||||||
|
|||||||||||||||||||||||||||||||||||||||||||||||
|
|||||||||||||||||||||||||||||||||||||||||||||||
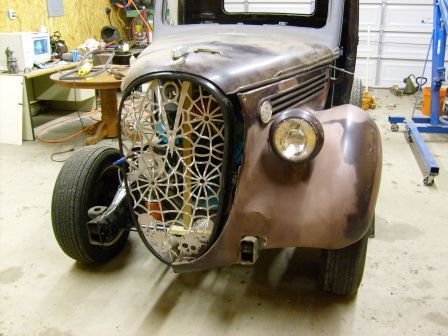
| quick set up to see how the new grill will look. | |||||||||||||||||||||||||||||||||||||||||||||||
| Click for next progress page | |||||||||||||||||||||||||||||||||||||||||||||||