DENNY'S
UTV BUILD
PAGE
Welcome to my UTV build page. I will be working on performance enhancements to my Brister's Boss 4x4 Utility Vehicle. This web page will follow the progress.
The Brister's 4x4 Utility Vehicle was chosen because it uses a Honda GX390 power plant. Originally we only planned to remove the governor to increase RPM, but after research we found that there were a number of inexpensive and simple modifications to improve engine performance. The Honda GX390 engine is used in Kart racing and Mini Cup cars, so there is quite a following and many performance parts available. There are performance enhancements available that are mild to wild, so this should result in an interesting project.
The UTV is used as a general work machine on my lake property in northern Minnesota. We also use this vehicle for transportation around the area, so it needs to maintain both low end performance for trails, but decent performance on paved roads. Initially the modifications will be mild in an attempt to maintain engine reliability.
We've learned a lot about the Honda GX390 engine and what can be done to improve it from the great people on Bob's 4 Cycle Karting Forum. Take the time to check the forum out if you are looking to build a small 4 stroke engine. There' a ton of great information on most small four stroke engines, and very knowledgeable people who are willing to help you.
http://karting.4cycle.com/index.php
Another great source of information, particularly about engine problems and rebuilding, is Small Engine Technical Forum
http://www.perr.com/forum/viewforum.php?f=2
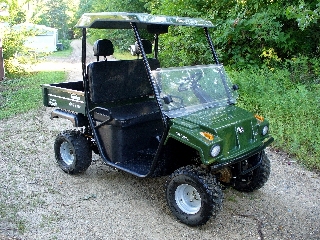
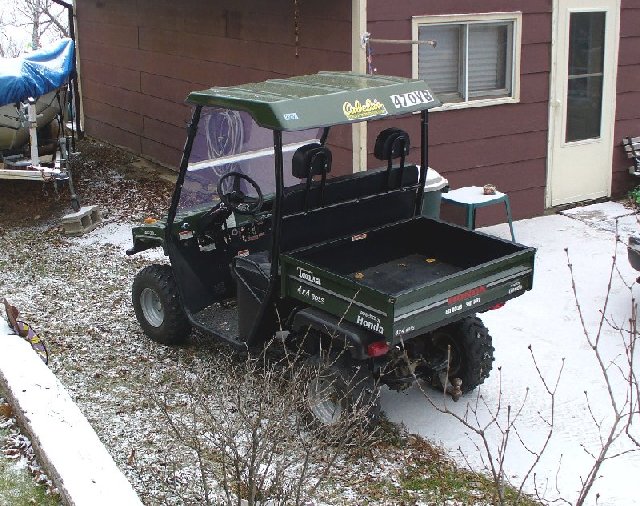
Here is a picture of the UTV - Click on Picture For Larger View
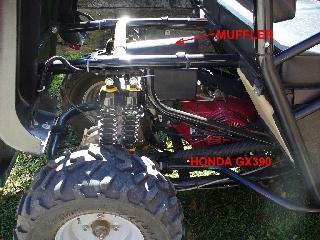
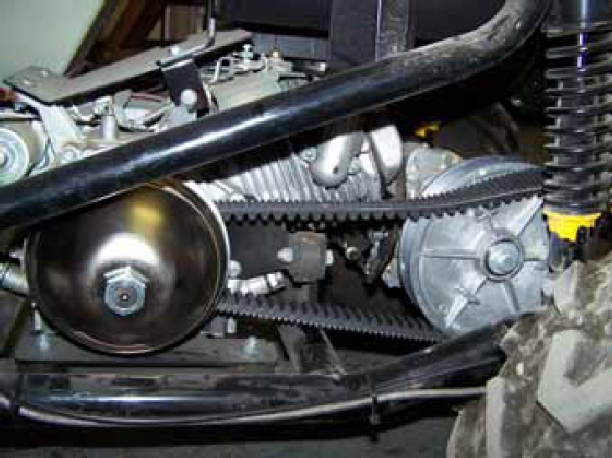
Here's a picture of the engine and frame - Click on Picture For Larger View
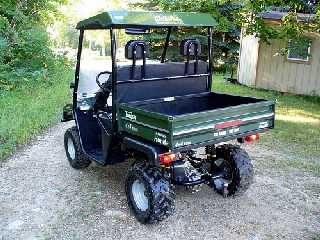
The Brister's 4x4 is a unique vehicle in that it uses all American made components with the exception of the Honda engine. The transaxle is made by Dana Spicer, which makes very good quality, heavy duty power transmission components. The front 4 wheel drive is "On Demand" electric made by Hilliard. - Click on Picture For Larger View
The engine build plan will occur in 2 stages. The first stage will be mild modifications in order to maintain reliability. If this provides the results we are hoping for stage two will be abandoned. Our intent is to raise the power output and top speed from 20 MPH to about 30 MPH. We want to maintain low end power and torque due to needs of the UTV off road. Stage two will include all of the stage one modifications, along with decked head (.100" removed), to increase compression, high lift power cam, stainless steel valves, chrome moly push rods, billet connecting rod, billet aluminum flywheel and 32 lb valve springs. Additional carb modifications or other fuel delivery options will also be looked at.
Stage One Modifications
Governor Removed - This should increase RPM from 3600 to aboout 5000 Peak power is reached at about 2500 RPM in stock form, so it will be interesting to see what the increased RPM will produce in terms of useable power.
Stronger Valve Springs - The GX390 stock valve springs are designeed for the stock 3600 RPM, and are too weak for the higher RPM with the governor removed. Update: Decided not to change springs, since the initial build will not push the RPM beyond 5000, and we have some concern for cam life with heavy duty springs installed. RPM will be closely monitored for valve float, and hopefully we will be able to set a throttle stop to limit RPM below the point where the valves might float.
Uni High Flow Air Filter - The stock air flow is very restricted, annd improving this is an important step. The carb on this engine is quite small for an engine of 390cc displacement. The main fuel jet will also need to be opened up after this modification. We will look at larger carb size later on. The filter will be installed into a special high flow air box to protect it from the dirty environment that the UTV will see.
Mild Porting - The ports will be cleaned of casting rougghness and polished.
Header and Flow Through Exhaust - The stock exhaust is also very restrictive. Once air flow and fuel intake is improved, it's important to improve the size and speed of exhaust removal. A Robertson header will be added to this engine. http://www.robertsonstorquetubes.com/
We will be adding a Supertrapp motorcycle muffler which is a flow through design. http://www.supertrapp.com/
Flywheel Key Advanced 6 degrees - This is a key performance improvement. Sttock ignition is somewhat retarded. This can go as high as 8 degrees of advance.
Spark Plug Indexing - The spark plug orientation will be set faacing the exhaust valve.
Wider Spark Plug Gap
Tighter Valve Lash - The valve lash will be set at .0025" - 003"
For information on Honda engine performance basics check here:
http://www.affordablegokarts.com/performance_basics.php
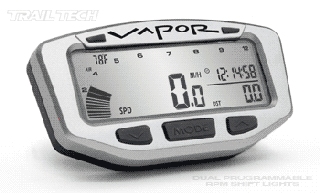
Trail Tech Vapor Computer - A Trail Tech Vapor Computer will be instaalled to monitor the machine speed changes, engine RPM and engine temperature. http://www.trailtech.net/vapor.html
The Trail Tech computer will be installed on the stock UTV before the modified engine is installed in order to get baseline numbers for speed, RPM and engine temperature.
Torque Converter Tuning - Tuning of the torque converter may also bbe required to obtain the best performance from the new engine.
Components and parts
The engine modifications will be done on a separate OEM GX390 engine so that the original engine remains stock, and we can put the stock format engine back in if the performance modifications do not provide the results that we want. It's also more convenient to do it this way, since the engine needs to be disassembled in order to remove the governor mechanism.
We purchased a blown GX390 Engine. This engine is basically a complete OEM Honda GX390 Electric Start with 10 amp charging coils, which is the same as the one in the UTV. It threw a rod, but the engine case is intact with no damage. - Click on Picture For Larger View
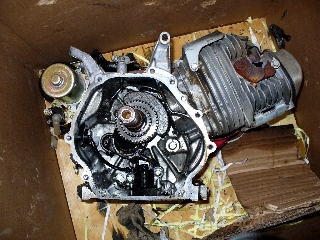
The interesting thing about this engine, is that it looks perfect except for the broken rod. The rod bolts are pulled out, but still in the cap. After discussions with folks on the Small Engine Technical Forum, this is a fairly common problem when a small engine overheats due to low oil or other issues. The rod bolts actually pull out of the rod - Click on Picture For Larger View
After tearing the blown engine down, a number of things were observed that deemed this engine not usable except for parts. The block and head are in good shape and could be used later in the project.
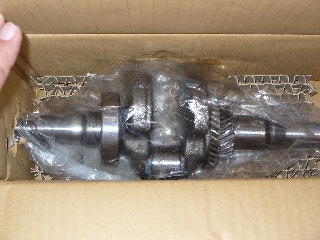
While waiting for the blown engine to ship, we ran across a deal on a complete OEM Honda GX390 short block with tapered PTO and a new 1" PTO crankshaft for $130 so we bought them. The total amount spent on the parts to complete the OEM engine without modifications is about $250. These are not Clone parts, so this will be a basically new Honda GX390 - Click on Pictures For Larger View
Engine Build - 11-02-08
The blown engine was stripped down for parts. The new OEM short block was torn down to change the crankshaft to 1" PTO crankshaft.
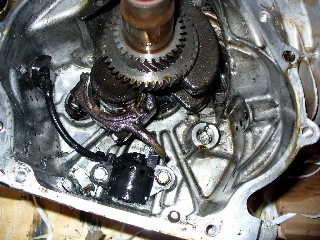
Governor Removal
The governor in the Honda engines is internal. The entire mechanism needs to be removed, because once disconnected, the engine RPM's will increased above the rated 3600, and the internal governor parts can fail, causing engine failure due to pieces of the governor mechanism thrown around inside the engine. It is not recommended to only disconnect the governor linkage, without removing the internal parts.
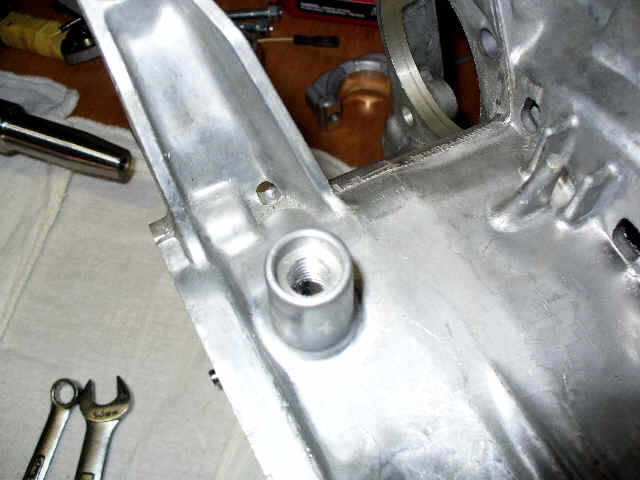
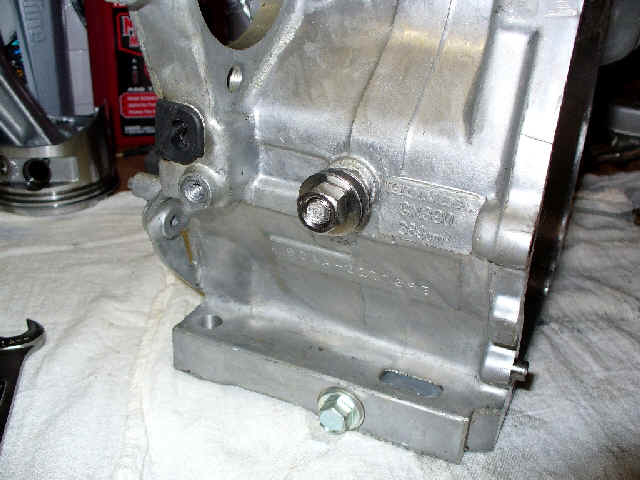
Once the governor mechanism is removed, we need to plug the hole where the governor arm comes thru the block. I decide to use a 3/8-16 set screw to plug the hole. First the hole is taped for the set screw. This is a fairly deep hole, so we decide to thread only part way, to insure that the set screw couldn't make it's way into the crank case. Click on Picture For Larger View
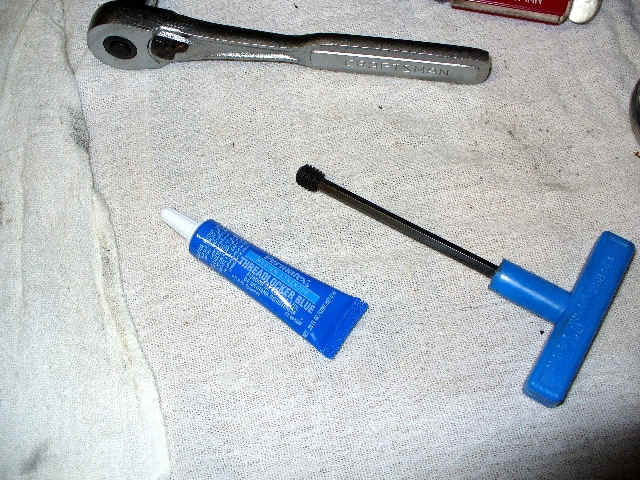
We decided to also Locktite the set screw for added safety, and to seal it. Click on Picture For Larger View
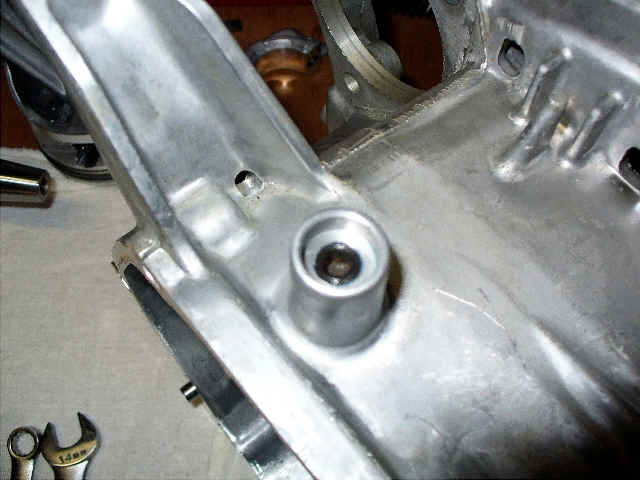
The set screw installed. Click on Picture For Larger View
For more information on governor removal check here:
http://www.affordablegokarts.com/govenor-removal.php
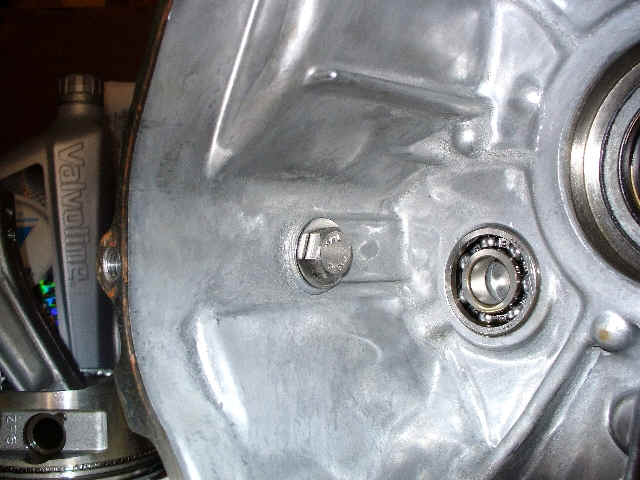
Another key item to complete internally it removal of the low oil sensor. We also need a temperature sensor mount, so we decided to use the low oil sensor location. A stainless steel M8 bolt with an additional lock nut and washers was installed in the hole, with sealer to insure that it will not leak oil. Click on Picture For Larger View
The short block and head are assembled. The head was cleaned and all carbon removed. This was a second used OEM Honda head, but fairly new with very low hours. The head from the blown parts engine had a stuck valve, so I decided to save it for my later compression head, as it probably will need new valves and seats. The valve seats on the second head looked very good and showed good seating. I lapped the valves just to be safe. We decide to stick with the stock valve springs on the initial build. Since the cam is new OEM Honda, and there are concerns about cam wear with higher pressure of 32 lbs springs, it was decided that the first build would remain stock to determine actual RPM. Throttle stop can be adjusted to reduce RPM.
For more information on valve lapping check here:
http://www.affordablegokarts.com/valve-lapping.php
The rod bolts were Locktited just to be safe.
The balancer was installed, since this will not be a pure race engine, and vibration is a concern.
For more information on cam installation and general short block assembly check here:
http://www.affordablegokarts.com/Cam%20Installation.php
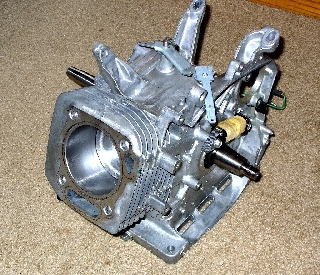
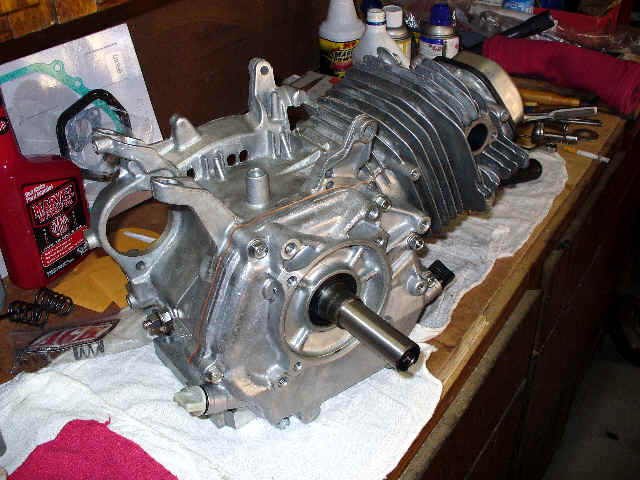
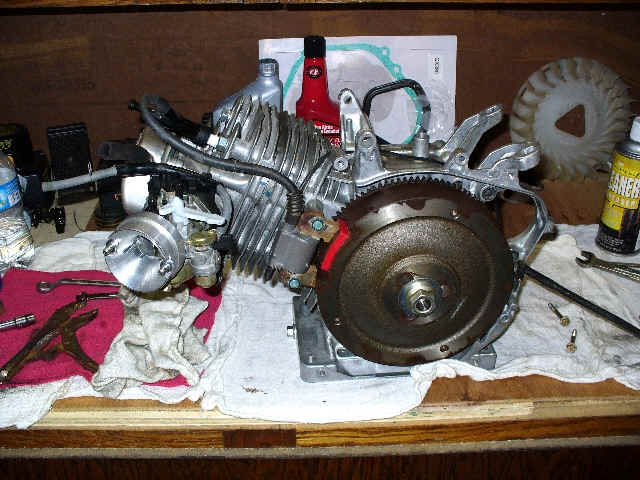
Here is the long block assembled. Click on Picture For Larger View
The engine requires the dual 10 amp charging coils, because that is what is in the existing engine. The blown engine had the 10 amp coils. The new short block only had the single 3 amp coil. The lower bolt holes needed to be tapped to accept the lower coil. We also will need to modify the wiring in the key start igintion box, because it was a purchased part and is set up for 3 Amp charging circuit. Click on Picture For Larger View
The flywheel and ignition coil are from the blown engine. According to the Honda manual, the flywheels are different depending on the charging coil type. The flywheel was lapped to the shaft, to insure a tight fit. This is a good idea when cut flywheel keys are used to advance ignition timing. Once the flywheel nut is torqued to specification with lapped fit, the chance of shearing key is minimal. The cut key, flywheel and ignition coil are installed and the coil air gap adjusted to Honda specifications. You can also see the carburetor and special billet intake venturi. There will be a special air box fabricated later to fit this. Click on Picture For Larger View
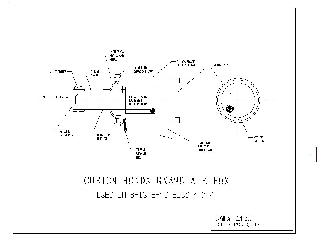
Here is the design for the custom air box. Since this is an off road vehicle, it's important to protect the air filter from water, mud and dust. We should have pictures of the air box installation after the engine is installed in the UTV, because there will be some fit issues that need to be addressed at that time - Click on Picture For Larger View
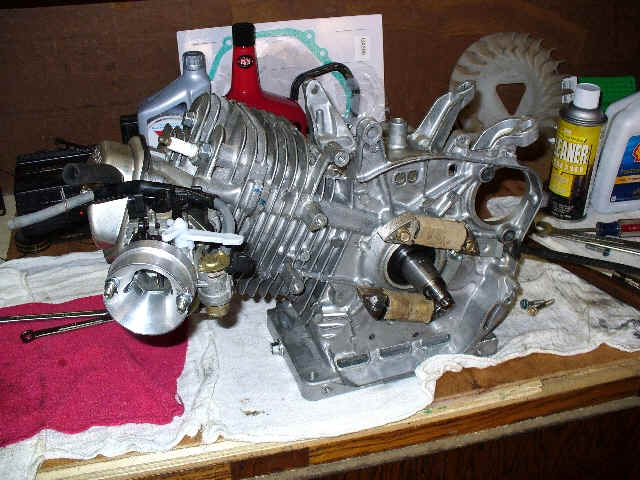
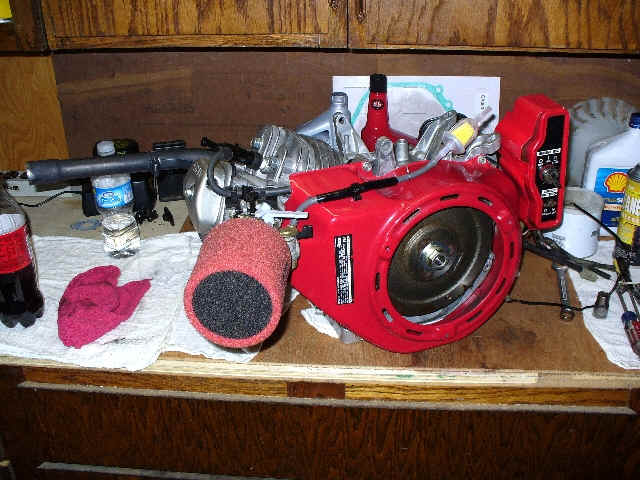
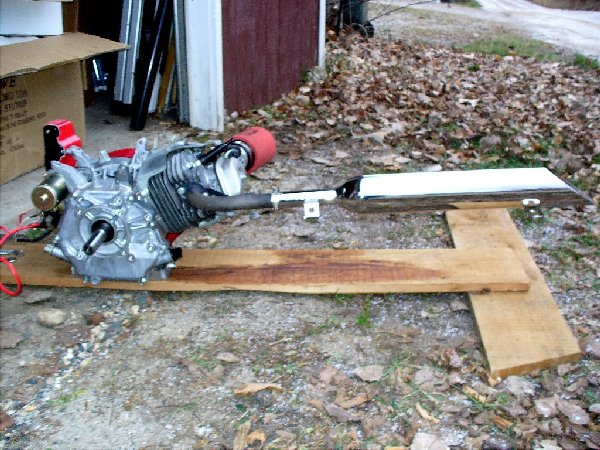
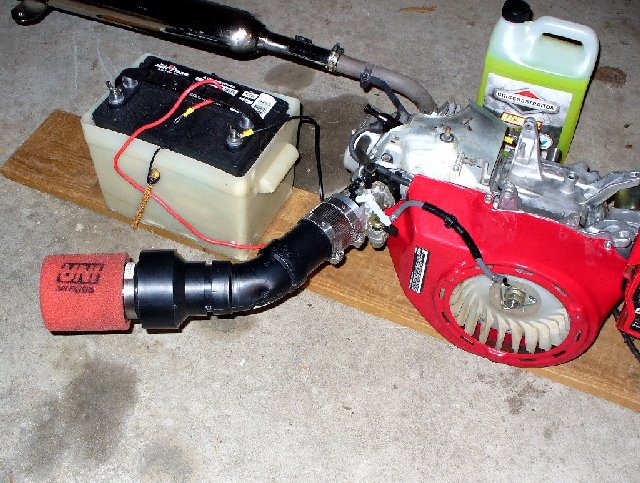
Here is the engine semi-assembled, showing the custom header, flow thru filter, fan shroud and key ignition. The starter was wired and the engine was turned over on the bench.
Some parts are still missing, so the engine was not run. The recoil hub was missing from the parts engine, so the cooling fan could not be installed. The parts are on order.
Click on Picture For Larger View
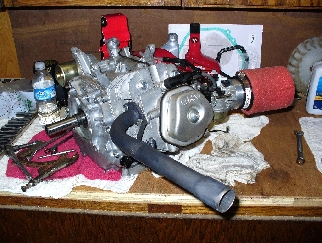
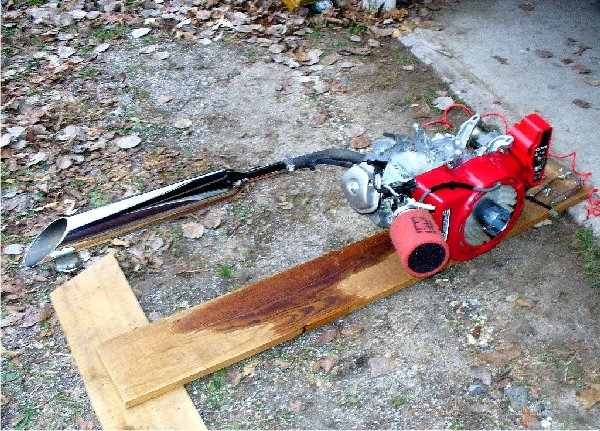
Here is another view of the engine from the front - Click on Picture For Larger View
Engine Test Runs 11-16-2008
Here is the engine mounted and ready for test run. This is the first time the Supertrapp exhaust has been on the engine. I had to modify the header to get the muffler to fit - Click on Pictures For Larger View
I turned the key and the engine started right up. It died once I took the choke off though. I was able to run it on half choke for a bit. The stock carb main jet was in the engine. I knew that this would be too small, with the flow through exhaust and air filter. I had put a brand new plug in the engine, with the intent to look at the plug in order to tell if it was running lean. What I didn't consider, was all of the oil I used when building the engine, which turned the new plug black. So much for that great idea.
I pulled the carb and took the jet out to measure it - Click on Picture For Larger View
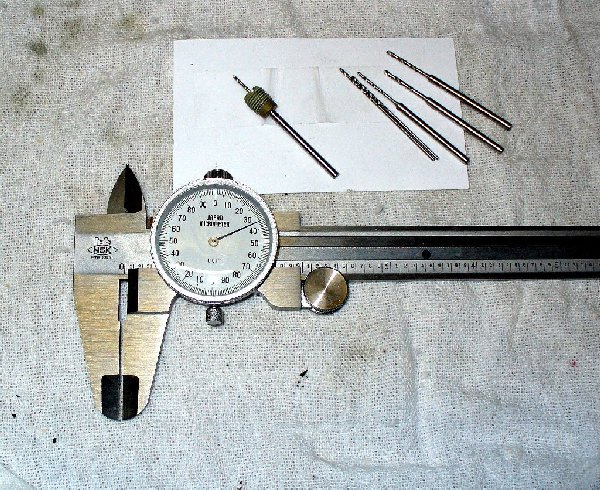
The stock jet measured .035" (#89 jet). I think it actually is a #90 jet, because the .035" drill bit was a little loose. I didn't realize at the time that the jet size is marked on the top of the jet. I decided to drill it out to .040" (#102 jet) - Click on Picture For Larger View
The .040" (#102 jet) still required the choke to be on part way when I ran the engine for a second time. At this point I'm a little concerned that the carb may not be totally clean. I cleaned and rebuilt it, but I am going to check it again and try it again before I open the jet more. I also purchased a #105 Honda jet, because that is my best guess as to the size I will need. This may take some testing to get the carb mix just right.
The motor was run for a while, and here is a link to a video of it running. It's not the best video, but it sounds nice - Click on Picture to go to video

Additional Parts to Complete Engine.
Fan Shroud
After some research I figured out that the GX390 with electric start and no recoil engine, has a special flywheel plate that fits inside the fan shroud. Since I have a special flywheel cover that I wanted to install, I ordered the special flywheel plate. I also plan to cover the center hole on the special flywheel cover, since I won't need access. I purchased a chrome Harley Davidson points cover that should fit nicely over the hole. I also have a chrome and enamel Honda logo to go on the fan shroud. This should look pretty cool, and I hope very professional to finish off the engine.
Throttle Linkage
The parts engine had the throttle plate without the mechanism (someone took it off). I haven't figured out the linkage yet, because the existing engine uses the governor arm (which is now gone), for throttle control. This will take some engineering to figure out how to configure the linkage to work with the existing system.
I had a number of things I wanted to accomplish this weekend. One was to wire the UTV with the Vapor Computer. My shop is too small to fit the machine and give me enough room to crawl around and wire things, so I hoped to work outside. Mother Nature had other ideas, and this should be expected in Minnesota in the middle of November. I woke to 18 degrees and snow. - Click on Picture For Larger View
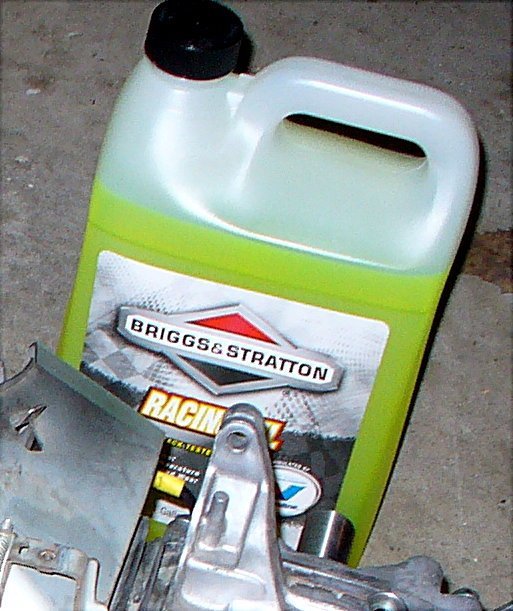
I want to bring up the great oil that I discovered. Valvoline recently came out with a new synthetic racing oil for Briggs & Stratton. I read about it on the web, and the stuff seems too good to be true. It was tested head to head against the top synthetic small engine racing oils, and showed lower temps, more horsepower, less oil consumption, less engine wear and much cleaner engine internal parts after long term testing. I bought a gallon to run in my new engine. - Click on Picture to go to the oil test report
More Carb Work
Given the weather, I went ahead with tearing the carb down and making sure it was clean. During the first tear down, I did not remove the main nozzle and the pilot jet, because I didn't realize that they came apart. I thought the main nozzle was pressed in. Once I removed the main nozzle, it was obvious that it was not clean. I slid a drill bit slightly smaller into the nozzle and a bunch of nasty stuff came out. I soaked it in carb cleaner and ran a pipe cleaner through it, which came out dirty. I soaked it some more and then blew it out with compressed air. The inside of the pilot jet was also dirty. I also filed the stop off of the pilot screw so I could adjust it. I cleaned the rest of the parts and the main body an blew them all out with compressed air.
I determined by the carb part number stamped in the flange, that the main jet is #92 the smallest GX390 jet. I installed a new #100 jet when I reassembled the carb and installed it on the engine.
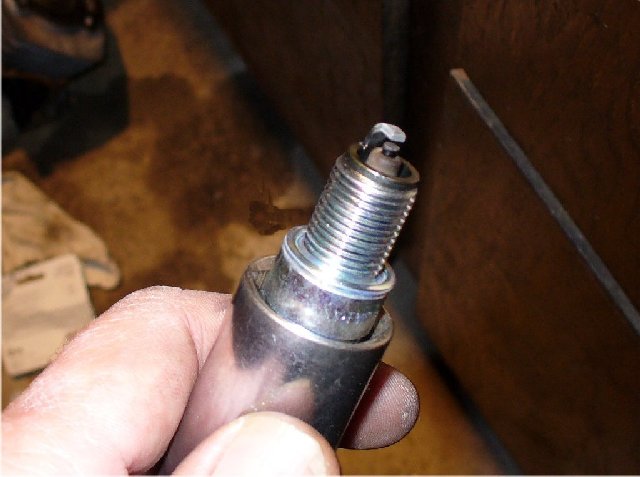
I also put a new spark plug in, so I could see how the fuel mixture was set.
I ran the engine, and once warn, I was able to turn the choke off. The motor idled fine, but hesitated when I throttled it up. Like a flat spot. If I raised the idle setting, the flat spot went away. I think I will need to open the pilot jet.
After running the motor for about 15 minutes, I removed the plug. The color looks fine, maybe a little rich, but pretty close to where you want to see it. - Click on Picture For Larger View
I ran the motor for about 3/4 of an hour, and decide to install the Vapor Computer on the engine so I could see how it worked and adjust the RPM sensor. I was able to get it to work fairly well, but it will need more "tweaking" once I get it into the UTV. Here's a video of the tach operating. The extra noises are the microphone picking up the open valve cover vent. The microphone was within a few inches of the opening.
Video Of Vapor Computer in Operation
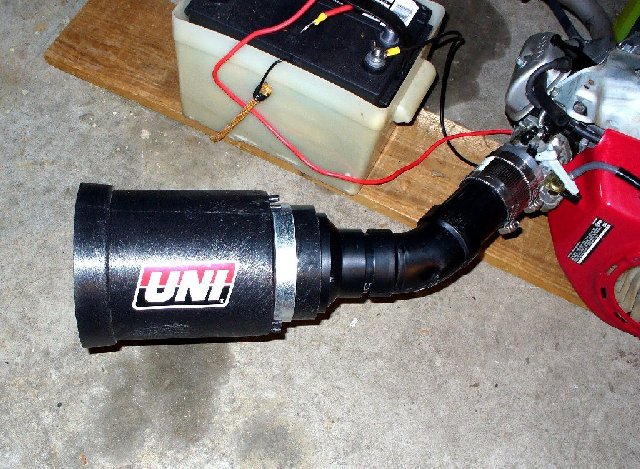
I started laying out the new air box. This is made from black ABS pluming parts. The main air box which slides over the Uni filter, is made from a 6" outdoor drain. It will have thumb screws for easy access to the filter once it is finished. It will need to be adjusted more once It is installed, so all I did was cut and dry fit the parts. I think I need to change the exit angle to 45 degrees. There will be a screen on the end of the finished air box- Click on Pictures For Larger View

I spent some time on cosmetics, installing the flywheel cover and the chrome center cover. The center cover is a Harley points cover. It took some modification to get it all to fit together. I bought the Honda flat plate for the flywheel to hold the fan. This was a part that I wasn't aware of originally, and had planned to cut the recoil hub to fit under the cover. I raised the chrome center cover about 1/2" above the flywheel cover so air can get in. I think it looks pretty good. - Click on Pictures For Larger View
![]()

If you have questions or comments, you can reach me at: [email protected]